Do you face sound problem when trying to plug in an external camera to your laptop or desktop? Several users report that they can not listen to audio in this situation in Windows 11. However, the built-in webcam is working well as soon as an external camera is plugged in through USB audio stops working. It also disables the built-in webcam microphone. This post will guide you to fix audio not working when connecting webcam in Windows 11.
This issue commonly occurs because of problems in the configuration of Windows audio service, outdated sound driver, or incompatible camera. Although a tricky correction works wonderfully to solve this issue. So, follow the methods ahead:
Table of Contents
Audio not working when Connecting Webcam
Here is how to fix Audio not working when Connecting Webcam in Windows 11:
Configure Windows audio Service
Simply setting up the Windows audio Service correctly by making changes to this will solve this problem. This service, similar to others, provides options to log in using Local system account or a selected account. Actually, this is the root of the audio not working and needs a modification.
So, configure this service by checking both the options as below:
- Plug in the external webcam to the computer.
- Click on Search and type services.
- Right-click on “Services app” from the result and select Run as administrator.
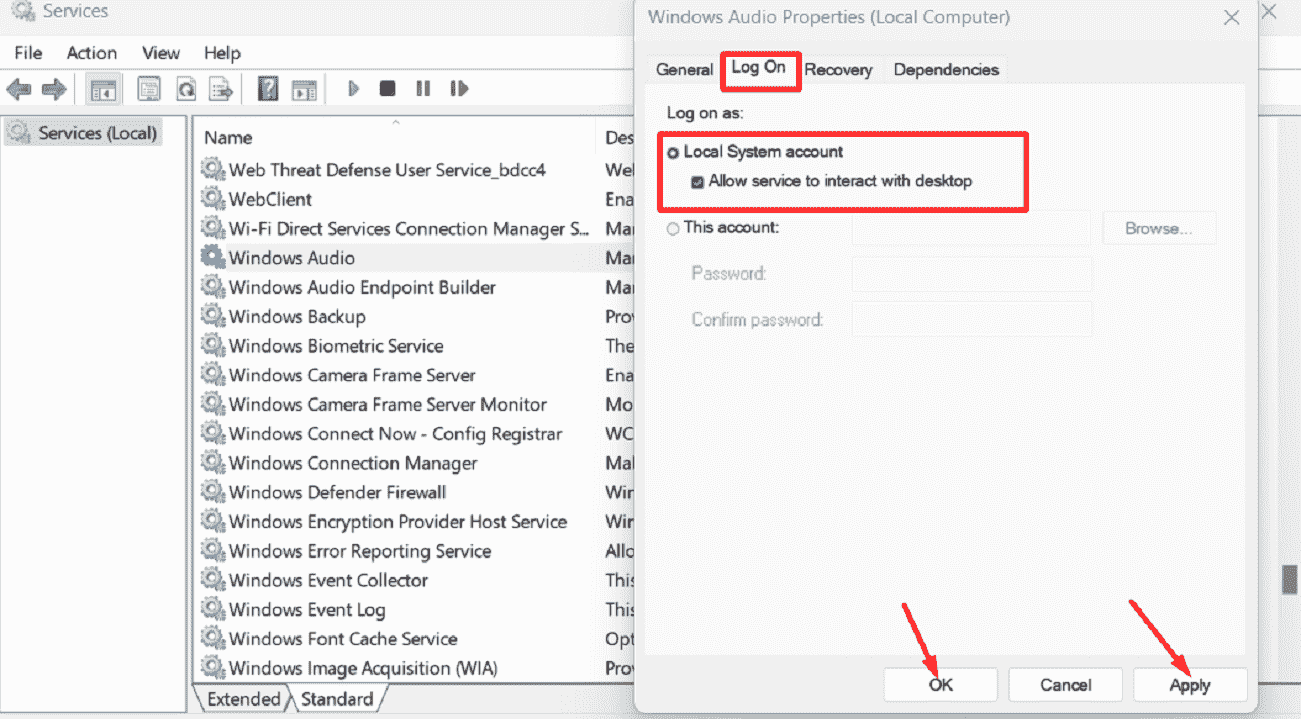
- Go to Windows audio and double-click on it.
- Click on the Login tab.
- Check the option Local system account for Log on as.
- Then, click on Apply and then on OK.
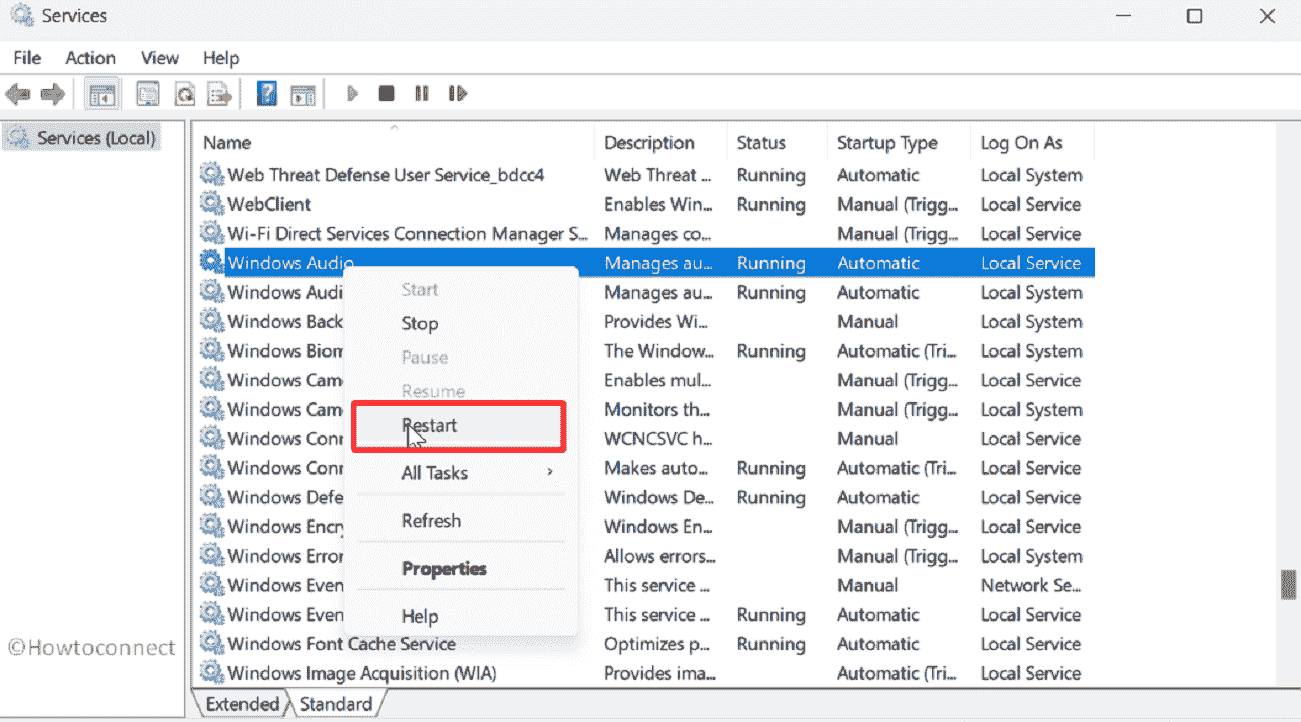
- Right click on “Windows audio” service and select Restart.
- Check if the audio is working now when connecting the webcam.
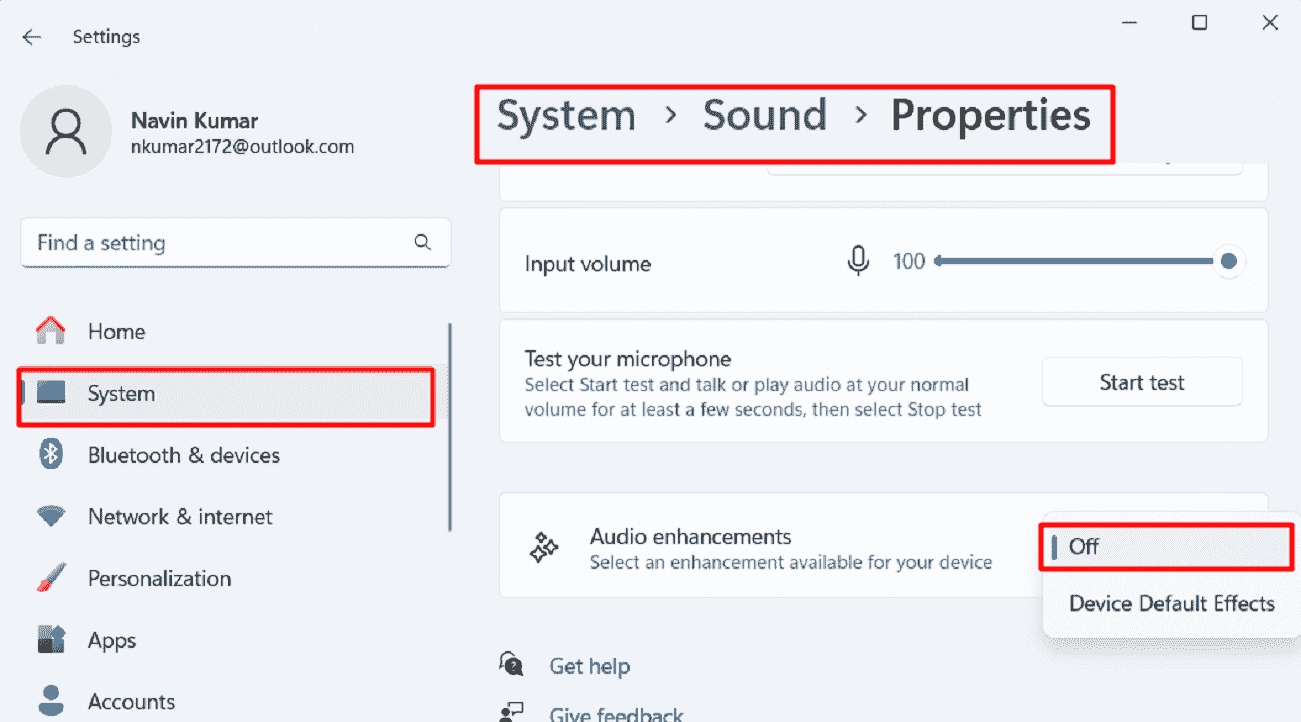
- In case, the issue still persists press Windows and I.
- Click on System from the left menu.
- Go to the right and select Sound.
- On the next page of Settings go to Input section.
- Locate your webcam and click on it.
- Scroll down and disable Audio enhancements using dropdown.
- Close the Settings window and back to Services window.
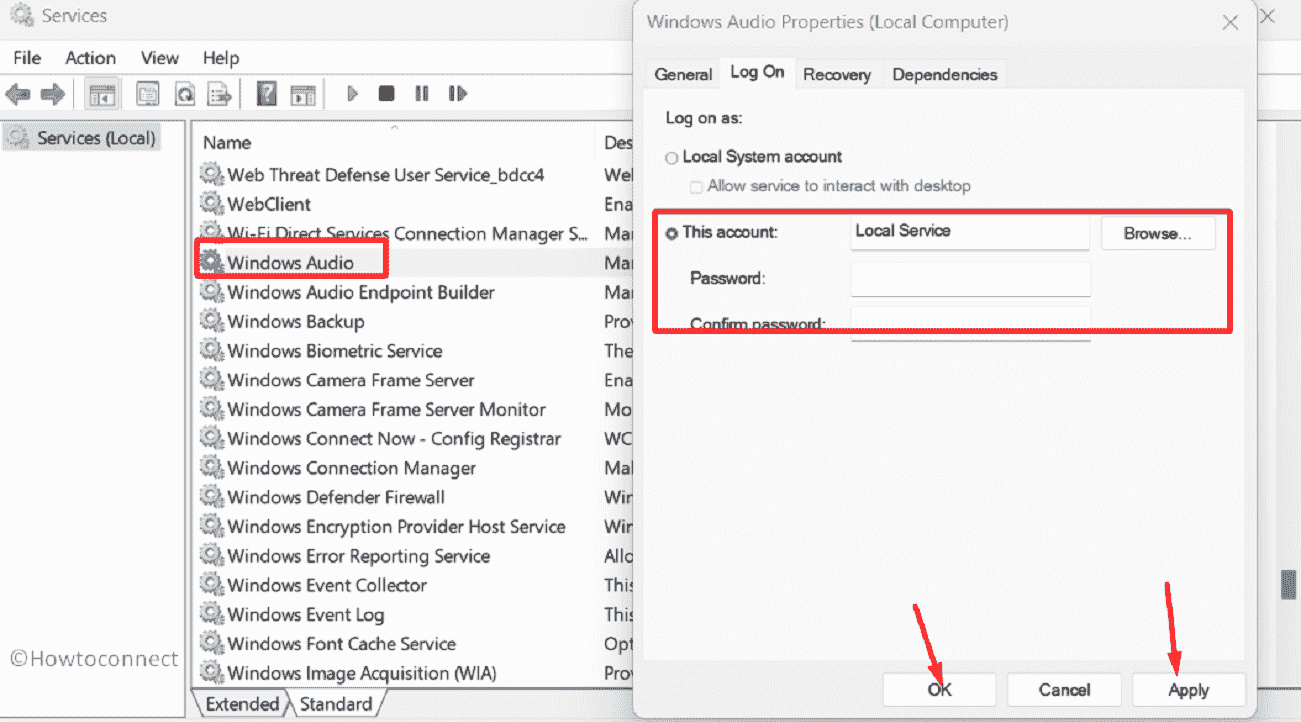
- Right click on Windows audio and select Properties.
- Click on Log On tab.
- Check This account.
- Then click on Browse.
- On Select User window, click on Advanced….
- Click on Find Now.
- Select LOCAL SERVICE and click on OK.
- Click ‘OK’ on the Select user window.
- From the Password and Confirm Password fields, delete the the ******** entries.
- Click on “Apply” then “OK”.
- Again, restart the Windows audio service.
- The webcam audio should work now.
See: How to fix Windows 11 Microphone not working (Solved!)
Update Audio driver
Audio driver, an integral part of a sound device, is likely to be outdated or corrupted when webcam disables microphone. Thankfully, you can update the device in easy steps:
- Right-click on Start.
- Select Device Manager.
- Go to Sound, Video and Game controllers and double-click on this to expand the category.
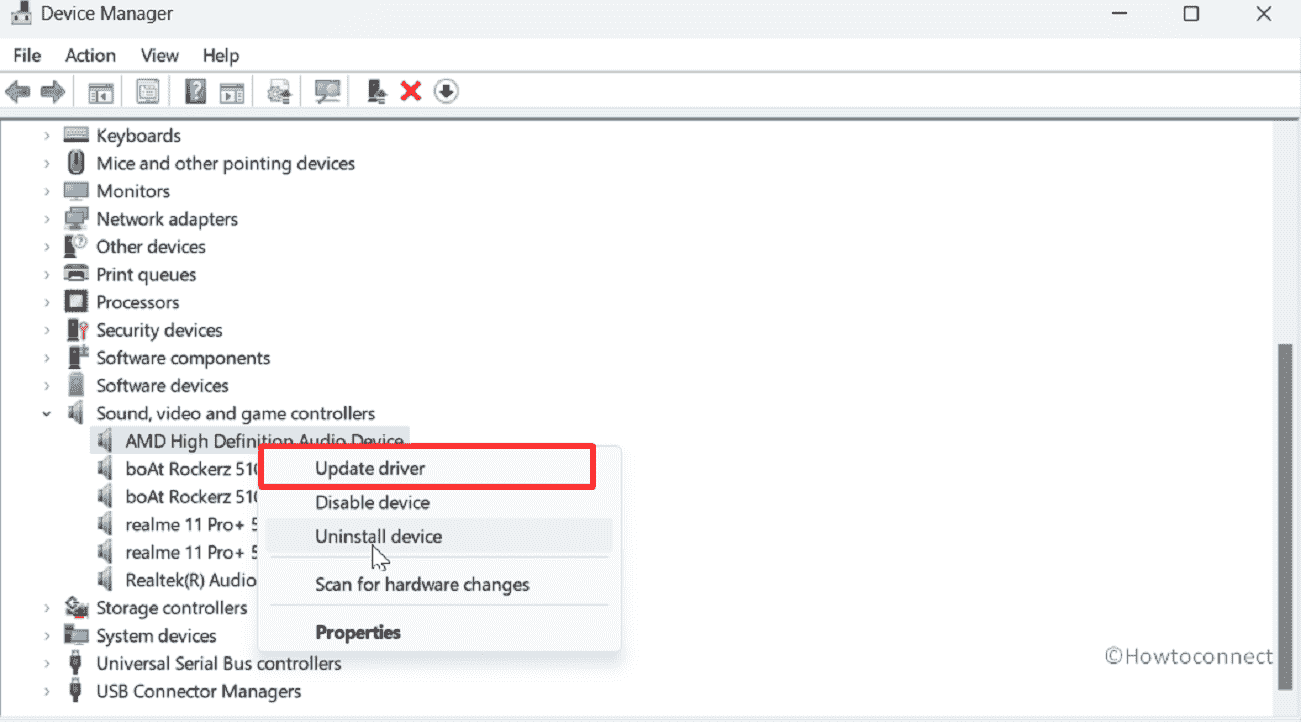
- Then, right click on the problematic device and select Update driver.
- Choose “Search automatically for drivers”.
- Restart the system and see if the issue is resolved.
Uninstall and reinstall the driver
However, in case, the driver is not properly installed then the microphone may cause problems when connecting the webcam to computer. In this scenario, uninstall and reinstall the software with the following steps:
- Open Device Manager (using Win+X).
- Right click on the the driver under “Sound, Video and Game controllers”.
- Select Uninstall device.

- Confirm the prompt and restart your computer.
- If the issue is not resolved then go to the official manufacturer’s website and log in using the model number of laptop, desktop, or surface.
- Download the latest audio driver.
- Run the setup file and go with the guidelines shown on the wizard.
- Once completed, reboot your system.
Receive pending Windows updates
Since Windows 11 following its predecessors receives updates for OEM device drivers, installing them can help you fix Audio not working when Connecting Webcam. Therefore, install them by stepping forward:
- Press Windows and I.
- Select “Windows Update” from left menu.
- Go to the right and click on Check for updates.
- Wait for a while until the pending are downloaded.
- If required, click on the Restart now option.
Methods:
Configure Windows audio Service
Update Audio driver
Uninstall and reinstall the driver
Receive pending Windows updates
That’s all!!
