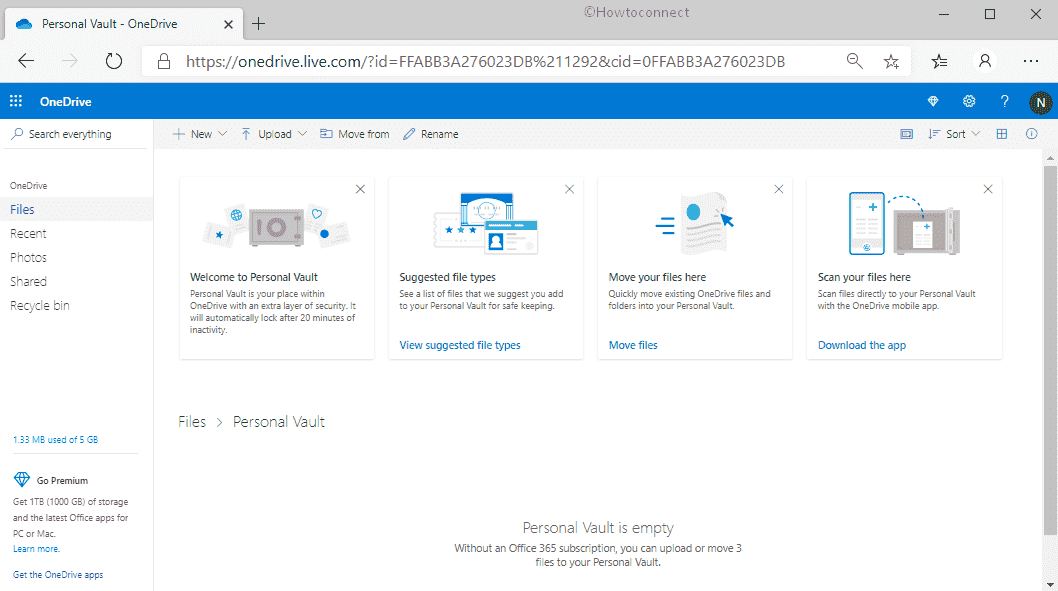
Personal Vault is an impervious folder inside your OneDrive that lets you save confidential documents and files. These may be scan copy of passport, driver’s license, home insurance, immigration documents, and power of attorney. Most importantly, it locks them down with two-factor authentication without sacrificing the congeniality of anywhere access. Once you set the Vault up, the stored files get locked after a period of inertia and to use them again, you need to provide identity verification.
This function is available in both web and mobile version of OneDrive but if you are a free user, the program doesn’t allow to upload more than three files.
Configure OneDrive Personal Vault
Here is how to configure OneDrive Personal Vault in Windows 11 or 10 –
Set up OneDrive Personal Vault
To get an extra layer of security, here is what you need to do first –
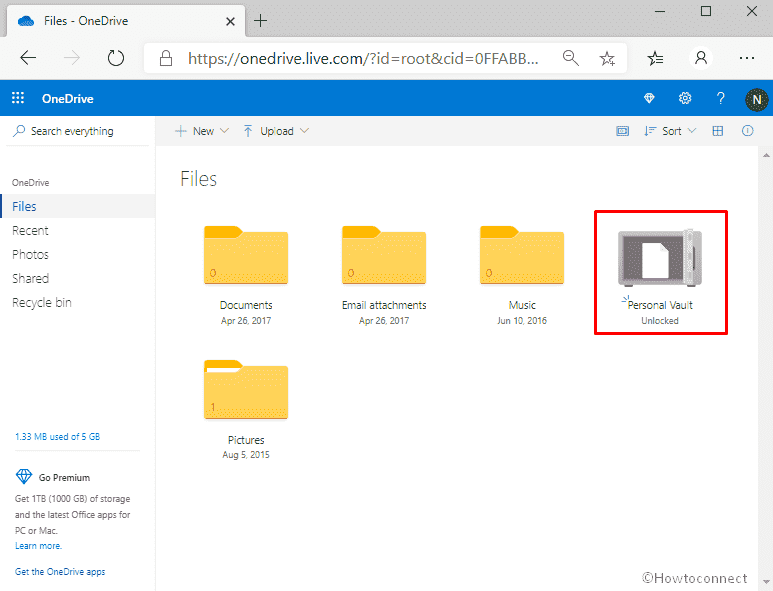
- Visit the official website of OneDrive first.
- Once it comes into the view, login to your Microsoft account and then click on Personal Vault folder.
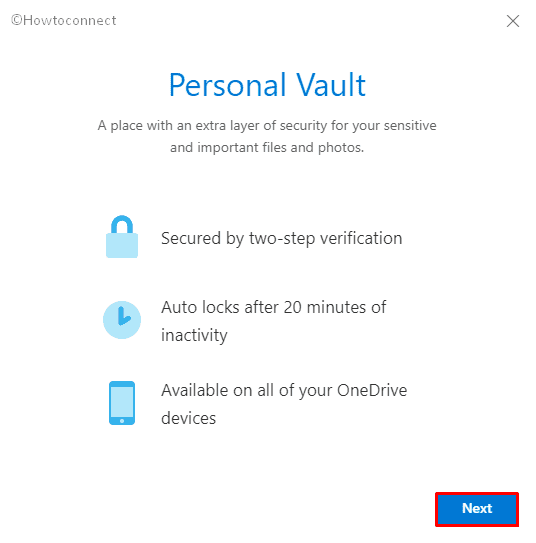
- On the pop-up, hit Next button to continue.
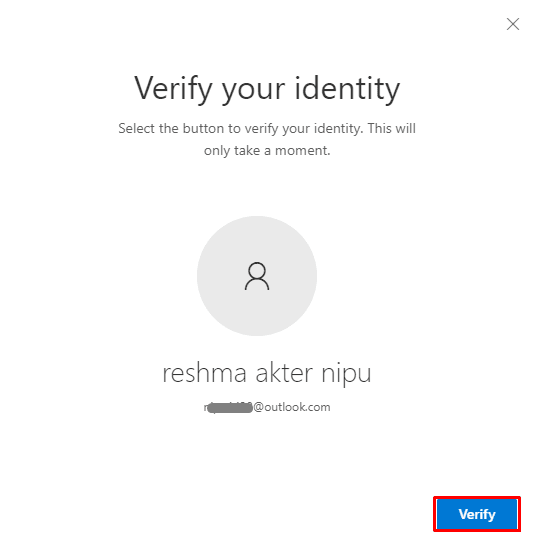
- Now, you need to confirm your account information and to do so click the Verify button.
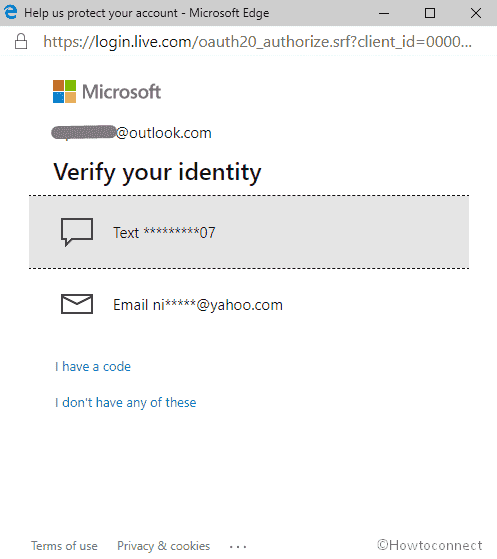
- Next, choose a convenient verification method that you will like to use to access your documents and files. This may be Mail id or messaging on mobile.
- After providing the code received in your mobile number or mail, you are ready to use Personal Vault. The final page looks like this –
Upload files in Personal Vault
- Open OneDrive and after appearing, choose Personal Vault icon.
- If you’re prompted, sign in with your selected identity verification method.
- Thereafter, click on Upload and choose either Files or Folders.
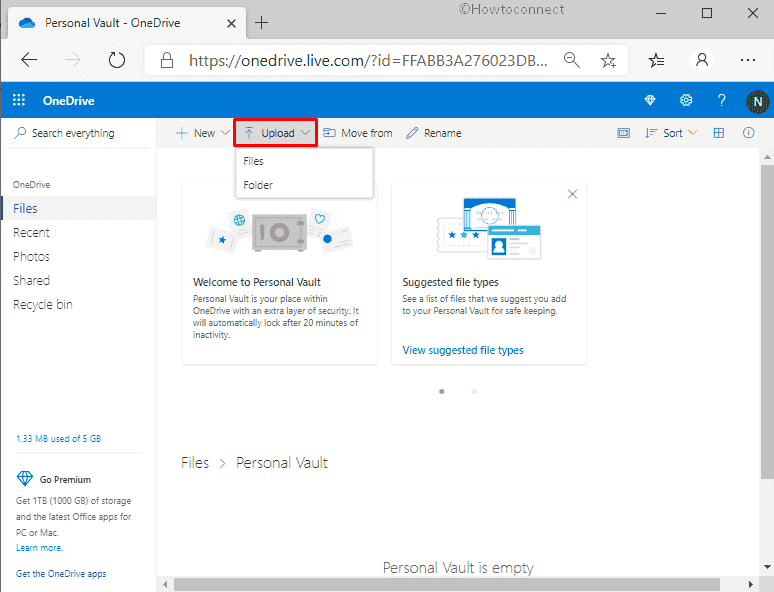
- On the following prompt up, select the file you want to process with, and then click Open button.
Move existed files to Personal Vault
If you want transfer the items that are already uploaded in Onedrive, here is how to process –
- Navigate to OnDrive Personal Vault page first.
- Complete the verification to enter into it.
- After that, hit the option Move from.
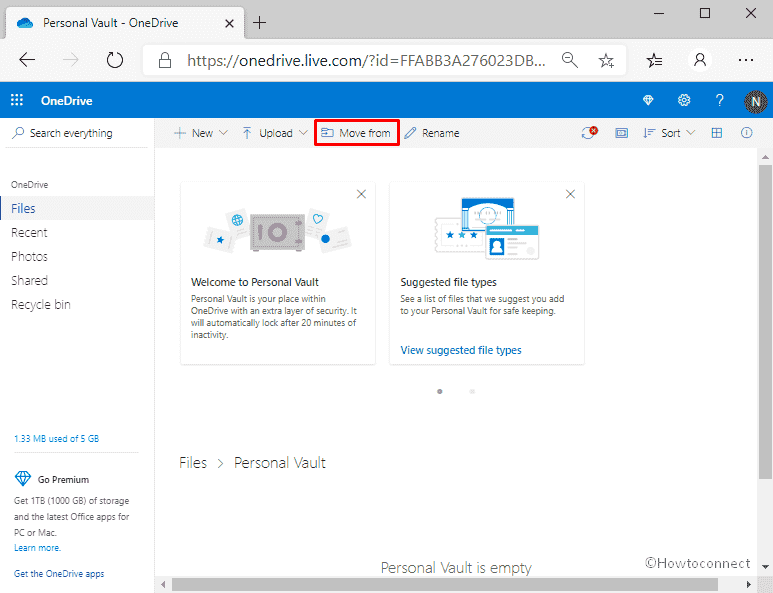
- Now, choose the files you want to move into Personal Vault. Alternatively, you can drag the items for accomplishing the same.
Unlock the files of Personal Vault
Commonly, personal vault locks your stored items if you are inactive for twenty minutes. To unlock them –
- Bring forward OneDrive webpage and then hit Personal Vault option.
- Select the verification method you chose while setting up Personal Vault and confirm your identity.
- You can also use Microsoft Authenticator app for the same motive. The app doesn’t need internet access to generate an access code.
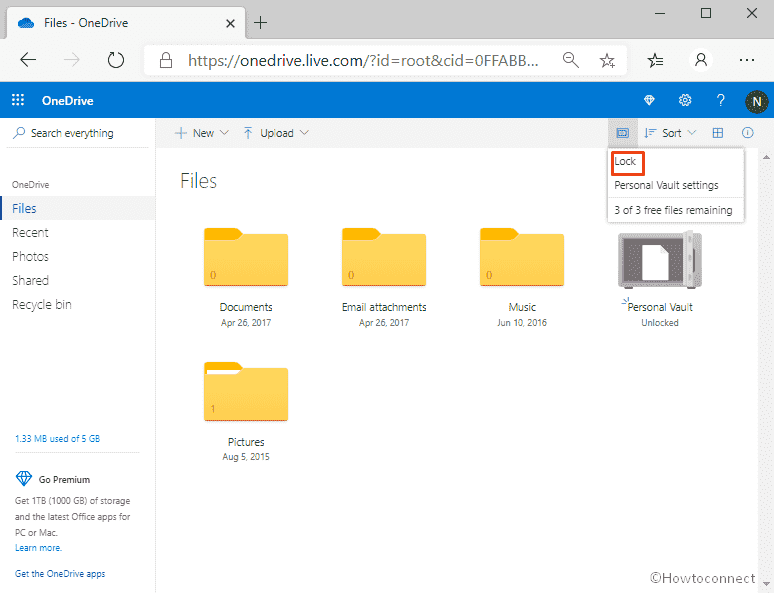
Lock your Personal Vault
Though the Personal folder becomes locked automatically due to inactivity for a certain time, you are able to lock them manually too. For that –
- In OneDrive, right-click on Personal Vault and select Lock.
Turn off Personal Vault
Once you put Personal Vault out of action, any items saved in that folder will be wiped out and there is no way to recover them later. So be careful before you proceed to disable it.
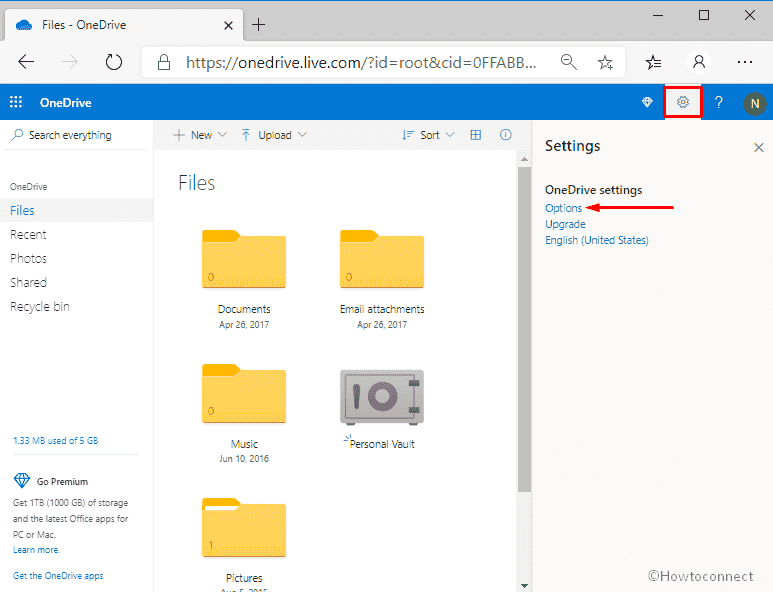
- In your OneDrive page, select gear icon from the top right side in order to open Settings.
- Once it stretches out, choose Options from there.
- On the subsequent page, click Personal Vault from the left.
- Hover the mouse pointer to Disable Personal Vault option and click Disable located beside it.
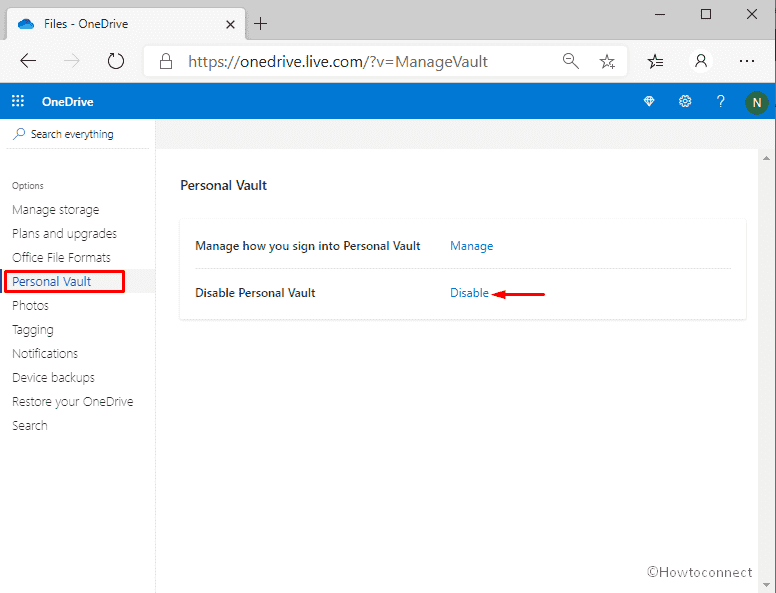
- A pop-up will appear for final confirmation, again click Disable button to successfully turn it off.
That’s all!!!!!!