Processes to fix Default Gateway Not Working in Windows 10 – A substantial number of users complain about the network mess up that declines oftentimes and once they disconnect and reconnect, it begins functioning well for a little span of time and it is repeated frequently. If you encounter similar symptoms on your Windows 10 system, it is very much possible that Default Gateway is Not Working accurately.
Follow the below-written solutions which will hopefully help you to a considerable extent.
How to Fix Default Gateway Not Working in Windows 10
Solution 1
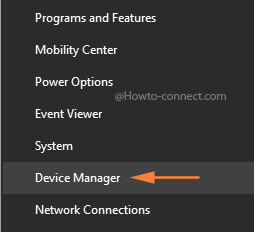
Step 1 – Appoint a right-click on Start and click or hit the choice termed as Device Manager, noticeable at the upper segment of the arrived menu.
Step 2 – Click or hit the arrow visible by the side of Network Adapters in the opened interface.
![]()
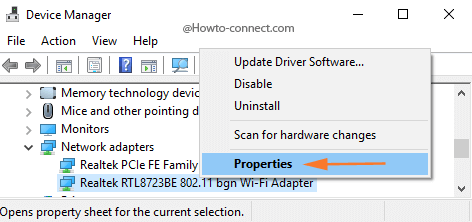
Step 3 – Trace out your WiFi adapter, and when you identify it, right-click on it followed by a click or hit on the last choice labeled as Properties.
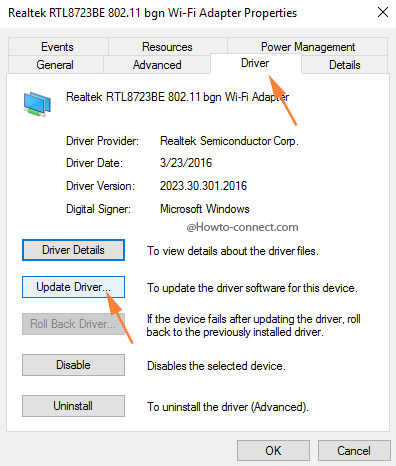
Step 4 – In the next arrived box, switch to the Driver tab.
Step 5 – Click or hit Update Driver button.
Step 6 – In the resultant box, two options will be represented, click or hit the second one, Browse my computer for software update.
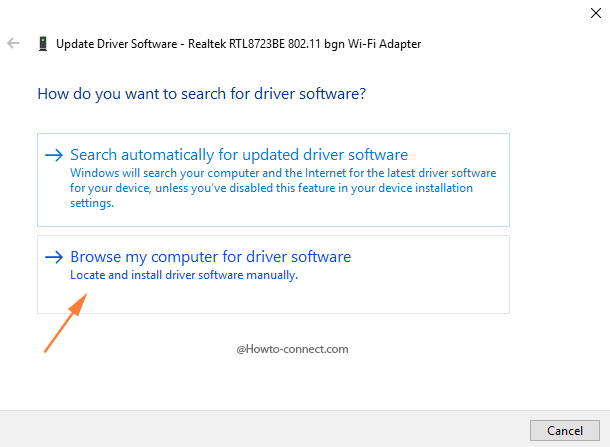
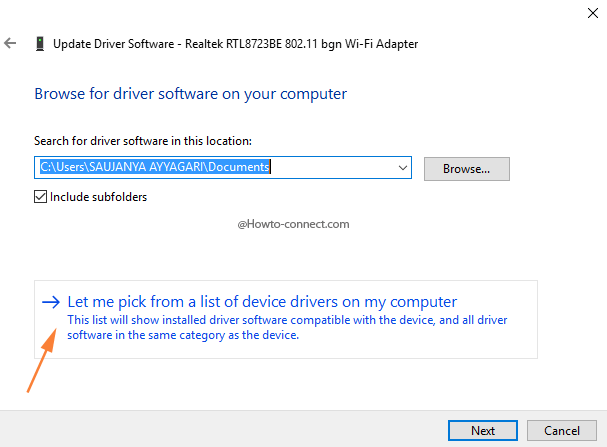
Step 7 – An option that reads as Let me pick from a list of device drivers on my computer with an arrow will arrive on the consequent screen, click or hit it.
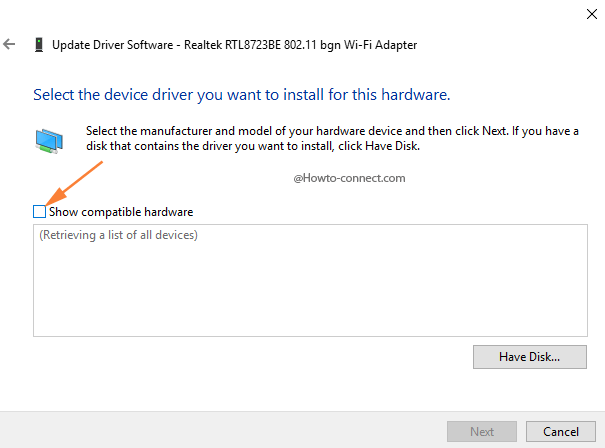
Step 8 – Now, you will witness Select Network Adapter segment, uncheck the tiny square cell that reads as Show compatible hardware.
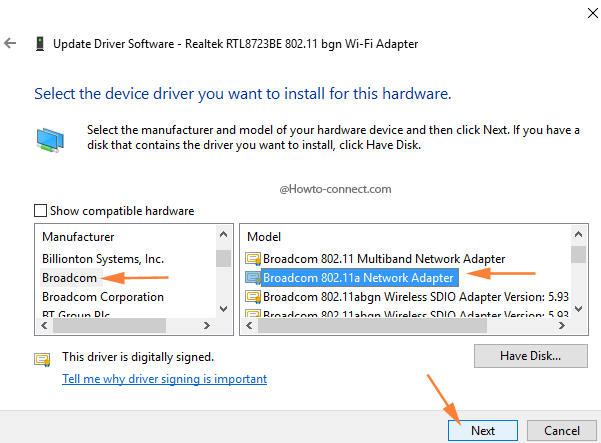
Step 9 – Underneath the Manufacturer column, trace out Broadcom, and select it and then beneath the Model column, click or hit Broadcom 802.11a Network Adapter and lastly hit Next.
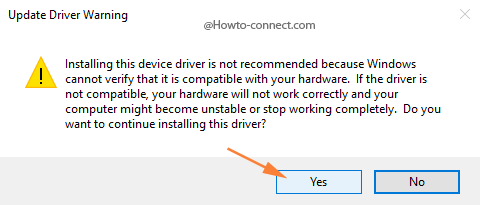
Step 10 – In the end, click or hit Yes when the prompt arrives and reboot the machine to make the changes effective.
Solution 2
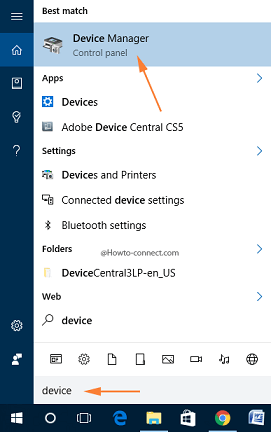
Step 1 – Write out device in the search area, located on the taskbar and soon you will spot Device Manager as the Best match, click or hit it.
Step 2 – Hit on the arrow that appears by the side of Network Adapters.
![]()
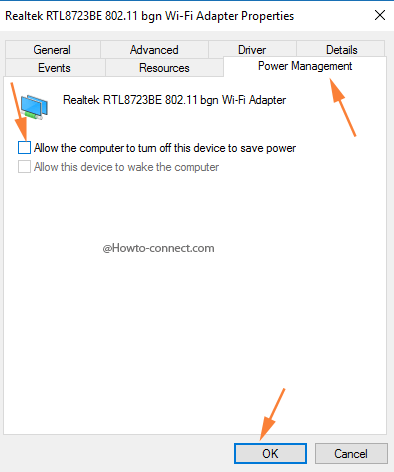
Step 3 – Right-click the device that is creating the mess, in this case, it is WiFi and then click or hit the Properties option.
Step 4 – In the next arrived box, switch to the tab labeled Power Management.
Step 5 – Remove tick mark from the tiny square-shaped cell that reads as Allow the computer to turn off this device to save power and click or hit the Ok button.
Solution 3
Step 1 – Follow the path
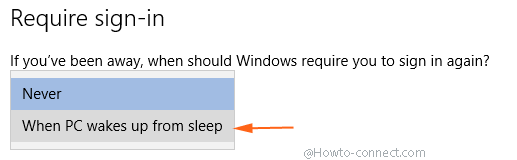
Settings => Accounts => Sign-in Options.
Step 2 – On the right-hand portion of the Sign-in Options Settings, the first heading is Require Sign-in, click the drop down below this, and choose the lower choice When PC wakes up from sleep to fix Default Gateway Not Working in Windows 10.