In each Windows version, we are aware of Windows Temporary Files. Actually, these are vain files and are produced automatically during computer operation, or while specific tasks are finished. So we should remove these temporary files from time to time otherwise they occupy and waste your considerable disk Space.
If these temporary files are not deleted they disrupt the Windows performance truly. As a result, we feel slow speed of our computer. Within Windows 8, the same troublesome condition is valid.
In these tips, I am going to describe two methods for how to delete the Temporary Files In Windows 8. Actually, Windows 8 has integrated disk cleanup utility tool which is a quick solution to it. So, see below.
Useful Tutorials:
Table of Contents
How To Delete Temporary Files In Windows 8 step by step
First Tips
Step – 1
- At first, move the cursor towards the right edge of the screen and hit the Search icon.

Or
You may press the combination of Windows key and F to spread out Windows 8 search window.
- Next type keyword “Disk Cleanup” on the search panel and click Settings button.
- On left screen panel of search result pages, hit on this link – Free up disk space by cleaning unnecessary files.

Step – 2
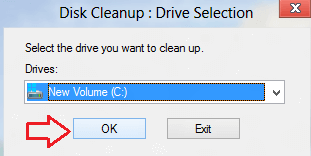
- Now you will prompt a dialog box named Disk Cleanup: Drive Selection.
- Then select a drive to erase the temporary files.
- Select drive C due to Windows version loading.
Step – 3
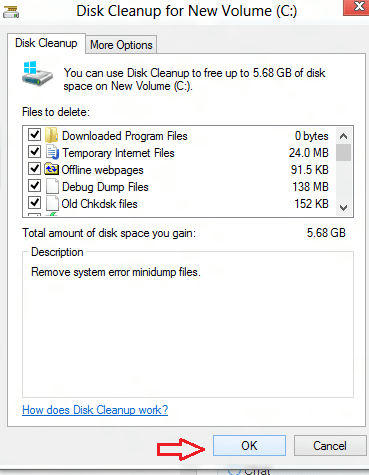
- Here you view another dialog box comes on the screen. Check all the choices and hit on OK button.
Step – 4
- Next, a confirmation box prompts before you. So click on Delete Files button to continue the process.
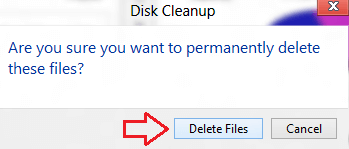
It will take some minutes to erase every temporary file from your Windows 8 system.
Second Tips
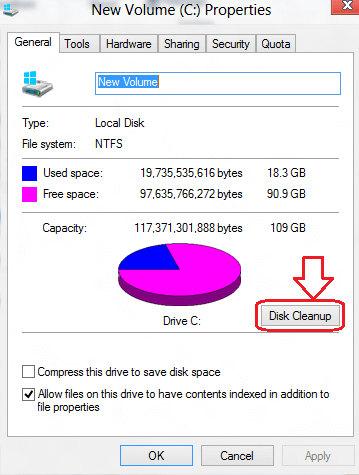
You can also perform to Delete Temporary Files In Windows 8 with the Disk Cleanup Utility via Drive C properties openly to Delete Temporary Files In Windows 8.
Step-1
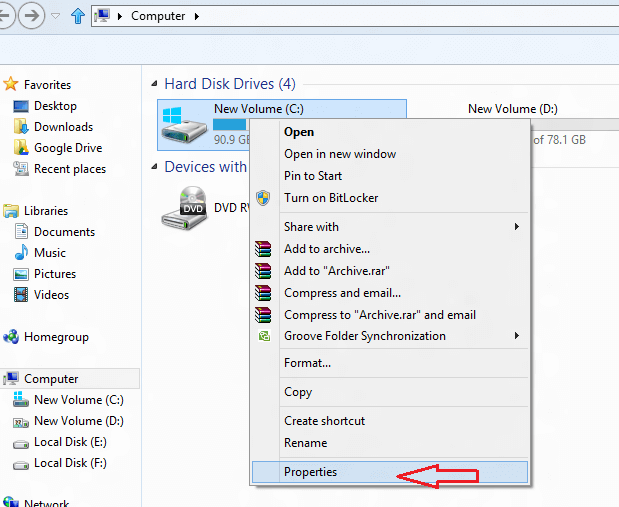
- Explore computer window, and press a right-click on C drive.
- Then move off with Properties menu from right context panel.
Step – 2
- Next, you view a properties box of Drive C emerges. Hit on the Disk Cleanup button.
The rest process is similar to Step 3, Step 4, and Step 5 talked about above under the first method.
