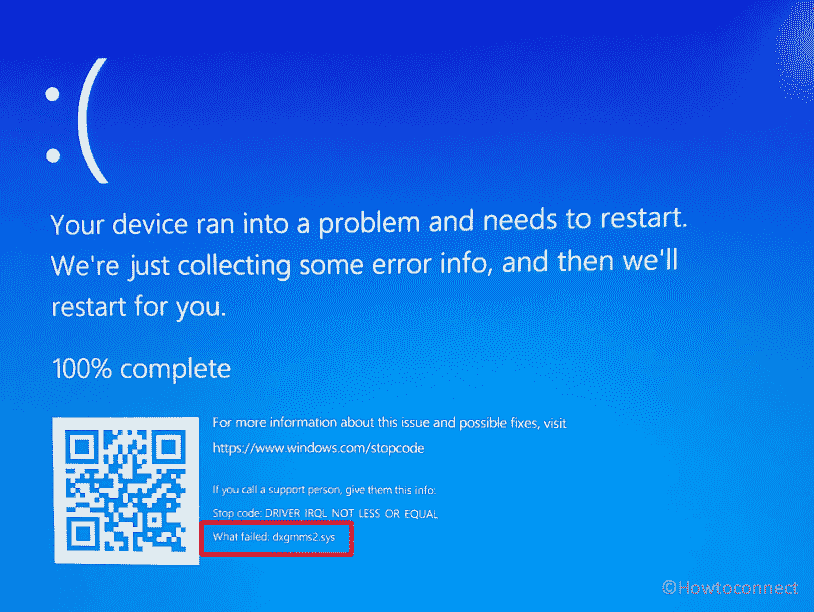
Encountering the frustrating dxgmms2.sys blue screen error can be a gamer’s nightmare as it disrupts immersive gaming experiences. The issue commonly appears with System Service Exception, Video_Scheduler_Internal_Error, System Thread Exception Not Handled, or DRIVER_IRQL_NOT_LESS_OR_EQUAL. This BSOD problem may occur with a system crash, and the PC may freeze, hang, and become unresponsive.
This glitch often occurs from obsolete or faulty graphics card drivers pushing your DirectX Graphics MMS system file beyond its limits. But fear not, as we’ve got this blog, to rescue your system from this digital quagmire. Whether it’s a driver hiccups or a hardware misstep, our solutions promise respite. Therefore, say goodbye to the relentless restarts and hello to uninterrupted gaming bliss.
Table of Contents
dxgmms2.sys blue screen Error
Here is how to fix dxgmms2.sys blue screen Error in Windows 11/10:
Update the Graphic Drivers
To tackle the pesky BSOD you should begin with updating your graphic drivers. This quick fix is done through Device Manager, an effective Windows tool that helps to update, uninstall, and roll back drivers and ensures a seamless gaming journey.
- Press Win + R, type devmgmt.msc, and hit Enter.
- In Device Manager, expand Display adapters.
- Right-click on your graphics adapter (AMD, NVIDIA, or Intel), and choose Update driver.
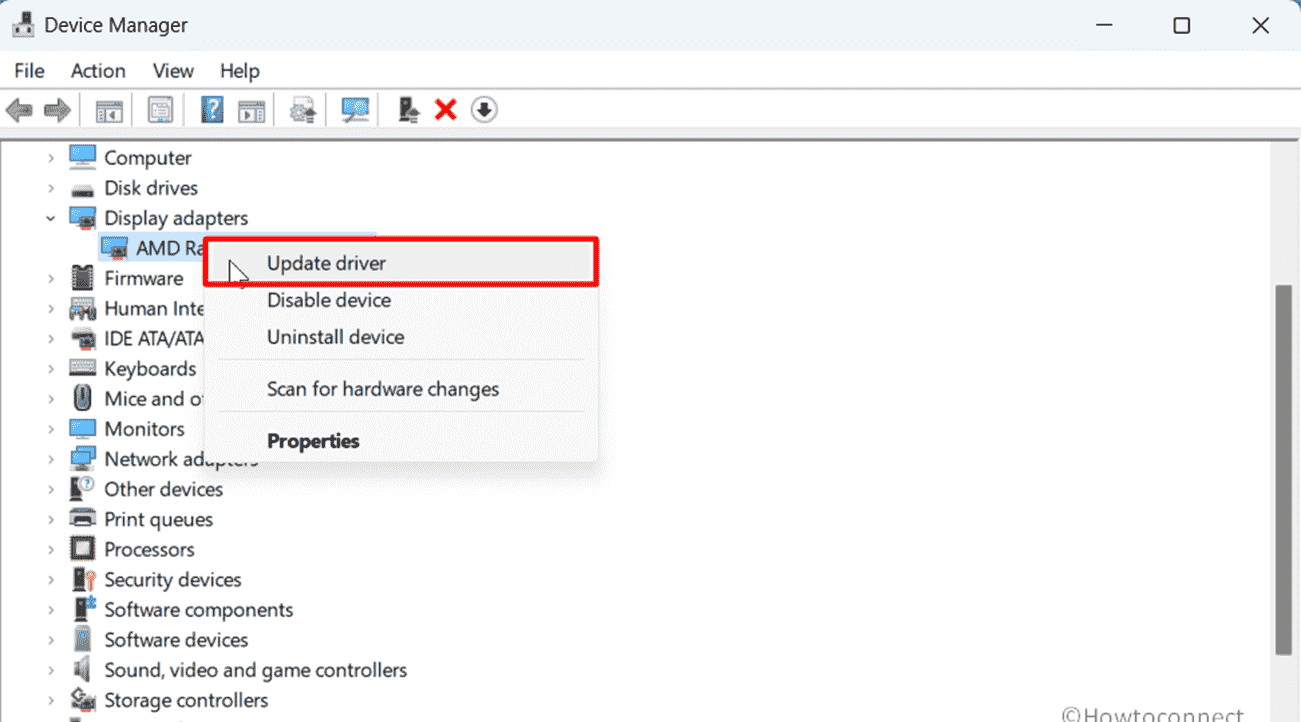
- Select “Search automatically for drivers”.
- Let Windows install the latest driver and reboot your computer.
Roll Back to the Previous Driver Version
In certain scenarios, updating the drivers has been identified as the real reason for this error, so, reverting them to the previous version where they worked can be a viable option.
- Right-click on Start and select Device Manager.
- Double-click on Display adapters.
- Right-click the graphics card, and select Properties.
- Navigate to the Driver tab.
- Select “Roll Back Driver”.
- Wait for the previous driver version to be installed.
- Click OK and restart your PC.
Launch the DirectX Diagnostic Tool to see note
The dxgmms2.sys error in Windows is closely tied to DirectX, a crucial component. Essentially, the filename is a shortcut for DirectX Graphics MMS. Therefore, understanding the error notes on the tool becomes a pivotal key in troubleshooting and resolving the issue effectively:
- Press Win + R, type dxdiag, and hit Enter.
- Let the DirectX Diagnostic Tool load.
- Click the Display tab.
- Check Notes for errors.
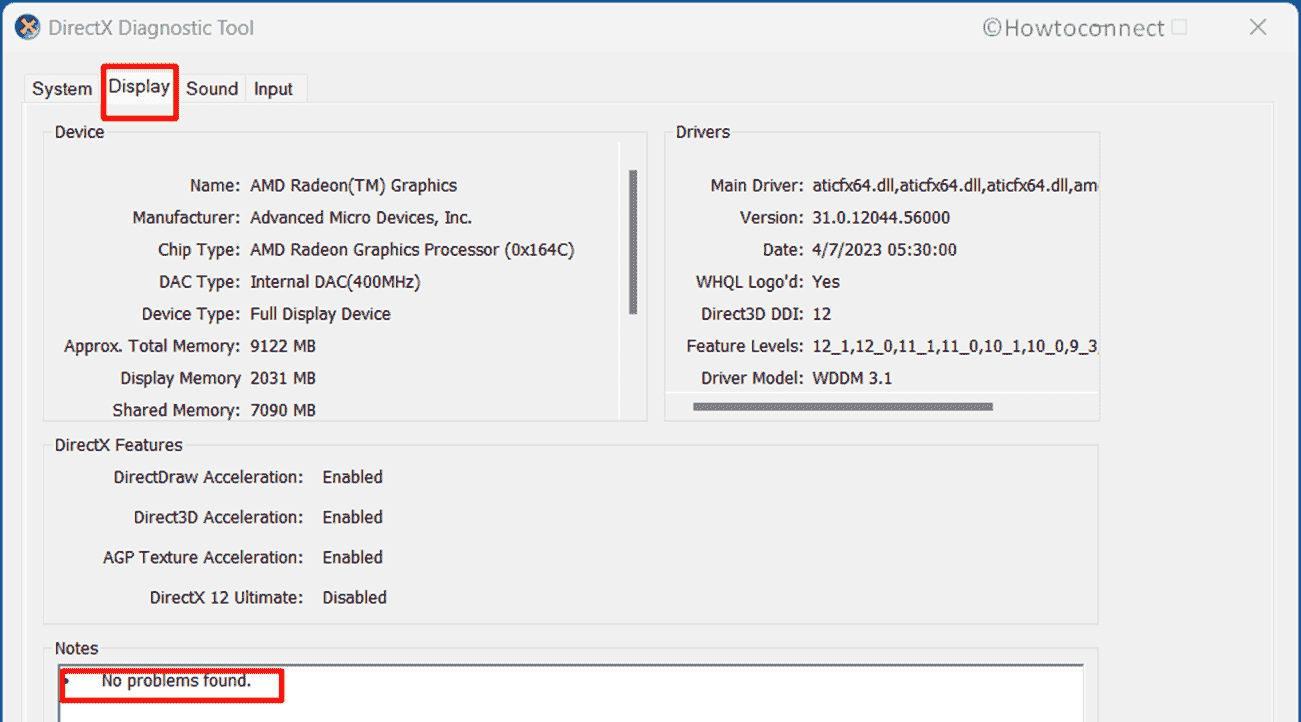
- If errors, use DirectX Web Installer to reinstall the tool.
Turn Off Hardware Acceleration
Another reason behind the BSOD error may be the hardware acceleration feature in your Windows system. While this feature aims to boost computer performance, it can also trigger issues. Try disabling hardware acceleration to check if the issue is solved.
- Click on Search, type regedit, and press Enter.
- Navigate to
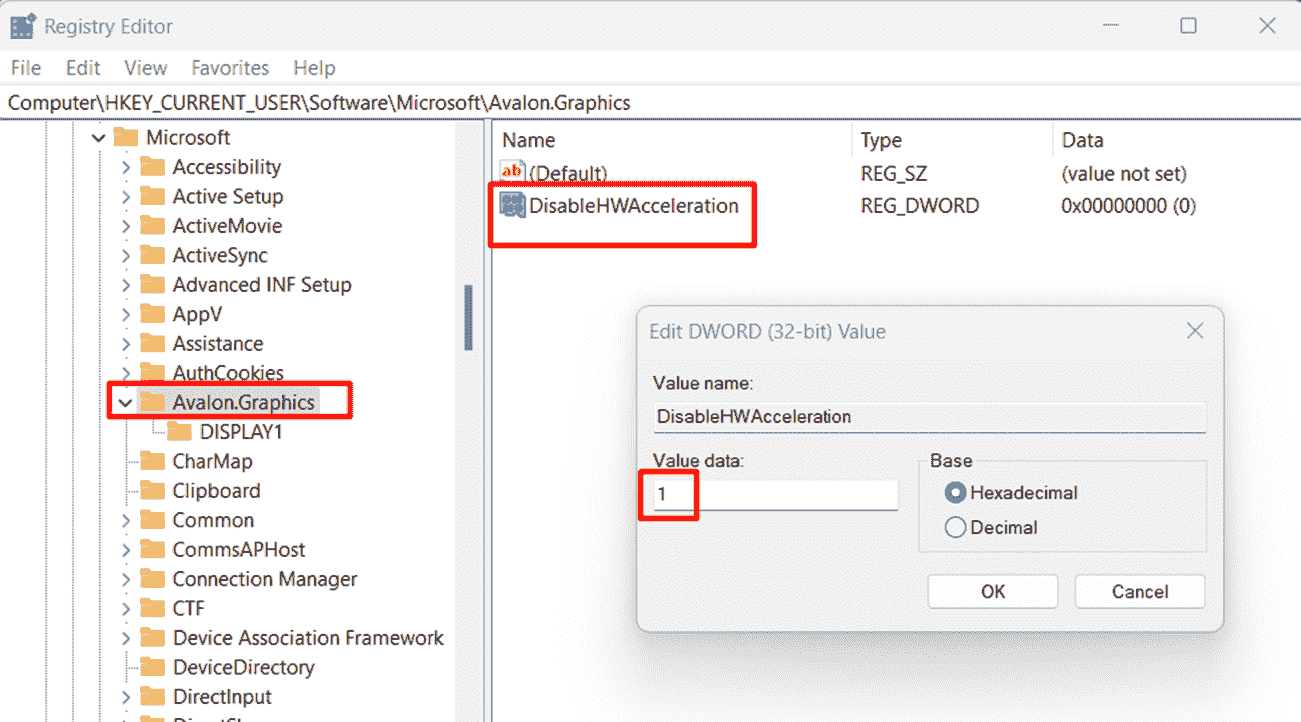
HKEY_CURRENT_USER -> Software -> Microsoft -> Avalon.Graphics. - Right-click in the right panel and select New -> DWORD (32-bit) Value.
- Name it DisableHWAcceleration.
- Double-click on this value, set its Value data to 1, and click OK.
- Exit Registry Editor and restart your computer.
- If needed, reverse the process by changing DisableHWAcceleration’s value to 0.
Run Windows Memory Test
Windows Memory Diagnostic Utility is your ally in dealing with the dxgmms2.sys problem. This Windows-integrated program serves as a diagnostic detective for memory-related issues.
When confronted with the dreadful blue screen problem, this utility becomes critical. Simply said, it scans your computer’s RAM for errors and provides suggestions for resolving the problem.
- Search for MdSched in the Start menu and press Enter.
- Click Restart now and check for problems.
- Alternatively, select Check for problems next time I start my computer for unsaved work.
- Windows scans for memory issues upon reboot.
Upgrade the BIOS
Still struggling with the dxgmms2.sys issue? You might want to try updating or upgrading your BIOS. It is the Basic Input/Output System which is nothing but the core of your computer’s startup process.
Therefore, updating it can be the key to addressing the aforementioned error. Moreover, BIOS updates often include enhancements and bug fixes, offering a potential solution to this glitch.
- Download the latest BIOS from your motherboard manufacturer’s website.
- Extract if it’s a ZIP/RAR to an empty USB drive.
- Click Start > Power > Restart (hold down Shift).
- Navigate to Troubleshoot -> Advanced options -> UEFI Firmware Settings -> Restart.
- In BIOS, find the Update option.
- Flash BIOS using the USB drive.
- Ensure smooth updates for your motherboard.
Switch HDMI/VGA Ports
Another quick fix for this error is to change the HDMI port on your computer by moving the cable from the Graphics Card port to the HDMI/VGA port on the motherboard. This simple switch might effectively solve the problem.
Install available Windows updates
You might want to try updating Windows to a stable version to bid farewell to dxgmms2.sys blue screen error. Whether on Windows 10 or 11, stability is key.
For Windows 10
- Click on Start and select Settings.
- Go to Update & security.
- Choose Windows Update.
- Click on Check for updates.
- Install the available updates.
For Windows 11
- Press Win + I and navigate to Windows Update.
- Click on “Check for updates”.
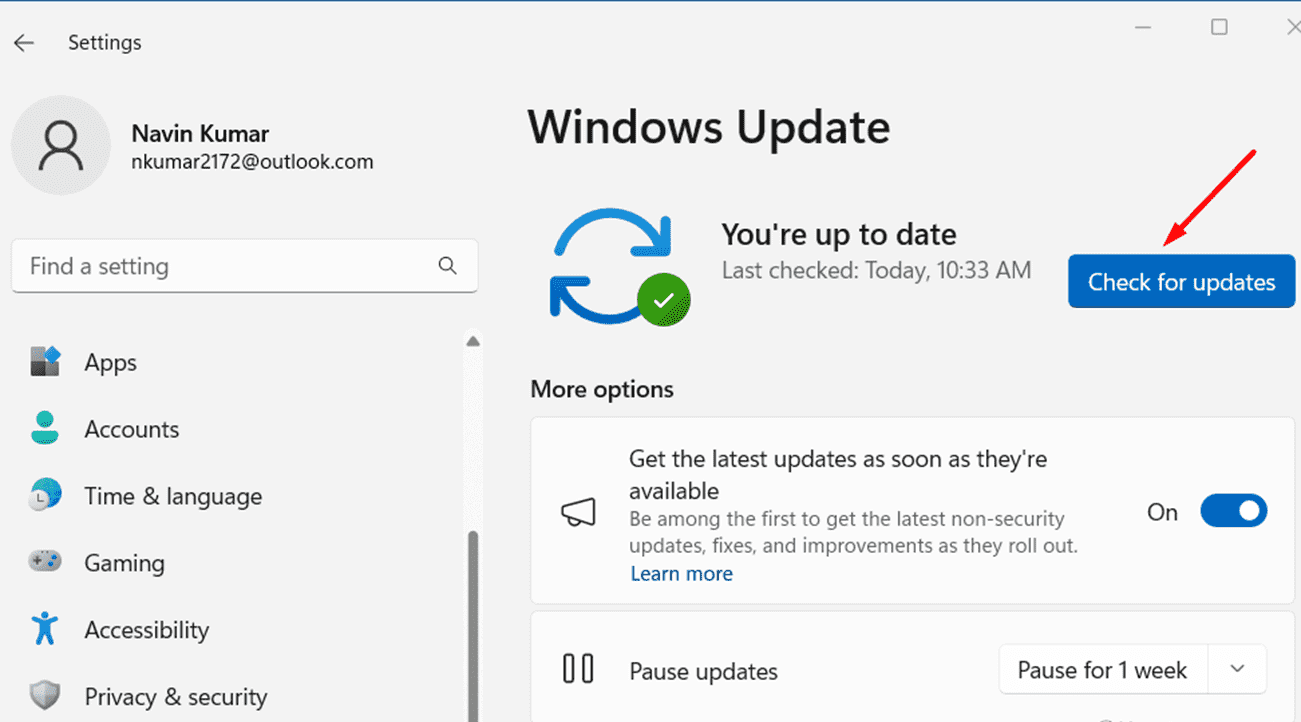
- Allow the system to scan and download pending updates.
- Finally, click on Restart now.
Methods:
Update the Graphic Drivers
Roll Back to the Previous Driver Version
Launch the DirectX Diagnostic Tool to see note
Turn Off Hardware Acceleration
Run Windows Memory Test
Upgrade the BIOS
Switch HDMI/VGA Ports
Install available Windows updates
That’s all!!
