Error 0x80242006 in Windows 11 and 10 is one of the most annoying errors that usually restrict you from getting update for the OS. This stop code appears when the distribution database of Windows Defender is broken. Moreover, another root cause of the issue can be the stopped BITS service.
Experts reveal that the broken database of Windows Defender is mostly responsible and thus it should be re-created to fix Error 0x80242006. There are a few promising solutions that can help you trigger the updates again without any issues. So, let us head towards the various solutions and their sequence of steps one after the other.
How to Fix Windows Update Error 0x80242006 in Windows 11/10
Solution-1: Start BITS Manually
Step-1: Type the command services.msc on Windows search and hit Enter to launch Services.
Step-2: A window opens up on the PC screen with a list of services. Moving on, here locate the service “Background Intelligent Transfer Service” (in short BITS) as indicated in the given image.
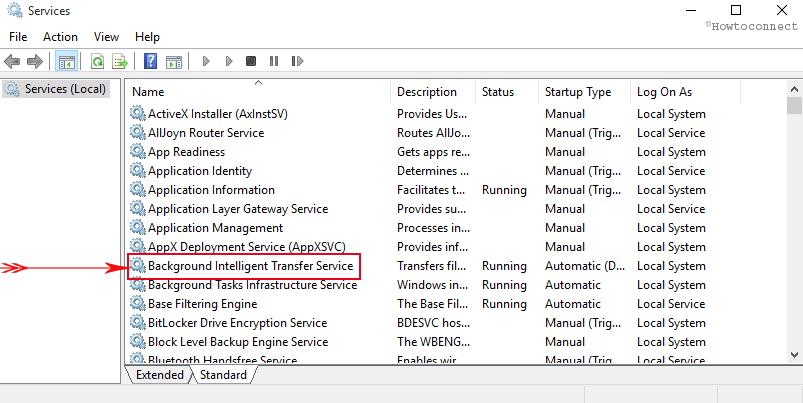
Step-3: Hit a double-click on it and from the dialog that shows up, click on Start. Lastly, click on Apply and then OK in order to start the BITS manually.

Read more on How to Start, Stop, Configure Windows Services in Windows 10.
Now, try to update the Windows and check for the Error 0x80242006. Hopefully, this should bypass the error completely. If you find it prevalent, go for renaming the update folders.
Solution-2: Rename the Update folders with the help of Batch files
Step-1: Press Start button, type notepad and press Enter to launch the same.
Step-2: When notepad shows up on the PC screen, copy/paste the below text as it is.
net stop wuauserv
CD %systemroot%\SoftwareDistribution
Ren Download Download.old
net start wuauserv
Step-3: After inserting the text exactly, click the File option. From this menu that appears, hit on the option Save as (see screenshot).
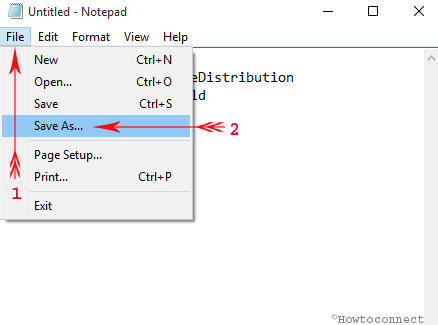
Step-4: Name the file as Rename Update.bat and make a click on the Save button.
Step-5: Now locate the batch file which you have just saved on your computer. Hit a right click on it then select the option “Run As Administrator“.
It will run and update Windows when the process is completed.
Solution-3: Run Windows Update Troubleshooter
If the Error 0x80242006 persists, give an attempt to Windows Update Troubleshooter. Most of the time, the troubleshooter repairs the corrupted database.
For Windows 10
Step-1: Use Windows + I hotkeys to launch the built-in Settings program. On its homepage, reach out to the icon Update & Security.
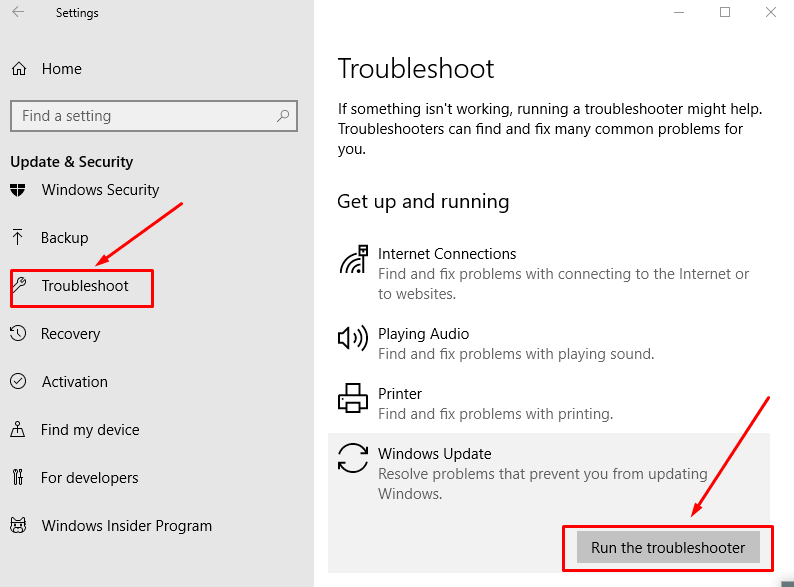
Step-2: Click Troubleshoot on the left sidebar of the following page.
Step-3: Shift to the other side and click Additional troubleshooters.
Step-4: select Windows Update. Click Run the troubleshooter button (see snapshot).
The troubleshooter will scan the system and it eventually repairs the damaged database.
For Windows 11
- Open Settings app by pressing Win+I hotkey.
- From right pane of appearing window, look for Troubleshoot and select the same.
- Select Other troubleshooters.
- Click Run present next to Windows update.
Solution-4: Disable Windows Defender
We have already known that this error occurs mostly because of Windows Defender. As a result, disabling it might work as resolution. To do so, the steps are:
Step-1: Open Start Menu and type gpedit.msc. Hit Enter.
Step-2: Navigate to the below path on the left sidebar of Local Group Policy Editor.
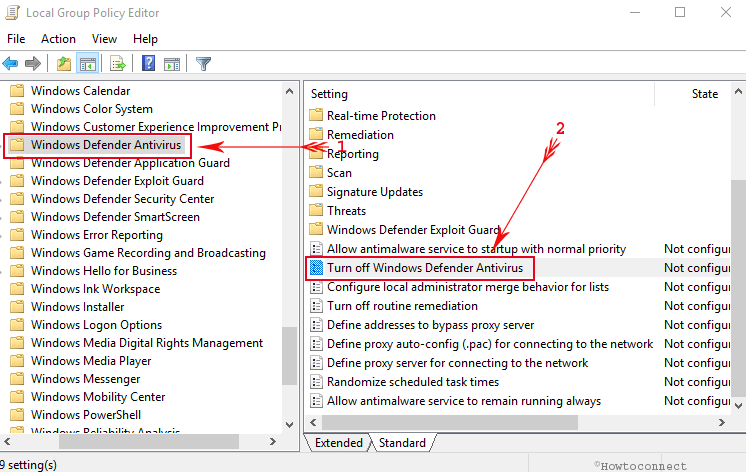
Computer Configuration => Administrative Templates => Windows Components => Windows Defender Antivirus.
Step-4: Switch to the corresponding right side, locate and double-click the setting namely Turn off Windows Defender Antivirus.
Step-5: Upon opening another window, select option Enabled. Press Apply button followed by Ok to implement the modification.

The error should be resolved by this time. You can now update windows smoothly after fixing Error 0x80242006 in Windows 10 using above methods.
Conclusion
Updating Windows periodically is necessary. Nowadays, some nagging errors are restricting the users from updating. Error 0x80242006 in Windows 11/10 is a similar problem and it demands to be fixed immediately after affecting your updating process. We have discussed some very effective resolutions here. Use these in your cases after through reading. Hope you can resolve this annoying easily.
Your edition is Windows 10 Home. Follow the link to get Gpedit first – How to Activate Local Group Policy Editor / Gpedit.msc in Windows 10 Home
I did not find gpedit on my machine, but I tried turning off Windows Defender elsewhere, and I tried all these solutions to no avail. Been over two years now with the error, not being able to update. So frustrating. Maybe that’s why no gpedit on my machine.
Thanks, Kenary. I have updated now.
Solution 3 Step 3 is pointing to the wrong item. It should highlight “Troubleshoot”