DEVICE_QUEUE_NOT_BUSY BSOD in Windows 10 is not really a common issue with the users but it might be dangerous when you get stuck with. Any BSOD error is harmful for the operation as they cause the system to shut down repeatedly. We will be providing some real effective resolutions so that you can knock the issue out of the arena in this write-up.
The said BSOD error usually comes in once the user launches a program that is incompatible with the system. The same can occur if new hardware is installed. The issue shows up as the computer restarts itself as to prevent the maximum damage to Hardware and software components. Repeated restarting of machine creates instability in working condition and we really don’t want to go along. Therefore, the error needs immediate resolutions. Read – Fix: THREAD_TERMINATE_HELD_MUTEX BSOD Error in Windows 10
Solutions to DEVICE_QUEUE_NOT_BUSY BSOD in Windows 10
Here is How to Fix: DEVICE_QUEUE_NOT_BUSY BSOD in Windows 10 –
Before we step into the Workarounds, let’s have some quick ideas about the symptoms and causes for DEVICE_QUEUE_NOT_BUSY BSOD in Windows 10.
Causes Responsible for DEVICE_QUEUE_NOT_BUSY BSOD
Usually, the error comes in due to incompatible hardware, Driver, software, and Firmware issues. However, a few other reasons are responsible too –
- The issue can evolve when a .dll file is missing.
- Most commonly from a corrupted, old, wrongly configured device driver.
- Hardware that is not perfectly suited with Computer.
- Corrupted Windows registry due to any recent changes made on software.
- Infection of malicious invaders resulting in corruption in Windows system or associated program files.
- Incompatible driver With Windows operating system.
- Conflict of drivers while installing a new Hardware.
- Incorrect allocation of Memory in Windows 10.
- A damaged hard disc can cause Error 0x 2 blue screens.
- Missing System files by mistake once you have installed new software or a driver relating to OS.
- Corruption in RAM can give birth DEVICE_QUEUE_NOT_BUSY STOP error in Windows 10 too.
When your machine is affected with the said error, the system seems unstable and you can have the following symptoms upfront –
Symptoms for DEVICE_QUEUE_NOT_BUSY BSOD in Windows 10
- An error message DEVICE_QUEUE_NOT_BUSY keeps on displaying on the screen at the same time crashing the active program Window.
- Repeated Restarting of Windows 10 automatically. The reason is once a problem comes in, Windows has a tendency to shut down itself as to prevent further damage.
- Frequent Crash of the system with Error 0x2 while running in the same program.
- Keyboard, Mouse and other associated accessories respond slower than before.
- “STOP Error 0x2: DEVICE_QUEUE_NOT_BUSY” flashes on the screen in a frequent interval.
- Computer system hangs every after a significant period for few seconds.
Resolving DEVICE_QUEUE_NOT_BUSY BSOD in Windows 10 error
The error is quite annoying and needs immediate resolutions. Therefore, follow the workarounds to solve the issue immediately –
Uninstall and Reinstall the Windows Operating System Program Associated with DEVICE_QUEUE_NOT_BUSY
As mentioned earlier, the conflict between a newly installed program with the said one can evolve the issue. Therefore, this is legit to Uninstall such a program eventually Reinstalling it again can resolve the issue. Here is how to do it –
- Right click on the Start button and select Run from the visible list.
- Once it shows up, type appwiz.cpl in the text field and hit Enter on your keyboard.
- On the Program and Features window, locate DEVICE_QUEUE_NOT_BUSY-associated program under the Name column.
- Do right-click on that Windows Operating System-associated entry and select Uninstall.
Follow the on-screen directions to complete the uninstallation of your Error 0x2-associated program.
Scan your full system
Infection from malicious invaders is genuinely responsible for the issue. Hence, a full system scan for Virus in the process resolve them will definitely resolve the error. Windows 10 is a Goldmine of amazing features and Windows Security is the best utility in this respect. You can put the tool into effect for malware issues –
- Press Win&I hotkey at the same time in order to open the Settings app.
- When it rolls out on the screen, click on Update & Security.
- On the following page, select Windows Security from the left pane and then shift to the corresponding right.
- Click on the Virus & threat protection.
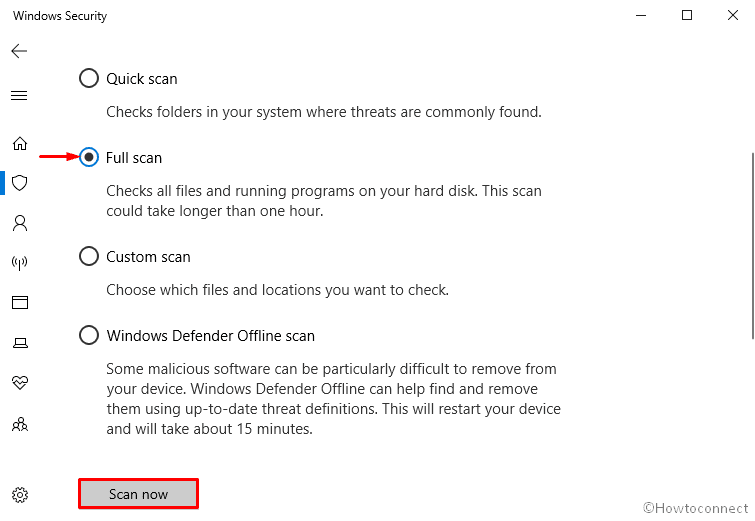
- When a new window prompts up, click on the Scan options.
- On the next page, select the radio button of Full scan and click on Scan now option.
Also, read – How to Schedule Windows Defender Full or Quick Scan on Windows 10
Recheck the Newly installed Hardware
Once the system is affected by DEVICE_QUEUE_NOT_BUSY BSOD in Windows 10 after installing new hardware, you can assume the reason pretty easily. In this case, remove the hardware in the first place and Restart the system. Check the documentation on the package complying with the system requirements. Install again once the same after checking and complying with device need. The error hopefully will not show up again.
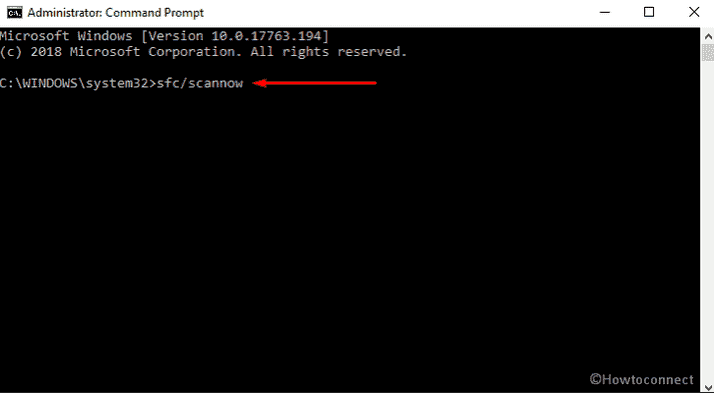
Run Windows System File Checker (“SFC /SCANNOW”)
- Open Command Prompt as Admin From Run Dialog.
- When it comes into the sight, Type sfc /scannow near the blinking cursor and press Enter. This will take around 10 minutes or more to scan the whole system. Wait patiently till this procedure ends.
- At last, reboot your system so that the changes made by the Scanning tool could take place.
- Check whether the DEVICE_QUEUE_NOT_BUSY BSOD in Windows 10 issue is solved or not. If not, follow the next workaround.
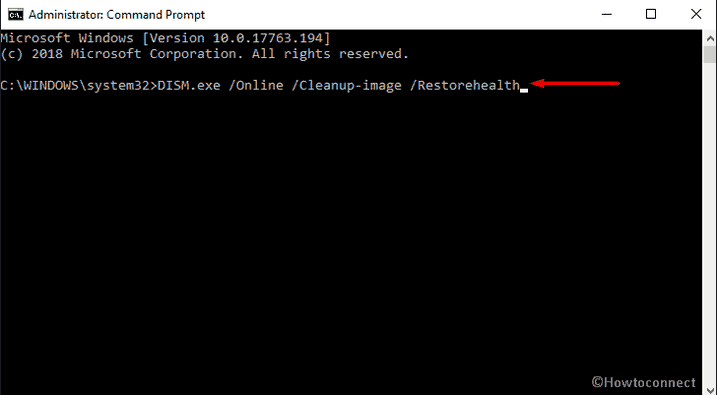
Run DISM command
DISM is indeed a command-line tool that helps to repair all Windows components and sometimes save your time of reinstalling Windows. To make it effective –
- Press Win+S at once to open Taskbar search and type cmd.exe in the text bar.
- Once the result shows up, click on Run as administrator.
- Wait for UAC to show up and ask for permission. Click on Yes.
- Once the Command Prompt appears, type the ahead command and hit Enter –
DISM.exe /Online /Cleanup-image /Restorehealth
Run CHKDSK Utility
- Again, Open Command Prompt with admin privilege.
- On the visible prompt, insert the following code followed by a hit on the Enter key.
Chkdsk /f /C:
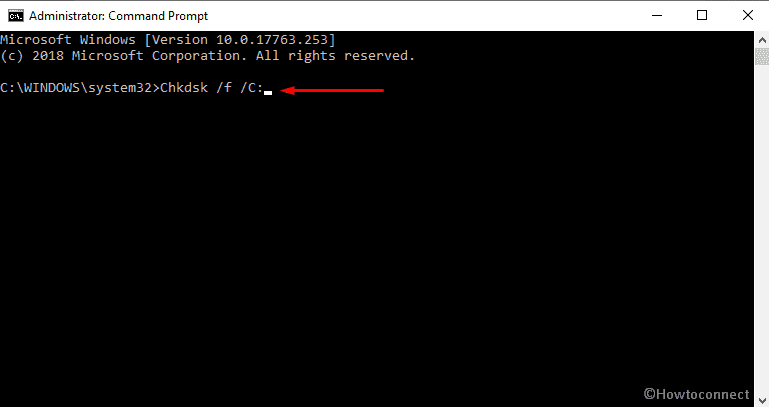
Note – The above command contains chkdsk that will initiate the disc checking functionality. The f code indicates fixation of error whereas C: is the selected disc drive. This the place where the operating system is installed. You have the attorney to change the drive letter and change accordingly where you have installed the OS in the machine.
Wait until the task is finished. Lastly, Reboot the PC and hopefully, this will overcome this DEVICE_QUEUE_NOT_BUSY BSOD in Windows 10.
Run Disk Cleanup utility
Missing resources in system files, corruption in registry entries, corrupted files in operation might strike the Whole system and you might encounter the issue in your machine. Disk Cleanup Utility will automatically detect the corruption and fix by itself. Follow the below instruction to execute it –
- Press Win+R hotkey to open the Run dialog box on the bottom left of the screen.
- Type cleanmgr in the text bar located next to Open and click on OK button.
- Once a small dialog appears, click on the drop-down menu and select C: drive then hit the Enter key.
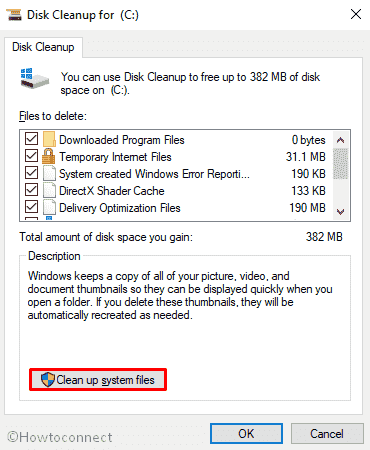
- Disk Cleanup calculates how much space you will be able to free from the occupied room. After that, you need to click Clean up system files once a wizard appears.
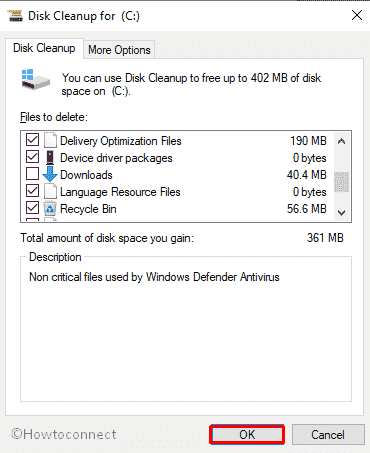
- Again choose the same drive and let the Disk Cleanup for (C🙂 appear.
- Tick all the options except Downloads and finally, click the OK button.
You may also like to read – How to Fix Disk Cleanup Not working in Windows 10
Update outdated Device Drivers
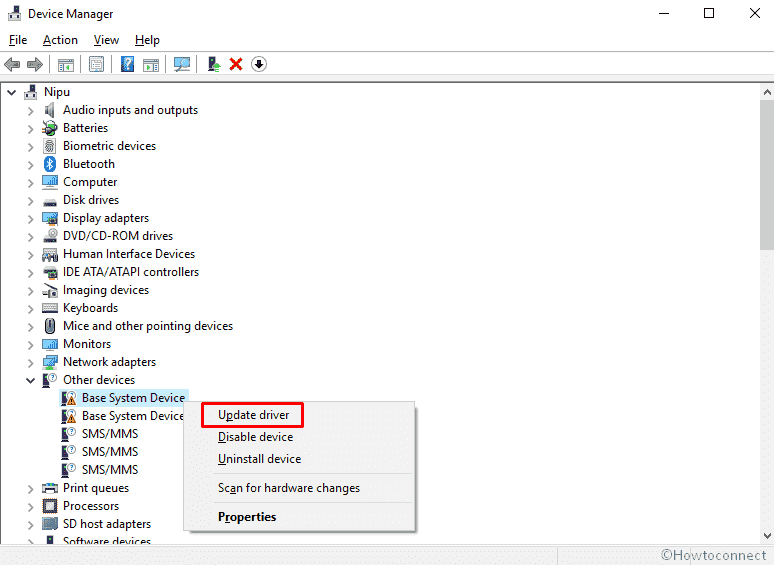
- Right click on the Start and select Device Manager from the list
- When it appears, look for the exclamation mark near any devices on the console.
- If found, expand the same then right-click on one having a yellow indication and choose Update Driver from the context menu.
- Repeat the same procedure for each yellow warning sign.
Install all possible Windows Updates
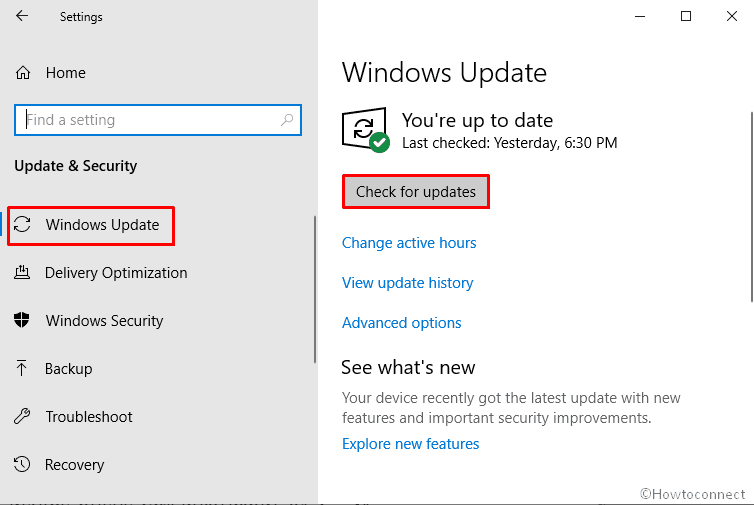
- Open Windows Settings and select Update & Security.
- After the additional Settings page opens up, choose Windows update option from the left pane.
- Move aside to adjacent right and hit Check for updates option if you are up to date. Else, select Download option under the new updates available here.
Verify RAM for issues
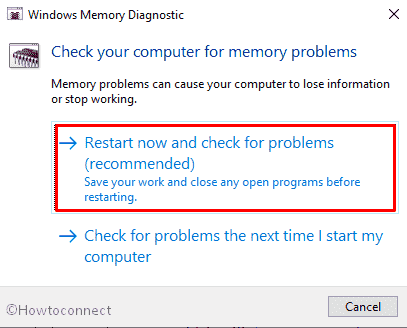
In case of failure to resolve DEVICE_QUEUE_NOT_BUSY BSOD in Windows 10 using the above methods, you can assume the error is coming up from RAM. This requires to scan the memory device. Therefore, we will go through with Windows Memory Diagnostic tool. This is so far the best deal to test the whole RAM at once easily. Eventually, you can find out the bad sectors of it and resolve the issue afterward. Here is how to proceed –
- First of all, save and close all the active apps.
- Thereafter go to Start and type Windows Memory.
- Once the result comes up, make a click on Windows Memory Diagnostic.
- Moving on, select the option namely Restart now and check for problems (recommended).
- In just a moment you will see a blue screen window on the screen which will detect memory issues. Once the testing gets over 100%, the system will automatically restart itself.
- You can see the test result in the notification area of the taskbar after signing up on your PC.
The same outcome could be carried out by navigating to the path: Right-click Start Menu => Event Viewer => Windows Log => System.
Hope this time it has managed to fix the Error DEVICE_QUEUE_NOT_BUSY BSOD.
Remove Secondary GPU and External HDDs or SSDs
We have got feedback from several corners that DEVICE_QUEUE_NOT_BUSY BSOD in Windows 10 is resolved only by disconnecting the unnecessary drives that are kept in use with the machine. The thing can be such that the power supply isn’t enough to satisfy the needs.
In this condition, the best way out is to separate the External HDD, Secondary HDD, Sound Speakers, Secondary GPU as well as Optical DVD drives. Apart from these, disconnect all that resolves the error. Try reconnecting them one after another the issue gets solved properly. Hopefully, the workaround will take away your headache.
Use Previous System Restore Point
Creation of a System Restore Point might be the savior for this case. Several reports evident that the issue is generated from crashed Windows Update. This realistic feature is ideal and helps you to get back to original settings if you have changed something by mistake. Therefore, follow the new few steps to resolve the issue-
Note: In case of having no restore points, we recommend you to skip this method and move on with the next proceedings.
- Right-click on Start and choose Run option.
- On the Run box, type rstrui in the empty box and click OK.
- In the System Restore wizard, perform a hit on Next to generate your PC’s Restore.
- In order to view more restore options, make a click on the checkbox against the box Show more restore points then select the latest restore point and hit the Next option to go ahead.

- Finally, click on Finish to let start this process.
Note: Make sure you have saved and closed all running applications before going through this procedure.
Perform a Clean Install
Clean Install is the last option standing in this regard. This means the Operating system needs to refresh and everything in the system will get a new life. We recommend you to save the important files in a Safe place your proceeding so that to prevent loss.
Clean Install is always a professional issue. It is safe to seek help from technicians and install the Latest Update files. This will save the significant time and you will no longer face the DEVICE_QUEUE_NOT_BUSY BSOD in Windows 10.
If you want to do it by yourself, follow
That’s all!!!