Windows 10 or 11 cumulative updates and Feature updates ensure the best performance of a system and new specialties. While attempting to get such patch or build through Windows settings app, error 0x800f0986 may appear that prevent the system from downloading it. The reasons behind this issue could be corruption in update components, misconfigured proxy settings, security application interruption, or third party services and programs.
0x800f0986 stops the updates all of a sudden and displays the error code under the Check for updates button. We have found some effective workarounds for the same as follow –
Error 0x800f0986 Solutions
Here is how to fix Error 0x800f0986 Windows 11/10 Update –
1] Make sure Windows Update service is enabled
Disabled Windows update related services often lead the system to prevent downloading update files. This configuration is mainly responsible to show error codes in Windows 11 and 10. To rectify the issue, you will have to make sure the Windows update service running. For that –
- Press Windows and R keys at one go.
- Type services.msc in the command box and press Enter.
- Locate Windows Update.
- Once found, double-click the same to open its properties window.
- Click the down arrow icon located beside Startup type and opt for Automatic.
- Hit the Start button.
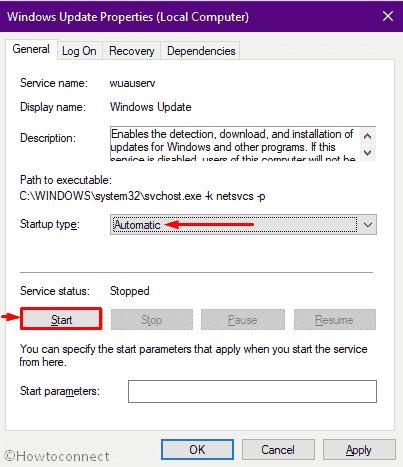
- Click Apply followed by OK to exit the window.
2] Run Windows Update troubleshooter
Microsoft came up with this built-in troubleshooter to find out the corruption obstructing Windows update. The utility not only detects the problem causing the problem 0x800f0986 but also puts forward an automatic solution for the same. To run the tool –
Windows 10
- Press Win+I to bring the Settings app on the computer screen.
- Click on Update & Security.
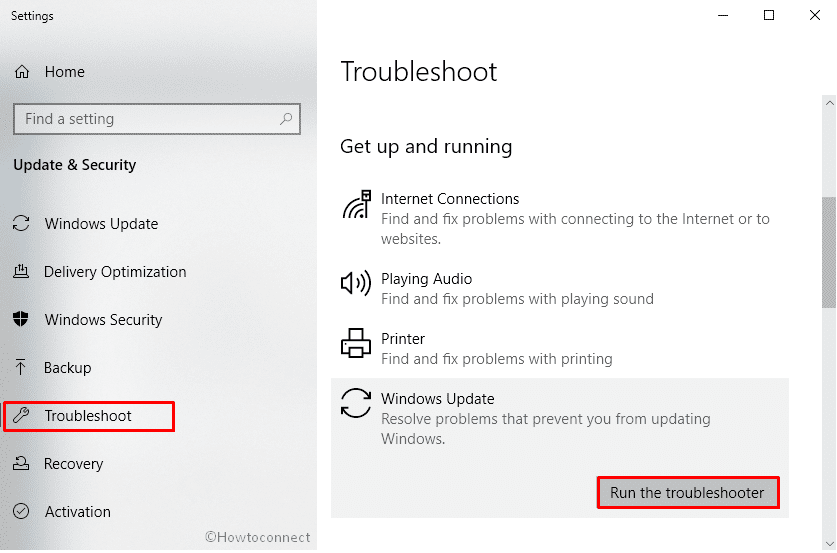
- Choose Troubleshoot from the left sidebar.
- Shift to the right pane and click Windows update.
- Hit the button Run the troubleshooter.
- Click Apply a fix when the troubleshooter recommends a resolution.
- To complete the process, go along with the on-screen guideline.
Windows 11
- Right-click Start button and choose – Settings.
- Move to the right of appearing window.
- Scroll down a bit and select – Troubleshoot.
- Click – Other troubleshooters.
- From the next page, hit Run present next to Windows update.
3] Download the most recent Servicing Stack Update
Before proceeding to get the latest SSU, you must know whether you use 32-bit or 64-bit Windows. To do so –
- Right-click on Start button and select Settings.
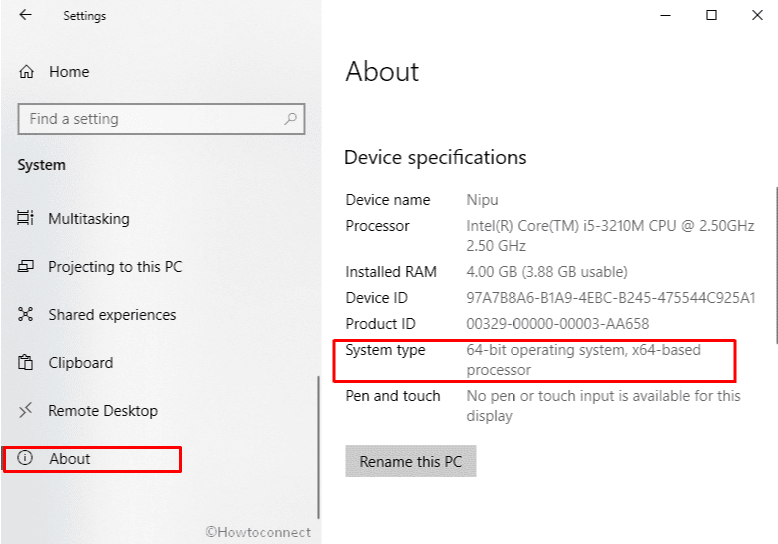
- Click System.
- Select About from the left column. In case of Windows 11, choose About from right.
- Check System type.
As of now you know the system architecture, let’s see how to get SSU –
- Visit the official webpage of Servicing Stack Updates.
- From the available products, pick out the compatible one and download the same.
- After downloading, install the product in the usual way.
- Reboot Windows.
- Once the system powers up, check for update.
4] Wipe out the SoftwareDistribution folder
System stores essential Windows Updates files in the SoftwareDistribution folder momentarily. Anything wrong with the same is largely responsible to bring forth update errors in Windows 10 and 11. To fix this kind of issue, either delete the folder or rename the same. Steps are as followed –
- Click on the taskbar search icon and type in services.msc.
- Hit Enter key.
- Look for Windows Update present under the Name list.
- Once found, right-click on the same and select Stop.
- Later on, press Win+E at once and navigate C:\Windows.
- Locate SoftwareDistribution folder.
- Right-click on the folder then opt for Delete.
Note – If you are afraid of losing data, simply rename the folder instead of deleting.
- Whatever you do, the system will re-create the same folder automatically after a reboot.
- In the end, Restart Windows Update Service and try to get the patch.
5] Reset Windows Update component
If error 0x800f0986 still exists after deleting the SoftwareDistribution folder, there is a high chance that Catroot2 is creating the issue. Resetting the update component may help in such a case. Here is how to proceed –
- Press Win+S simultaneously and type in cmd.exe.
- Select the option Run as administrator.
- When a UAC prompts, click Yes button.
- Insert the below commands one by one and hit Enter after each –
net stop wuauserv

net stop cryptSvc

net stop bits

net stop msiserver
- Execute the following command in the same way –
ren C:\Windows\SoftwareDistribution SoftwareDistribution.old

ren C:\Windows\System32\catroot2 Catroot2.old
- After completion, restart the services you have stopped in earlier commands –
net start wuauserv

net start cryptSvc

net start bits

net start msiserver
- Close the Command Prompt and thereafter restart your device.
6] Restrict Antivirus programs to fix error 0x800f0986
Though antimalware programs work to keep our system safe from hazardous threats, often it can end up causing error 0x800f0986. It happens when the security program mistakes update file for malware and obstruct the downloading process immediately. If the same happens with you, disable built-in antivirus along with third-party one. Here is the process –
Disable built-in Windows Security
- Press – Windows + S.
- Type – Virus & threat protection.
- Hit – Enter.
- Move to the right pane of appearing window.
- Click the link says Manage settings.
- Turn on the toggle button of Real-time protection.
Disable third-party antivirus
- Right-click on the antivirus icon located on the system tray. If you don’t get the icon here, click up arrow sign to find it.
- Choose Disable or anything identical.
- It may ask to choose a time interval after which the program will turn on automatically. Select accordingly.
7] Get the most recent KB manually
If a specific feature update is generating error 0x800f0986, try to download it manually. Here’s how –
- Visit the official webpage of Microsoft Update Catalog.
- Use its search bar to find out the KB number you are having trouble with.
- After getting the same, download the package compatible with your Windows 11 or 10 and install it.
8] Settle Windows file corruption
Corrupted or missing system components related to Windows update often generates error 0x800f0986. To recover corruption, you will have to run both DISM and SFC command-line utility. Steps to do so are as followed –
- Press Win+X and opt for Run.
- Type cmd.exe in the text bar and press Ctrl+Shift+Enter altogether.
- Click Yes for the UAC.
- Copy the below command and paste it after blinking cursor –
dism /online /cleanup-image /restorehealth
- Hit Enter to run the command.
- Once the DISM command finishes the scanning process, execute the below command in the same elevated Command Prompt –
sfc /scannow
9] Disable Proxy server
Misconfigured proxy settings are one of the main causes to generate error 0x800f0986 Windows Update error. Hence, you need to correct them by following below steps –
- Open Run Dialog box.
- Put inetcpl.cpl in the command box and hit Enter.
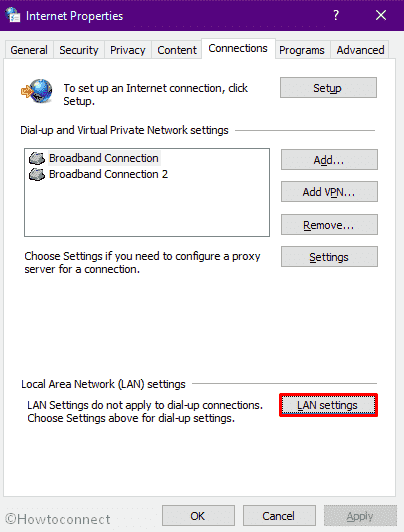
- Move to Connections tab.
- Click LAN settings button from the bottom.
- Check the box set for Automatically detect settings.
- Also, make sure the box assigned for Use a proxy server for your LAN (These settings will not apply to dial-up or VPN connections) is unchecked.
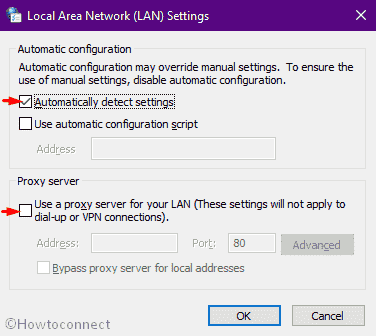
- Click the OK button to save the changes.
- Reboot Windows machine and attempt to download the update.
10] Perform Clean boot to fix error 0x800f0986
When you power on your Windows device, multiple numbers of services start and they keep running until you turn the system off. Though some services are necessary to run the PC smoothly, many of them can cause an issue while updating Windows. Mainly, third-party ones are responsible for this.
Clean boot allows you to run Windows machines with basic services provided by Microsoft. This way, you can be sure if any third-party service is causing error 0x800f0986. According to reports, when you perform a clean boot, errors related to Windows update goes away. So, let’s give it a try –
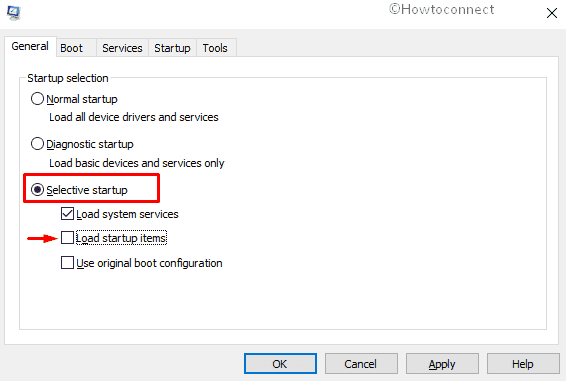
- Press Win+S and type in msconfig.
- Press Enter key When you see System Configuration at top of the search result.
- Click the radio button of Selective startup.
- Make sure the checkbox of Load startup items is ticked.
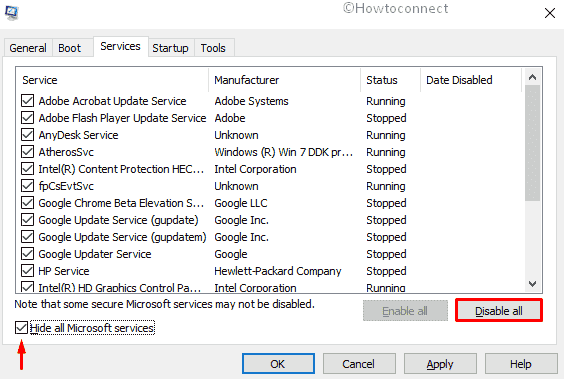
- Shift to Services tab.
- Click on the checkbox set aside Hide all Microsoft services.
- Hit Disable all button.
- Head over Startup tab then.
- Click the link Open Task Manager.
- When Task Manager appears, right-click on each program present there one after another and chooses Disable for all.
- Return to System Configuration wizard and click on Apply followed by OK.
11] Reset Windows
There is a time when Windows device doesn’t perform the way it should be and throws unexpected error codes. This mostly happens after making any changes in the system. It’s hard to find out which change went against, hence, reset is the only option. Here is the process –
- Press Windows key and type Reset this PC.
- Hit – Enter.
- Move to right pane and click the button Get Started or Reset PC located under Reset this PC.
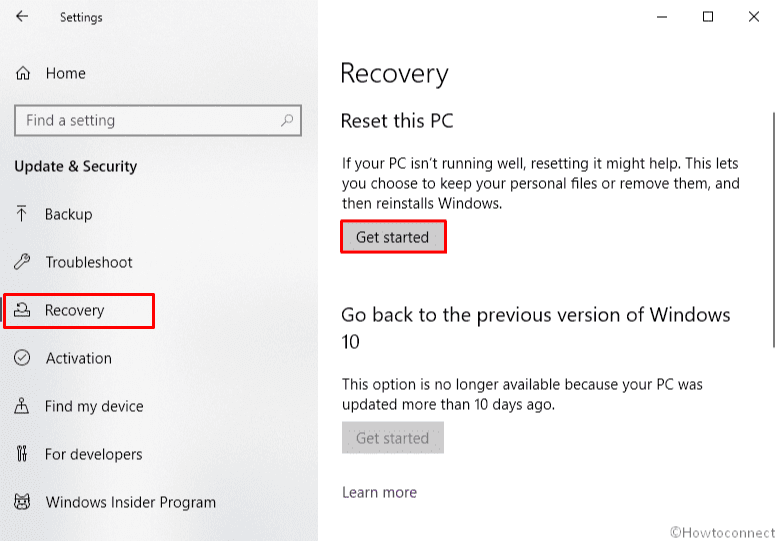
- Choose the option Keep my files.
- Click Next button for the pop-up shows which apps will be wiped out during the process.
- Hit Reset button to give final consent.
- Hold your patient as this process may take one hour or more.
12] Perform an in-place upgrade to fix error 0x800f0986
If error 0x800f0986 stubborn enough and any resolution from above couldn’t solve it, the last thing you can do is updating Windows 10 or 11 through the Media creation tool. here’s how –
- Visit the official page of the Microsoft Website.
- Click Download tool now.
- Double-click on the downloaded file.
- When a UAC prompts, hit Yes to continue.
- Click the Accept button to once you see Windows Setup wizard.
- From the subsequent page, choose Create installation media (USB flash drive, DVD, or ISO file) for another PC and then hit Next.
- Make sure Language, Edition, and Architecture is correctly selected. Thereafter, hit Next.
- Click the radio button set for ISO file and click on Next.
- After choosing the directory where you want to store the file, hit Save button.
- Once the downloading process is done, click Finish.
- Finish the procedure by installing the file.
Methods:
1] Make sure Windows Update service is enabled
2] Run Windows Update troubleshooter
3] Download the most recent Servicing Stack Update
4] Wipe out the SoftwareDistribution folder
5] Reset Windows Update component
6] Restrict Antivirus programs
7] Get the most recent KB manually
8] Settle Windows file corruption
9] Disable Proxy server
10] Perform Clean boot
11] Reset Windows
12] Perform an in-place upgrade
That’s all!!