While attempting to upgrade your PC, you may encounter some stop codes along with Windows update Error 0x8024a223. For an average user, it might not really be a, well, very easy task to deal with such issues. Simply difficult understanding, right? There can be a big bunch of reasons behind a displayed error code. Thus, finding the actual cause might be tricky. However-and thankfully enough- generally, you don’t have to look deep into error codes or tax your brain understanding it. Moreover, fixing this problem might not be that difficult.
We’re listing some of the common tricks that did work to fix 0x8024a223 Windows update Error at least in a majority of cases. If you are seeing the same annoying stop code too, these workarounds should set your update trouble just fine. In fact, these may work for many other upgrade related errors you may confront on your Windows 11 or 10. So here, let’s go on to check out some workarounds you can try out.
Windows Update Error 0x8024a223 Solutions
Here is how to fix Windows Update Error 0x8024a223 in Windows 11/10 –
Run Window Update troubleshooter
Most proven way to fix such an issue is running Windows Update troubleshooter. However, there is not much guarantee in case of Error 0x8024a223. But Several users give a nod confirming that this tool works to fix Windows Update problems. Here is the process –
Step-1: Type CP in the Taskbar search and when the result appears, Press Enter on your keyboard.
Step-2: On the following Window, click on Troubleshooting.
Step-3: To proceed forward, do a click on View all from the left column of the running window.
Step-4: When All Categories window arrives, locate Windows Update from the list and click on it.
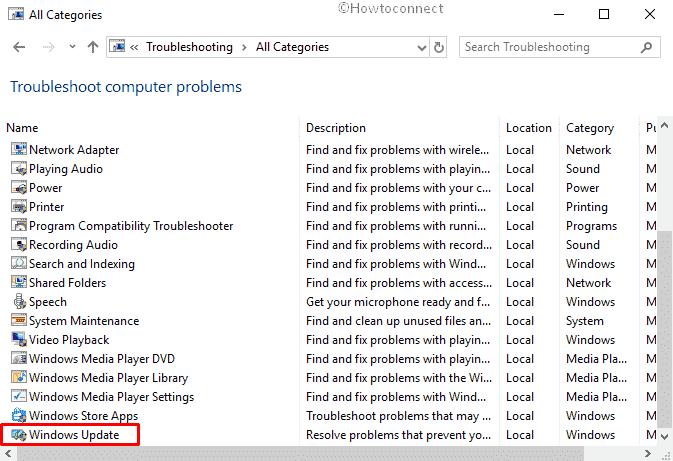
Step-5: Click on Next and then follow the on-screen instructions until the end of the troubleshooting.
Rename the Software Distribution Folder
Software Distribution folder is a basic Windows component where the crucial update-related data is stored. Therefore, unless absolutely necessary, it is better not to disturb it. Anyway, one of the most general roots of updates related errors is a malfunctioning or corrupted Software Distribution Folder. Instead of , you can just rename it. When you do so, Windows is programmed to create a new one automatically in the same name. This should fix the Windows Update Error 0x8024a223, as the new folder thus created wouldn’t be corrupted.
- Click the search bar from taskbar and type cmd.exe. Once the result turns up, click on Run as administrator.
- A UAC will prompt up, click on Yes to give consent.
- In order to stop the services that prevent you from modifying the Software Distribution folder, run the following commands –
net stop wuauserv
net stop bits
- Either, type the below command and hit Enter to rename the Software Distribution Folder –
rename %windir%\SoftwareDistribution SoftwareDistribution.bak

- Or, Navigate to C:\Windows directory. Locate “SoftwareDistribution” and rename it to “SoftwareDistribution.old”.
- Now, enable the services you disabled earlier by running the commands successively –
net start wuauserv
net start bits
After finishing, reboot your PC and check if the issue is resolved.
Disabling Antivirus and Firewall temporarily
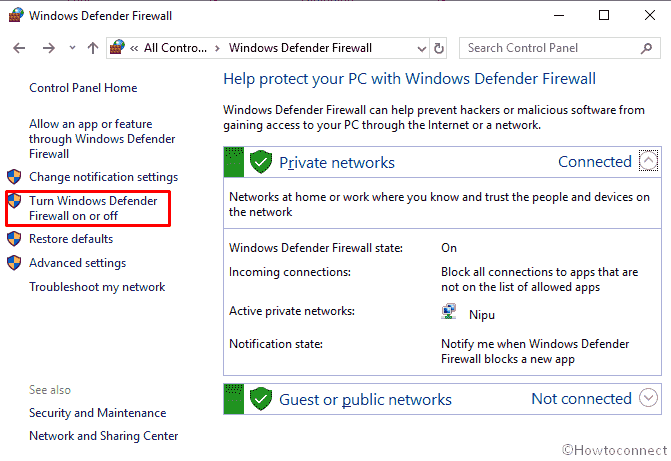
Sometimes, Firewall and third-party security software may be an obstacle in Windows updates. If this is the case, disable them temporarily. To Turn off Windows Defender Firewall, follow the below steps –
- Launch Control Panel and when it comes into the view, click on Windows Defender Firewall.
- From the left-hand side column, select Turn Windows Defender Firewall on or off.
- Select the radio buttons that showing cross red marks for Turn off Windows Defender Firewall. Repeat the same for both the Private and Public network settings.
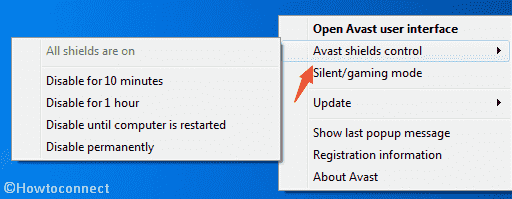
Disable third-party antivirus temporarily
Here, we are showing an example for Avast. However, the procedure of disabling other antivirus is almost the same.
- Click the small triangle located in the Taskbar to open the notification area.
- Do a right-click on the Avast Antivirus icon in order to view the options.
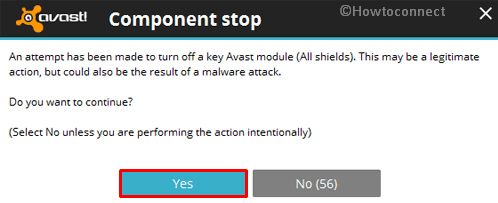
- Here, move your cursor to Avast shields control and then select the desired option depending on how long you wish to disable it.
- Thereafter, Click on Yes to give final confirmation.
Cleaning hard disk
Some of the update-time errors are pulled because of insufficient space available on the device. In such cases, clearing some space on your local drive might be a help. Follow the method for the same – Windows 10 – How to Open and Use Disk Cleanup.
Reset Catroot2 Folder
If you are still struggling with Windows Update Error 0x8024a223, try resetting the Catroot2 folder and then attempt to install again.
- At first, Run Command Prompt as admin.
- Type the following commands one after another and hit Enter after each one –
net stop cryptsvc
md %systemroot%\system32\catroot2.bak
xcopy %systemroot%\system32\catroot2 %systemroot%\system32\catroot2.bak /s
- Now, navigate the below path directory –
C:\Windows\System32\catroot2
- Press Ctrl+A hotkeys together to select all. Perform right-click on it and select Delete or simply Press the delete button.
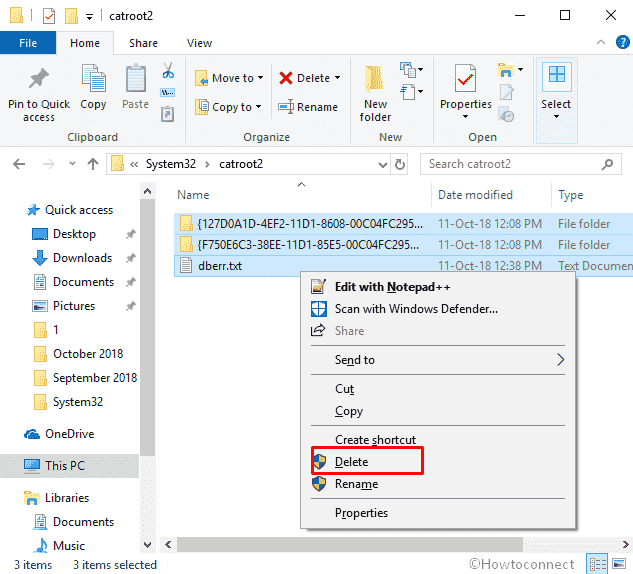
- Go back to Command Prompt again. Write down the following line after blinking cursor and Press Enter –
net start cryptsvc- Finally, Restart your machine and this time Windows Update Error 0x8024a223 should not appear again.
Fixing Issues with Services
This tip would work if the update error is due to some service-related problem. To fix this problem,
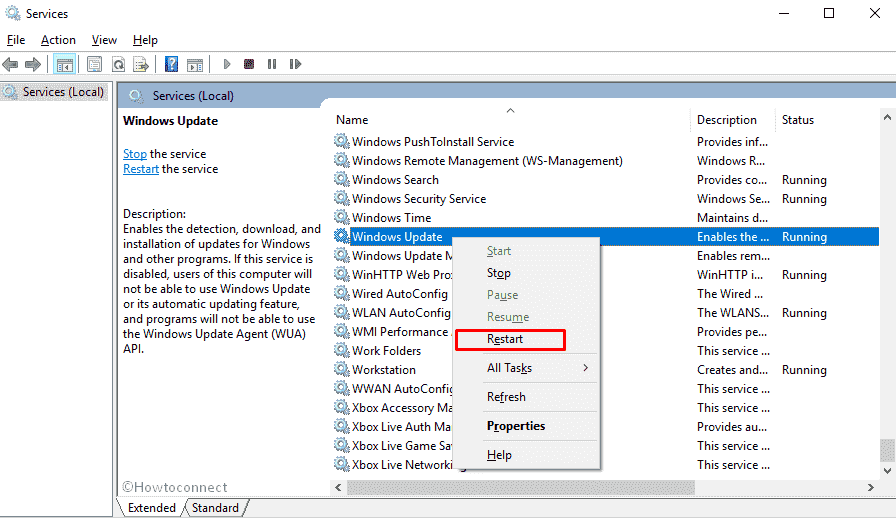
- Press Win+R at the same time to open Run Dialog. Once it appears, type services.msc in the empty text box and hit Enter.
- From the visible list, find Windows Update, make right-click on it and Select, Restart.
- Finally, Reboot your PC and give a try to install the Windows update again.
Modifying Update Settings
This might not be what you generally find everyone suggesting, but a little change in Update setting is all that might be needed to have the Windows Update Error 0x8024a223 gone. Follow along with these steps if the other tips don’t work.
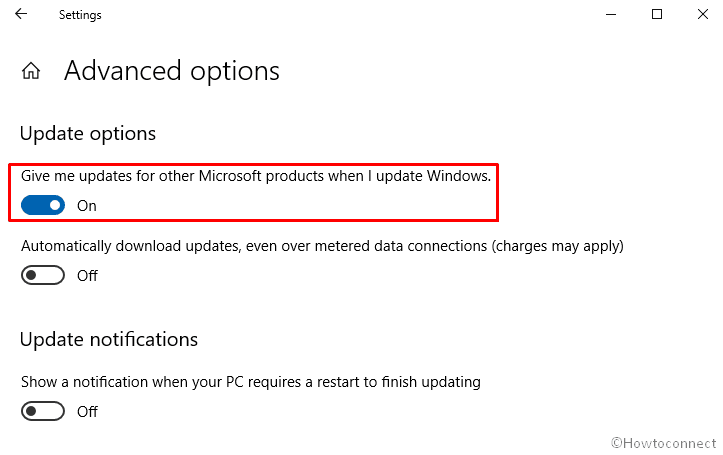
For Windows 10
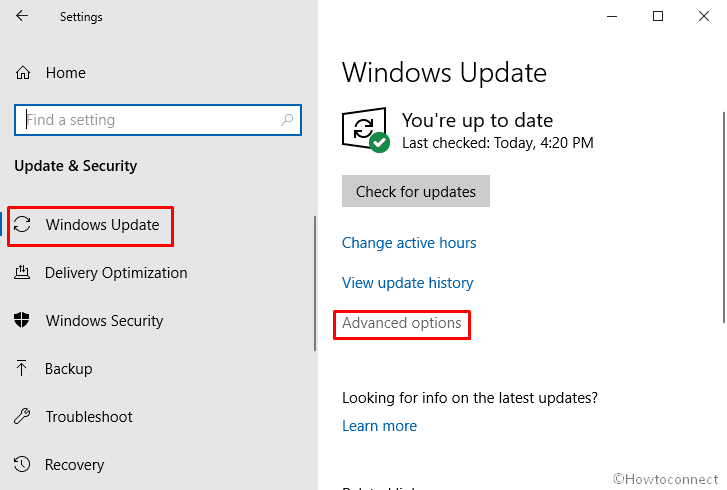
- Press the shortcut Win+ I and on the subsequent Window, click on Update & security.
- Next, move to the right side and select Advanced options.
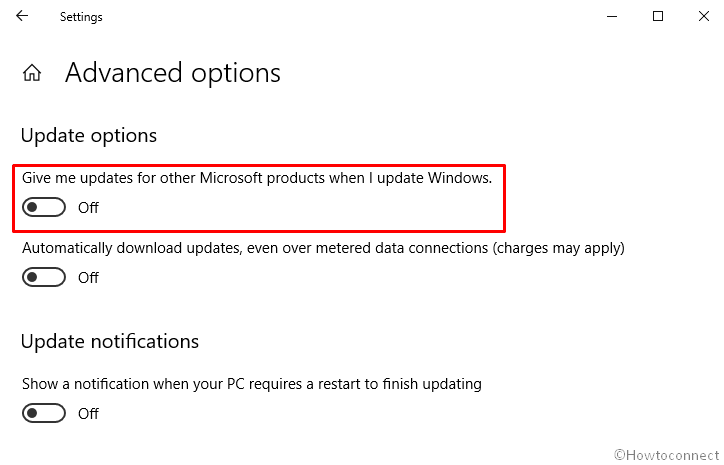
- Turn off the toggle button of Give me updates for other Microsoft products when I update Windows.
- Now, Reboot your system and see if Windows updates behavior is correct.
- If the problem isn’t yet fixed, enable the option again and retry the update.
For Windows 11
- Press – Win + I.
- From the left column, select – Windows update.
- Move to the right and click – Advanced options.
- Once on the next page, turn on the toggle switch set beside Receive updates for other Microsoft products.
The above method should fix Windows Update Error 0x8024a223. Let us know which method helped you to eradicate the issue. And for further query, comment down below.
That’s all!!