Multiple Windows 11 users are unable to open Snipping Tool in order to take screenshots. There are 2 ways to launch the utility using Keyboard Shortcut and through Search; sadly both of these do not work to launch this built-in screen capturing app. If you are facing Snipping Tool not working in Windows 11 issue then here you will find the solutions. The methods in this post will be effective in all cases whether the app is not working after installing the Windows version or in normal situations.
Snipping tool not working in Windows 11 usually occurs after installing this version. After upgrading to Windows 11, when you press the shortcut keys Ctrl + Shift + S the tool doesn’t open. Furthermore, using search also fails to launch the program. Sometimes, you might find that the program opens but doesn’t work properly. The issue might happen because of buggy Windows update, incorrect settings configuration for the Screenshot capturing tool, corrupted system files, and other.
Snipping Tool not working in Windows 11
Here is how to fix Snipping Tool not working in Windows 11 –
Way-1: When the utility doesn’t work after upgrading
If Windows 11 Snipping Tool missing problem occurs just after installing or upgrading to Windows 11 then this might be due to a bug. Here, you can find a discussion about this issue – Techcommunity. You may assume in this case that Microsoft will soon take notice of the issue and come with a resolution. Until then you can run the app with a tweak that includes restoring Snipping Tool from the Windows.old folder. Installation of the Windows operating system commonly stores the antecedent data and files are in a folder called Windows.old. Many users delete the folder because this folder occupies a large amount of space just after upgradation. So make sure that you haven’t done this then follow the steps –
- Press – Windows and E.
- Click on This PC from the right navigation pane.
- Double click on – Local Disk (C:).
- This will have a Windows.old directory. Double click on it.
- Go to Windows folder in this directory.
- Once reached, double click on System32.
- Here you will find Snippingtool.exe.
- Double click on this.
- The shortcut path to the location of this tool is C: /Windows.old/Windows/System32/SnippingTool.exe.
- After the tool is launched we recommend to pin it to the Taskbar so that you can further open the app easily.
- For this, right-click on the shortcut of the Snipping tool on the taskbar.
- Select – Pin to taskbar.
See – How to Pin Snipping Tool to Start and Taskbar in Windows 11 or 10
Way-2: Reset Snipping Tool
Windows 11 offers to reset any app if it is causing any problem and provides an option in Settings for this purpose. Once you use this option the Snipping tool will restore the default configurations. Therefore, in case, the problem started after changes in settings or installing a third party program then follow the steps –
- Click the – Start.
- Select- Settings.
- When Settings appears, click on- Apps.
- Go to the right and select – Apps & features.
- Let the page load to see the list of all programs installed on your PC.
- Locate Snipping Tool.
- From this section, click on 3 dots menu.
- Select – Advanced options.
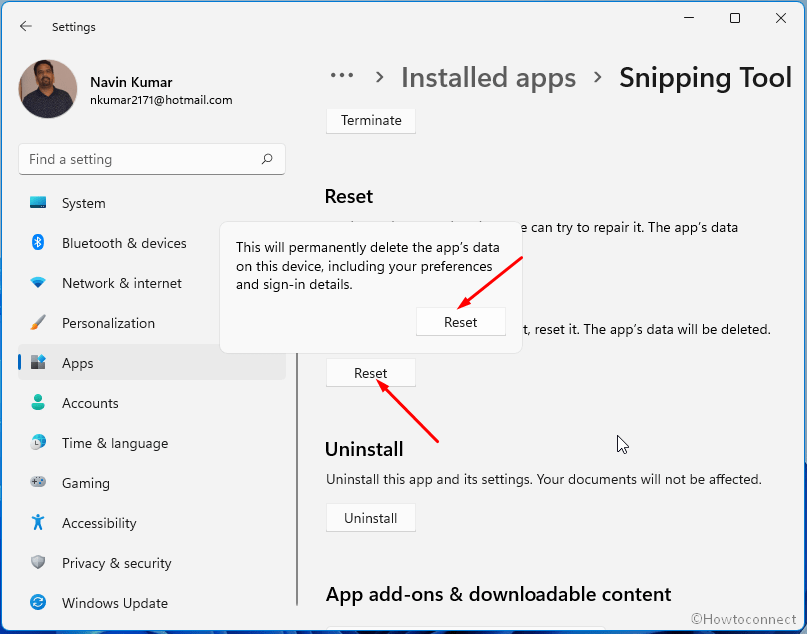
- From the next page, click on – Reset.
- You will come across a tiny pop up.
- Again click on ‘Reset’.
- Restart the computer and check if the utility is working now.
Way-3: Download Snipping tool
Snipping tool is a built-in screenshot-taking utility and has been available since Windows XP. However, commonly it comes through installation files and is not downloadable. We have managed somehow the MSU file of the utility using which you will be able to install the utility on Windows 11.
- Click this link.
- Download the Snipping tool.
- Double click Setup file Snipping_Tool_5.2.0.0 (1).msi and follow the instructions on the screen to complete the installation.
Way-4: Uninstall recent updates
Many times, Snipping Tool problem occurs after updating Windows 11. This case indicates that the patch or build you have received is having some bugs. The simplest method to fix the screenshot utility error would be to uninstall the update. Further, install the update after the bug is fixed because it is essential for the protection of your operating system. However, follow the guidelines to uninstall now –
- Click the – Search.
- Type – update history.
- Hit – Enter.
- When the Settings app appears, scroll down to the bottom and click on – Uninstall updates.
- A window from Control panel will open soon; find the patch installed recently. This will be in KB…… form.
- Right-click on this one and select – Uninstall.
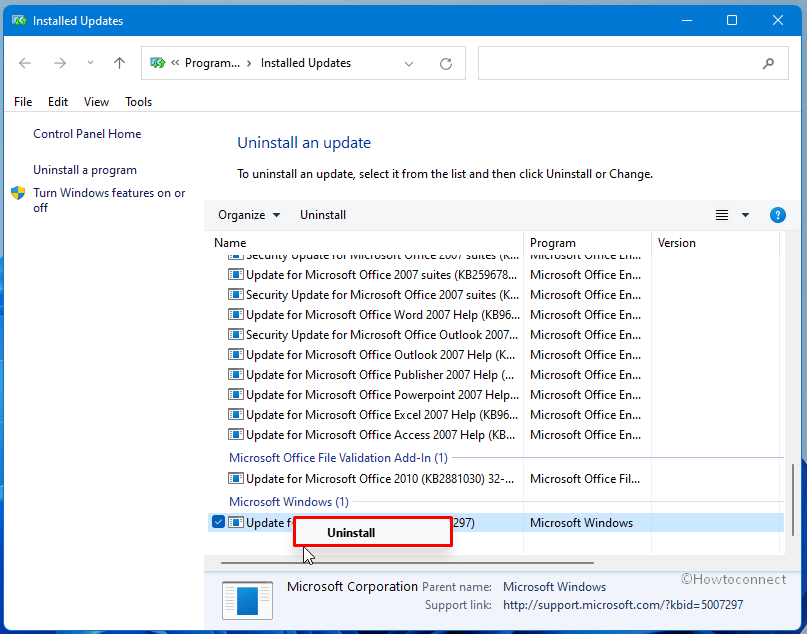
- You may notice a confirmation dialog, click – Yes.
- The update will be uninstalled in a while. See if the utility works now.
Way-5: Repair the app
You are getting troubles like Snipping Tool not popping up in Windows 11 then using Repair from the Settings app can work. This will work as a troubleshooter to fix the screenshot utility. Here are the steps –
- Press – Win+I.
- Select – Apps from Settings.
- Click on Apps & features.
- In the list of installed apps click on 3 dots from the Snipping Tool section.
- Select – Advanced options.
- From the coming page, click on – Repair.
Way-6: Use the Shortcut key to launch the Tool
Using Shortcut keys is the handiest way to launch apps on Windows operating system. You can see a complete list of Windows 11 Keyboard shortcuts with downloadable PDF in this concern. Give a try to use these keys as they may easily invoke the Snipping Tool.
- Press Windows + Shift + S on the keyboard.
Way-7: Install the pending Windows updates
When any mishap occurs because of Windows updates sent from Microsoft then you may get a resolution. The only matter is time for this situation so try checking updates at a regular interval. However, the updates are installed automatically but sometimes you may need to follow some manual action as below –
- Press – Winkey+I.
- Select – Windows update.
- Click on – Check for updates.
- Windows will start scanning for updates and in case anyone is pending it will download automatically.
- When the downloading is completed you will get a notification pop up. Click on Restart now on that pop up.
- Now open the app and work with it.
Way-8: Let the app run in background
Some apps require permission in Windows 11 or in the earlier versions for running in the background. The activities in the background commonly help the apps to send and receive notifications, sync information and keep them updated. Lacking permission might prevent the Snipping tool from opening on the desktop. So change the Setting by following steps –
- Press – Winkey + I.
- Select – Apps.
- Click on Apps & features.
- Move down in the next Settings page and reach Snipping Tool.
- Click on the three dots icon in that section and select – Advanced options.
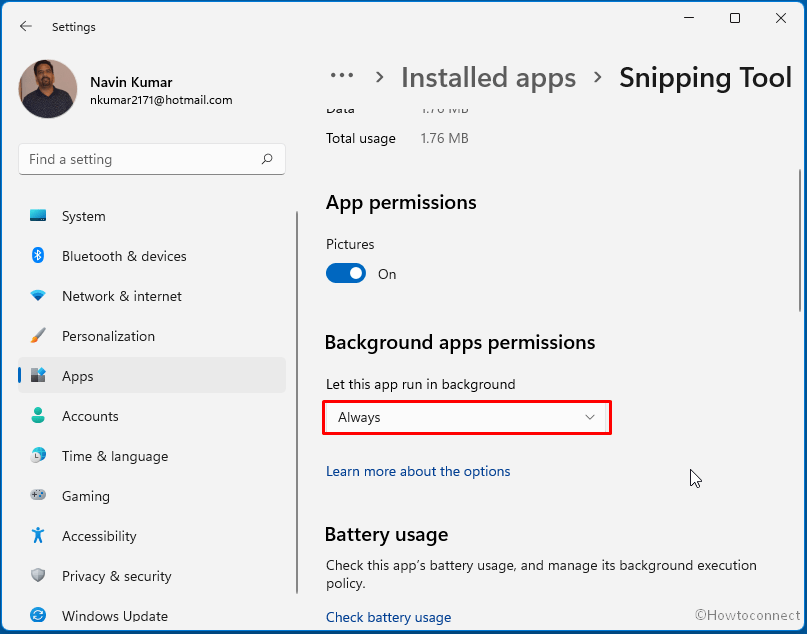
- Now, click the drop-down under Background apps permissions.
- Select – Always.
Way-9: Run SFC aka System file checker
There might be third-party utilities or antivirus programs interfering with the functionality of Windows 11 if you find Snipping Tool not working problem. These programs corrupt the system files and create different types of messes on the PC. But fortunately, System file checker diagnoses all the issues and repair them by running on cmd command prompt. Here is the method –
- Click the Search located on the taskbar.
- Type – cmd.
- Select – Run as administrator.
- A user account control dialog will appear; click on – Yes.
- Once Command prompt opens up, type SFC /Scannow.
- Press – Enter.
- You will see Beginning system scan on the prompt. Once it reaches 100 percent reboot the PC.
Way-10: Run Store app troubleshooter
Store app troubleshooter, being a built-in utility, diagnoses problems with the applications installed through Microsoft Store and repairs them. When Snipping Tool not opening error occurs this utility may be a great help. Follow the instructions –
- Press – Windows logo key+I.
- On the Settings app, click on – Troubleshoot.
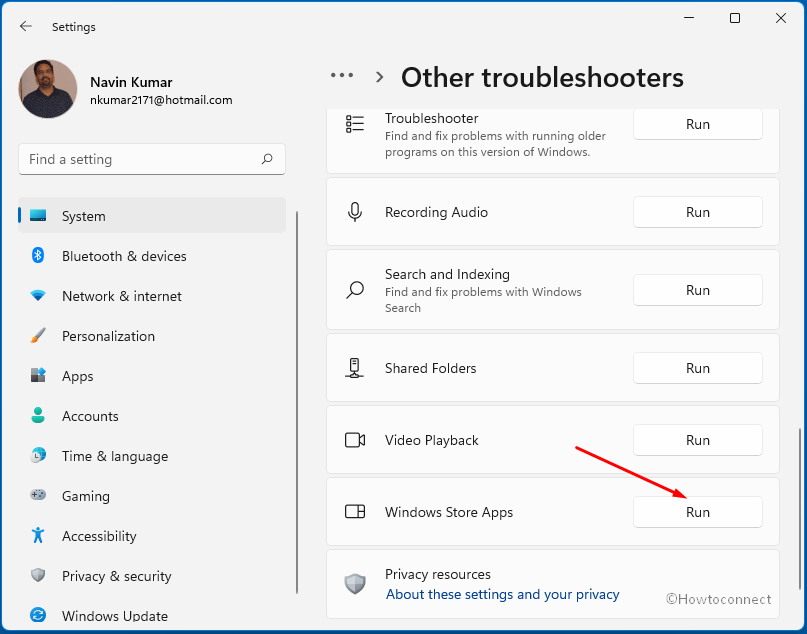
- Click on – Other troubleshooters.
- Move down to Store apps and click on Run.
- The tool will scan for issues and then suggest you follow some steps. Go along with them to fix the issue.
Way-11: Run DISM tool
Deployment image servicing and management aka DISM is a command-line utility to detect any messes in WIndows image and rectify them. Once running on Command prompt, the tool repairs the issues which may cause the tool not working in Windows 11. Follow –
- Right-click on Start from the taskbar.
- Select – Windows Terminal (Admin).
- Once User account control pop up prompts, click on Yes.
- Click on ‘Open a new tab’ drop down and select – Command prompt.
- type –
DISM.exe /Online /Cleanup-image /Restorehealth. - Press – Enter.
- Reboot your device and hopefully, the app should work now.
Still, the Snipping Tool couldn’t be opened and you are desperately needing to run it then you can Join Windows Insider Program and switch to receiving builds.
Methods list:
Way-1: When the tool doesn’t work after upgrading to Windows 11
Way-2: Reset Snipping Tool
Way-3: Download Snipping tool
Way-4: Uninstall recent updates
Way-6: Repair the app
Way-7: Use the Shortcut key to launch the Tool
Way-8: Install the pending Windows updates
Way-9: Let the app run in background
Way-10: Run SFC aka System file checker
Way-11: Run Store app troubleshooter
Way-12: Run DISM
That’s all!!