Whether you are using Windows 11 or 10, update errors like 0x8007001d are pretty frequent and often found to prevent the system from receiving patches. Such errors may arrive anytime from downloading the updates to preparing the installation. Oftentimes the fatal code arises because of simple glitches, if so, a system reboot will make things right immediately. In case of other causes like broken Windows update agents, missing components, or software conflict, you have to go through additional workarounds to Fix Windows 11 or 10 Error code 0x8007001d.
Windows update is an automatic process and the system only needs a stable internet connection to receive them once available. When this simple process ends up in unexpected complications, it not only makes the system insecure but also deprives the OS of the upcoming features and improvements.
Windows 11 or 10 Update Error code 0x8007001d
Here is how to fix Windows 11 or 10 update Error code 0x8007001d –
Way-1: Check internet connection
The first thing to start with resolving error code 0x8007001d is to check your internet connection. This is the most basic demand to download the update files and finally install them to the operating system. Intermittent network service won’t allow the process to be completed flawlessly, downloading stops in the middle even it starts somehow. Therefore, make sure to connect with a stable internet network before marching out for Windows Update.
If you feel the internet service is not much suitable for downloading large files, provide some time to recover them automatically. You can switch off the router for a while and then turn it on to check whether this is working properly. Sometimes, enabling the network to Metered will also not allow you to download the update files being a bit large. Therefore, ensure the Metered Connection is also disabled and then try for the updating.
Way-2: Make sure the Date & Time settings are correct
Nevertheless, having a far stable internet connection, the Windows updating process often doesn’t start at all in some computers. This is needless to say obviously if you are in a different time zone or the Time and Date settings are incorrect in your system. To get a relentless Windows Updating service in the operating system, make sure this setting is completely correct. To do so, follow the below steps –
- Press – Windows + I.
- From the left column, select – Time & language.
- Shift to the right.
- Choose – Date & time.
- Turn on the toggle button of Set time automatically.
- Also, make sure Set time zone automatically is enabled.
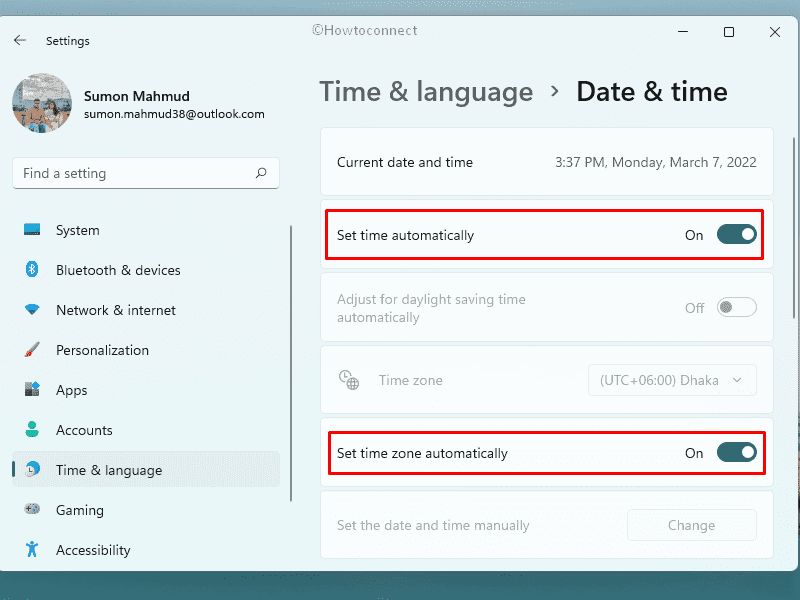
If you are using Windows 10, open settings => choose Time & language. In the right pane, you will get the same options.
Once you are done performing the aforementioned process, imitate the below steps –
- Press – Windows+R.
- In Run command, type – control.
- Hit – Enter.
- Click – Clock and Region. If you can not see it, ensure the View by option of Control Panel is set to Category.
- From the right-hand side, select – Date and Time.
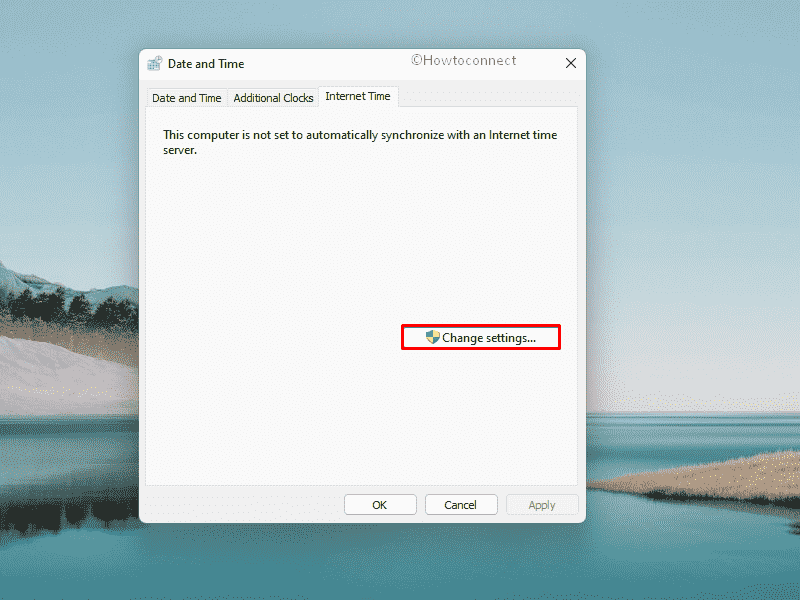
- Shift to Internet Time tab.
- Click – Change settings.
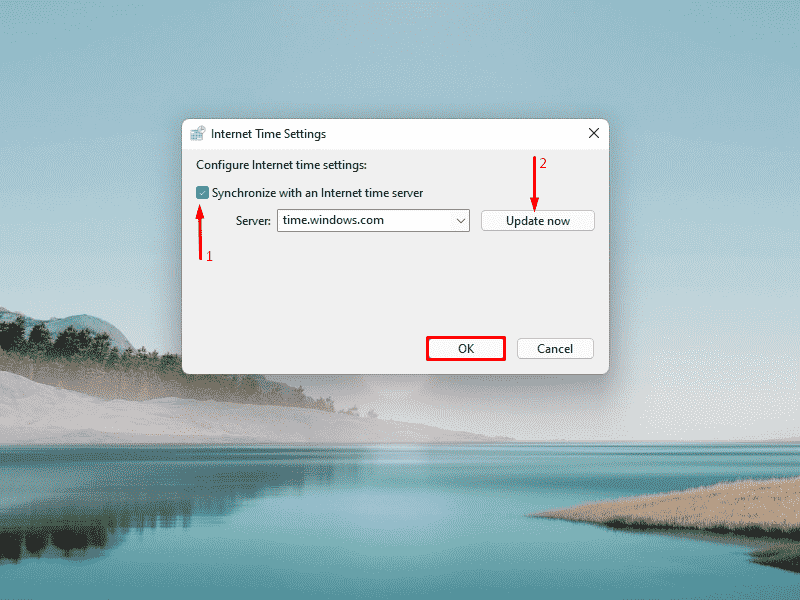
- Tick the checkbox present before Synchronize with an Internet time server.
- Click – Update now.
- Finally, hit – OK to save the changes.
Way-3: Run Windows Update troubleshooter
In operating systems like Windows 10 or 11, you would definitely expect a smooth running of the device and getting regular updates frequently. However, the process oftentimes gets stuck in the midway or doesn’t really start due to some issues. While installing some update files, you may also experience Windows 11 or 10 Error code 0x8007001d as well. To get rid of these troubles and ensure continuous error-free updating, Microsoft has introduced a new troubleshooter in the system.
Windows Update Troubleshooter is a built-in utility that traces out most of the issues very easily and offers quick fixes. Most of the users prefer using this utility ahead of any other complex workarounds for resolving update-related issues. To deploy the troubleshooter, follow the below guidelines –
Windows 11
- Press – Windows + I.
- From the right pane, choose – Troubleshoot.
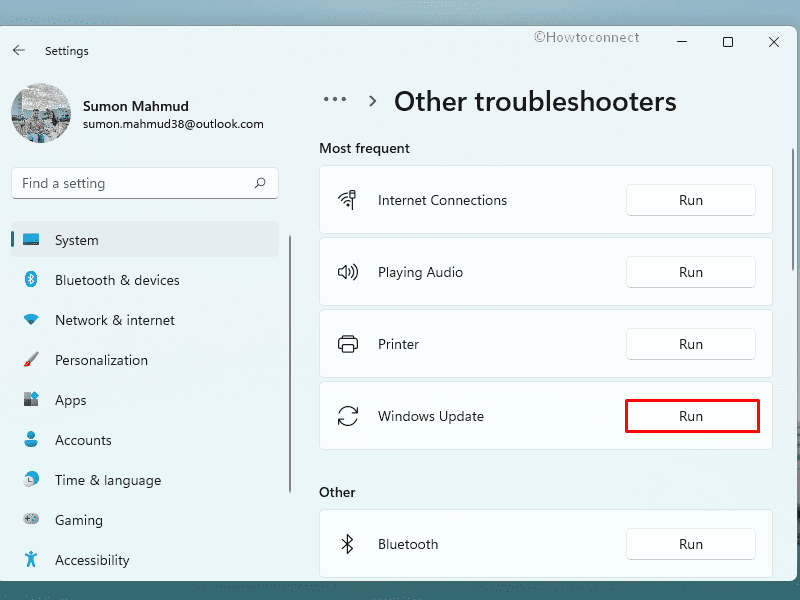
- Click – Other troubleshooters.
- When on the next page, hit – Run located next to Windows update.
- Keep following on-screen instructions to continue.
- After scanning the associated update agents, the utility will suggest an automatic fix for found abnormalities.
- Click – Apply this fix.
- Close troubleshooter.
- Restart the Windows.
- After signing back in, try to get the update.
Windows 10
- Right-click on Start and choose – Settings.
- Select – Update & Security.
- From the left pane, select – Troubleshoot.
- Move to the right-hand side.
- Click – Additional troubleshooters.
- Next, select – Windows update.
- Click – Run the troubleshooter.
Way-4: Unplug external peripherals
Driver conflict is yet another major reason for which you may experience Windows 11 or 10 Error code 0x8007001d. The mentioned issue happens from the external peripherals like USB devices, scanners, printers, speakers, or webcam. Several users have come up with an easy fix stating that commencing the Windows updating after removing these peripherals has a greater success rate. Regardless to say, this is not much popular and some hardware devices are necessary as well to work with. However, you may not leave a stone unturned that eliminates chances of getting errors while updating.
Therefore, unplug the external peripherals before proceeding to an update except those are basics and necessary to navigate. Once the task ends up successfully, reconnect them eventually.
Way-5: Reset Windows update components
Receiving updates automatically whenever available is one of the most flexes offered by the operating system like Windows 10 or 11. Regular updates strengthen the OS by providing the newest drivers for hardware devices, fixing known bugs, providing major upgrades, and making the security a robust one. However, the process may not work properly in some devices as well due to a few direct as well as indirect reasons relating to corrupted Windows Update components.
You can reset Windows update components with a script in order to resolve error 0x8007001d. Expected that, it will fix a plethora of issues associated with Windows updates and downloading the patches. To carry out this workaround, follow the mentioned instructions –
- Press – Windows key.
- Type – cmd.
- Select – Run as administrator.
- When User Account Control prompts, click – Yes.
- In the appearing elevated Command Prompt, insert the following lines one after another and hit Enter after each –
net stop bit

net stop wuauserv

net stop appidsvc

net stop cryptsvc

Del "%ALLUSERSPROFILE%\Application Data\Microsoft\Network\Downloader\*.*"

rmdir %systemroot%\SoftwareDistribution /S /Q

rmdir %systemroot%\system32\catroot2 /S /Q

regsvr32.exe /s atl.dll

regsvr32.exe /s urlmon.dll

regsvr32.exe /s mshtml.dll

netsh winsock reset

netsh winsock reset proxy

net start bits

net start wuauserv

net start appidsvc

net start cryptsvc
- Close Command Prompt and then reboot the PC.
Way-6: Temporarily disable antivirus
Antivirus programs stand out to be the most useful asset in terms of providing the security of the system as most of the devices are connected to the internet nowadays. A lot of deleterious bugs are all over the net arena waiting to fuse the security interface of your system and cause havoc in it. Considering the fact, antivirus programs like default Windows security and others are developed. These will eventually block all the spyware, trojans, worms, and even relatively suspicious bugs once coming across.
Undoubtedly, you have to make sure the antivirus program is running to ensure safety unless it becomes a troublemaker. Oftentimes these programs act so preciously that, they presume the update files suspicious. Eventually, these files are turned down and you get Windows 11 or 10 Error code 0x8007001d as a result. To fix this issue, you have to disable the antivirus for the time being so that updating process can take place without trouble. Make sure to turn on the same after successful completion of updating.
Disable Windows Firewall
- Press Windows key.
- Type – security.
- Hit – Enter.
- Click – Virus & threat protection.
- From the right column, hit the link – Manage settings.
- Turn off Real-time protection.
- To allow the action, click – Yes.

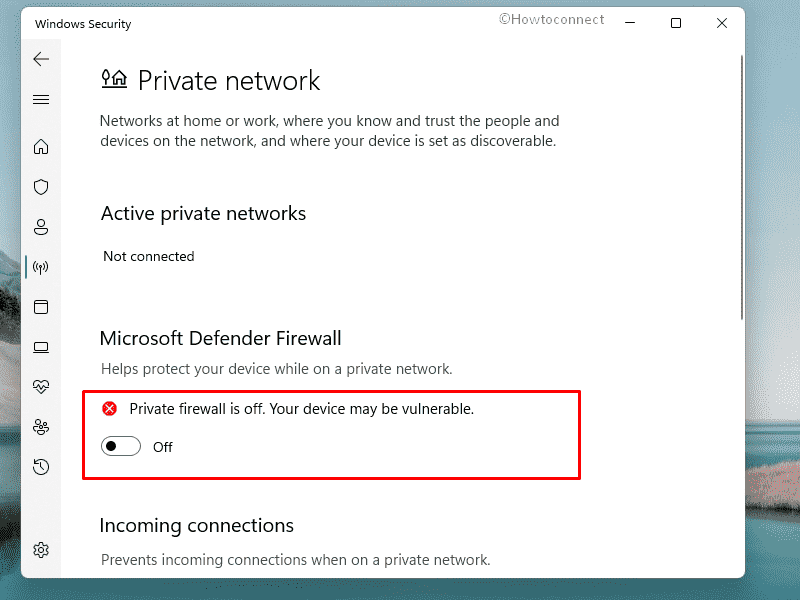
- From the left sidebar of the app, choose – Firewall & network protection.
- Click – Private network.
- Turn off the toggle button of Microsoft Defender Firewall.
- Give consent when the system asks.
- Click the back arrow icon from the top left corner.
- Now, choose – Public network.
- Disable Microsoft Defender Firewall for this network as well.
Put third-party antivirus out of action
- Click on Up arrow on the right side of taskbar to show hidden icons.
- Right-click on the 3rd party antivirus icon.
- Choose – Disable.
- Pick a time slot for how long you want to keep the app disabled.
Note – The steps may vary depending upon the software installed in your Windows machine but it will be pretty much similar for most of the software.
Way-7: Run SFC and DISM scan
Many a time, Windows update error happens only from the corrupted system files or if some components are missing from the core. Various necessary files help in running the OS effectively and they are very sensitive for obvious reasons. Such components become the prime targets of malware invaded into the system and make them corrupted. Some of these files are removed accidentally as well due to reasons like software collision, sudden power outage.
Whether these System files are corrupted or missing, will definitely harm the Windows Updating process and you will receive Error code 0x8007001d. Well, Windows offers strong default utility e.g. SFC scan and DISM to trace out corrupted components and fix them. Missing ones will be recovered as well once you will run the command-line tool. To carry out this, follow the below instructions –
- Press – Windows+R.
- In the Run command, type – cmd.
- Press – Ctrl + Shift + Enter.
- When User Account Control prompts for consent, click – Yes.
- Insert – Sfc /scannow.
- Hit – Enter.
- Let the scanning progress reach 100%.
- If the utility fixes found abnormalities, restart your Windows PC and then check for Windows update again.
- In case of getting the same error code, run DISM scan.
- For that, open Command Prompt as admin as above.
- Run – DISM /Online /Cleanup-Image /RestoreHealth command.
- When the process ends, reboot the device.
- Once you sign back in, run SFC scan in the elevated command prompt once again.
Way-8: Perform clean boot
Clean Boot process in Windows 10 or 11 removes every single chance to have conflicts between startup software and services during the updating process. OS will then start with only minimal resources opting out mostly third-party services and programs. Performing Clean Boot may resolve Windows Updating issues and hence, you can follow the below steps to perform that –
- Press – Windows + S.
- In the search bar, type in – msconfig.exe.
- Hit – Enter.
- From the System Configuration window, select the radio button set before Selective startup.
- Uncheck – Load startup items.
- Shift to Services tab.
- Untick the checkbox present alongside Hide all Microsoft services.
- Hit – Disable all.
- Move to the Startup tab.
- Click the link – Open Task Manager.
- When a window opens up, right-click on a program listed there and choose – Disable.
- Disable all startup programs similarly.
- Close Task Manager and return back to the System Configuration window.
- Click Apply and then OK.
- Select – Restart.
- Try to get the update after starting the PC in clean boot.
Way-9: Do in-place upgrade
In-Place Upgrade is the best alternative to an automatic Windows Update if the process ends up in errors and issues. This will directly upgrade the Operating System to the most recent build and most importantly, you won’t face any slight glitch. If you have decided to perform an in-place upgrade to Windows 10 or 11, follow the below guidelines –
- Visit Software Download page of Microsoft.
- Click – Download tool now.
- Double-click the downloaded file.
- To allow the User Account Control, click – Yes.
- When the License terms page turns up, hit – Accept button.
- Once on the next page, select Upgrade this PC now and then click – Next.
- Follow on-screen instructions to complete the process.
Methods list:
Way-1: Check internet connection
Way-2: Make sure the Date & Time settings are correct
Way-3: Run Windows Update troubleshooter
Way-4: Unplug external peripherals
Way-5: Reset Windows update components
Way-6: Temporarily disable antivirus
Way-7: Run SFC and DISM scan
Way-8: Perform clean boot
Way-9: Do in-place upgrade
That’s all!!