Windows is a great and popular operating system that constantly receives updates to add new features and fix persistent bugs. But sometimes, you might see error code 0x800b0110 the failure of update installation. Generally, this problem occurs because of several reasons such as corrupted files, slow internet connection, and update files conflict.
The error message likely to appear when the issue appears is “There were problems installing the updates, but we will try again later. If you continue to see this message and if you want to search the Internet or contact the support service for information, this may help: (0x800b0110)”. Fortunately, you can fix this Windows update error code by following the steps in this article.
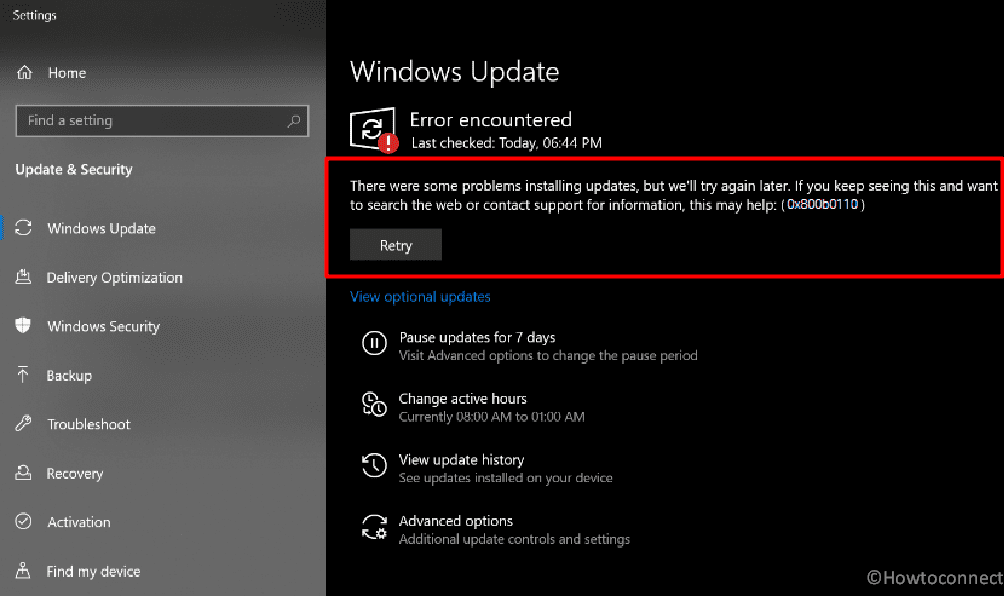
Table of Contents
Windows update error 0x800b0110
Here is how to Fix Windows update error 0x800b0110:
Run DISM and SFC command line tools
This is the most successful method as reported on different forums, for example, you can see on this page. So follow the steps to run both of the SFC and DISM tools:
- Press “Winkey + R” and type cmd.
- Once the results are shown, select Run as administrator.
- Type the following lines one by one and press “Enter”:
Dism /Online /Cleanup-Image /ScanHealth
Dism /Online /Cleanup-Image /CheckHealth
Dism /Online /Cleanup-Image /RestoreHealth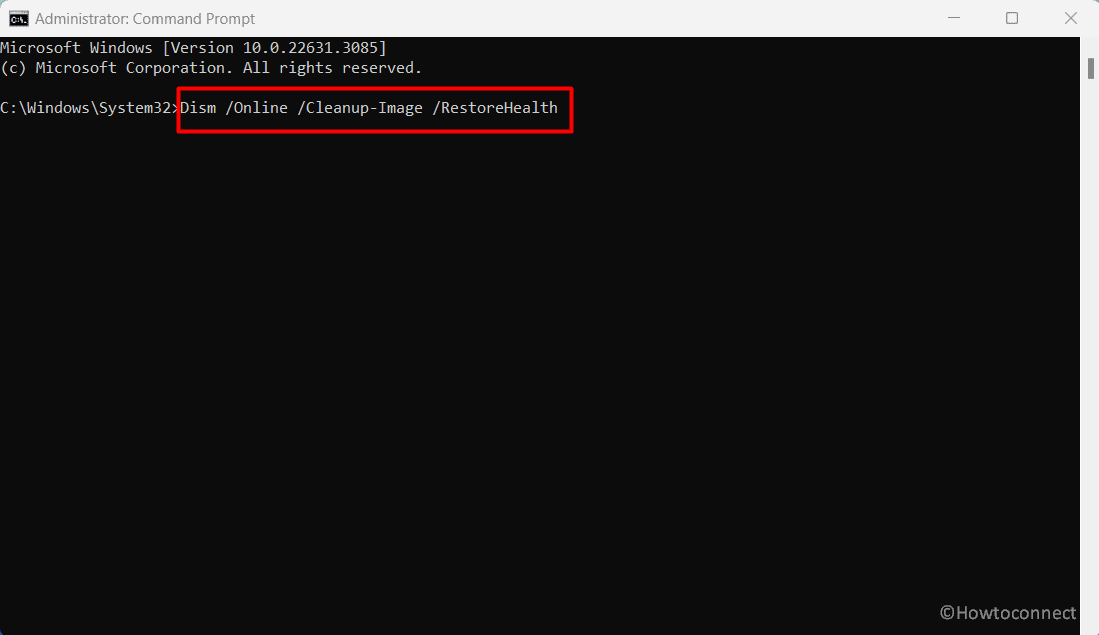
- Restart the PC and check for the error. In case it still occurs, then again open Command Prompt as administrator.
Type SFC /SCANNOW and hit Enter.
- Let the system file checker complete the tasks and restart the system.
See more: SFC /Scannow, DISM.Exe, CHKDSK Windows 11 or 10
Use Windows Update Troubleshooter
The troubleshooter is used to scan or identify the issues causing an error in your Windows. If the tool finds any issues, it normally suggests following different methods including restarting your computer. Follow the steps to run Windows Update Troubleshooter:
Windows 11:
- Press “Windows + I” to open Settings.
- In the “System” tab, go to “Troubleshoot” and then click “Other troubleshooters”.
- Click “Run” just beside “Windows Update”.
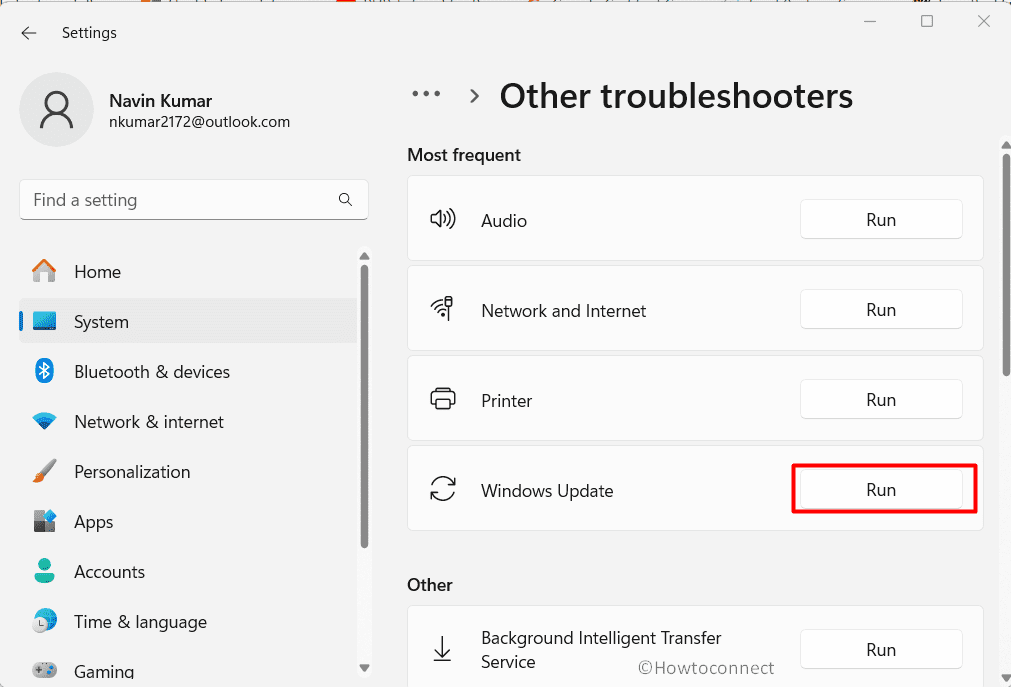
- The troubleshooter will start scanning; wait until the tool shows suggestions and follow them carefully.
Windows 10:
- Press “Winkey + I” and select “Update & Security”.
- Navigate “Troubleshoot” from the sidebar, and then click “Additional troubleshooters”.
- Select “Windows Update” and choose “Run the troubleshooter”.
- Stay for scanning; if the problem is found, it will show the issue with an option to fix it.
When the Troubleshooter has solved the issue restart the system.
Delete Temporary Update Files
The C:/SoftwareDistribution folder stores Windows update files temporarily necessary during the installation. When you download Windows Updates, they accumulate the files in this folder and then start applying them to your computer in the process.
Sometimes, the files inside the SoftwareDistribution folder interfere with the new Windows update which can cause issues and errors like 0x800b0110. Don’t worry, deleting the files doesn’t harm your Windows and its performance, so follow the steps:
- Launch Command Prompt as administrator as mentioned in the first method.
- Type the below commands and press “Enter”.
net stop wuauserv
net stop cryptSvc
net stop bits
net stop msiserver- Open “This PC” and navigate to “C” drive or where the Windows is installed.
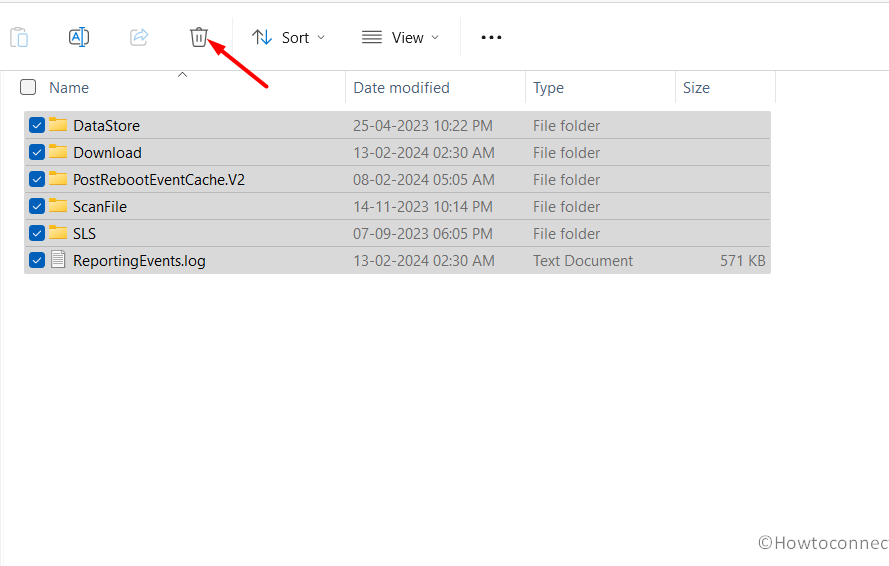
- Double-click the “Windows” folder and then go to the “SoftwareDistribution”.
- Press “Ctrl + A” to select all the items.
- Press “Shift + Del” and then “Yes” to permanently delete the files. If some files are not deleting, then click Skip.
- Run the below commands now:
net start wuauserv
net start cryptSvc
net start bits
net start msiserver- Restart the PC and click on “Check for updates” from “Settings > Windows update”.
Make Sure that Relevant Services are Running
If the Windows Update Service or Installer Service or both are not running, then the update can fail and show an error message like 0x800b0110 in your case. By default, it’s running, but we should have to make sure whether the relevant services are running:
- Click the “Start”, type “Services” and click on it.
- Find “Windows Update” and make sure that the Status is “Running”.
- If it’s not “Running”, then right-click on it and choose “Properties”.
- Select the Startup type as “Automatic” from the drop-down menu.
- Click “Start” and then click “OK” to close the box.
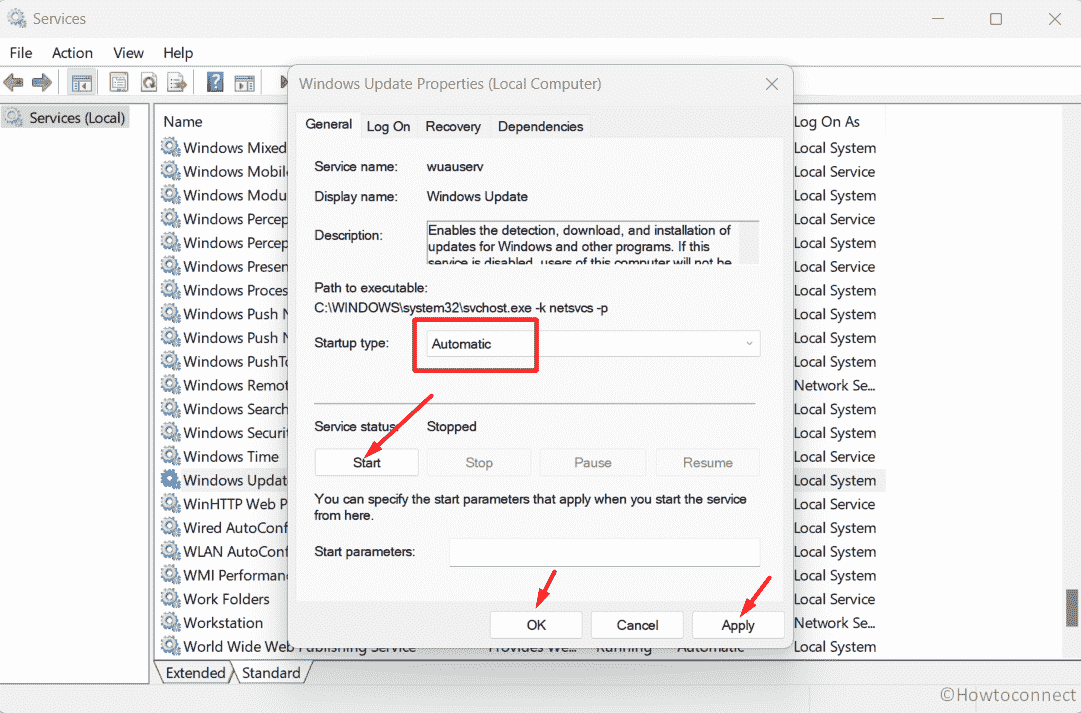
- Find “Windows Installer” from the services list. If it’s not running, then right-click on it and choose “Start”.
- Similarly, find “Background Intelligent Transfer Service” from the list, and if it’s not running, then right-click on this service and choose Start.
- Restart your Windows.
Install the Update Manually
You can directly download the Windows update file of your KB Version from the Microsoft Update Catalog and try installing it manually:
Copy the KB Number
- Go to “Settings > Windows update” and click “Update history”.
- Copy the KB Number of an update that is not being installed.
Download Update Manually
- Visit Microsoft Update Catalog.
- Paste the copied “KB number” on the search field and press “Enter”.
- Download the update that is compatible with your computer.
- Open the .msu file and follow the on-screen instructions to install the update manually.
Reset Windows Update Components
Missing or corrupted Windows Update components commonly cause errors during installing updates. Resetting will restore them to the default state and fix the issue:
- Type “CMD” (without quotes) in the Start search.
- Select “Run as administrator”.
- Type the following commands and hit enter sequentially:
net stop wuauserv
net stop cryptSvc
net stop bits
net stop msiserver
ren C:\Windows\SoftwareDistribution SoftwareDistribution.old
ren C:\Windows\System32\catroot2 Catroot2.old
Note: If your Windows is installed in another drive then change “C” with that drive.
net start wuauserv
net start cryptSvc
net start bits
net start msiserver- Close the Command Prompt and Restart your PC.
Use In-Place upgrade
The In-Place upgrade allows you to update your Windows 11 to the latest version including installing the operating system. Most important part of this process is it does not affect personal files, apps, and documents. So head to the steps:
- Head to the software download page of Windows 11.
- Find “Download Windows 11 Disk Image (ISO) for x64 devices” and click on “Select Download” drop-down.
- Select “Windows 11 (multi-edition ISO for x64 devices)”.
- Then, click on “Download Now”.
- Select your suitable language using the “Choose one” drop-down and click on “Confirm”.
- Let the validation complete and click “64-bit Download”.
- Now, go to the folder where the ISO file is saved and right click on “Win11_23H2_Language_x64.iso”.
- Select “Mount”.
- Right-click on the “setup.exe” and choose “Open”.
- Select “Yes” in the warning dialog box.
- Click “Next” on the “Install Windows 11” wizard,
- Then, “Accept” to agree with the license agreement.
- Finally, “Ready to Install” window will come on the screen; check the box for “Keep personal files and apps” and select “Install”.
That’s all!!