Sometimes, Windows Updates fail to work even after multiple attempts. In such scenarios, you can either choose to repair Windows update or manually install them. Using the Microsoft Update Catalog, you can grab the updates and they are provided as *.msu file but there are some of them come as cab files which are eventually difficult to install. So, in this article, we will show you the way to Install Cab Update via DISM in Windows 11 or 10.
The method is pretty simple and you need to just execute the command along with the correct path of the file in the Command Prompt. But to carry out the task completely, ensure to have admin rights. Additionally, you can also install the updates through other methods like via context menu, using CAB Update Installer, or with the help of Registry Editor. Amongst all these, DISM is the easiest and simplest way to install cab updates.
Way to Install Cab Update via DISM in Windows 11 and 10
Here is how to install Cab Update via DISM in Windows 11 or 10 –
Step-1: First of all, you need to download the update as a cab file.
Step-2: Once the download gets over, open Run dialog box by using “Win logo + R” key sequence. On the text field, type cmd. Next, press “Ctrl + Shift + Enter” keys all together to access an elevated Command Prompt.
Step-3: Upon the prompt of User Account Control (UAC), click Yes.
Step-4: Moving ahead, type in or copy-paste the below-given command on the black panel and hit Enter to Install Cab Update via DISM in Windows 11 or 10.
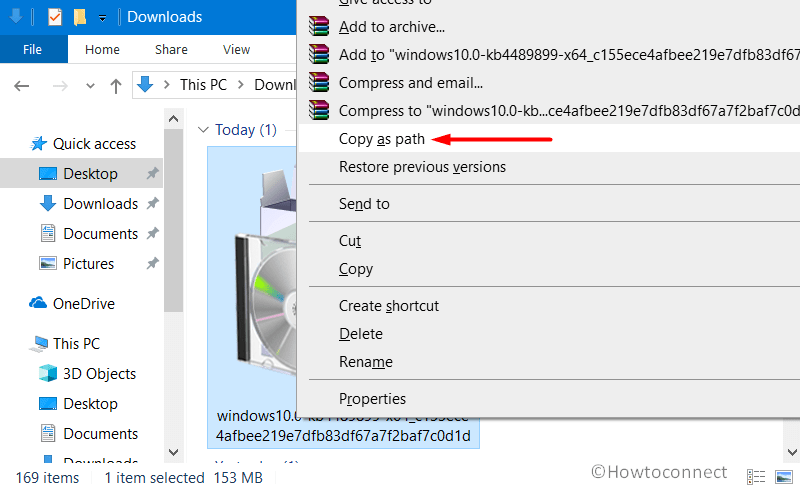
DISM /Online /Add-Package /PackagePath:"Pathtothecabfile"There are two easy ways to copy path of the Cab file.
Way-1: Open File Explorer and navigate to the location of the CAB file. Once you have located the file, press and hold the Shift key and do a right-click. From the list of options, select Copy as path.
Way-2: Alternatively, rename the cab file and make it short. If you prefer to type in the path manually, then renaming it to something short will be helpful.
For example, the entire command along with the path of the cab file will look like this –
DISM /Online /Add-Package /PackagePath:"C:\Users\ProfileName\Downloads\windows10.0-KB5017308-x86.cab"Step-5: Furthermore, you can also refine the command line by adding: space /NoRestart /quiet
Error 87 When Installing Cab File
While you make an attempt to Install Cab Update via DISM in Windows 11 or 10, some users come across an error message “Error 87”. If you also receive the same error code, then check for these two things –
- Check whether you access and run the command with administrative authority.
- If the cab file path is correct moreover the Command Prompt has access to the path. So, as an alternative, you can place the cab file in a public folder and then try to install the cab file from there.
See – Steps to Fix DISM Error 87 in Windows 10
And, SFC /Scannow, DISM.Exe, CHKDSK Windows 10
That’s all!!!
Thanks Andreas Meyer, updated.
Thank you – was helpful.
I am an administrator, so I made it work. Perhaps a hint to some other readers:
Put no spaces between Slash and parameter name. Likewise put no space between /packagePath: and “C:\path…” (/packagePath:”C:\Users…)