Win+X is such a shortcut key once pressed together invokes commonly used system tools and basic features like PowerShell, Task Manager, Event Viewer and so on. Since Microsoft didn’t name it specifically, users call the menu as Power Menu, Quick Link, or even sometimes Administrator Menu. However, for a long time, people from all corners struggled to remove or add shortcuts to Win+X Power User Menu in Windows 11 and 10. Well, the wait is over as an expert named Rafael Rivera stepped up with the utmost way.
Power User Menu alternatively Windows logo+X keyboard shortcut combination comes super handy to access necessary functions. The process would be more effective once you can customize it as you want to. The tool developed by Rafael Rivera is one easiest as well as hustle free utility ever in this respect. You probably be waiting so long to include Shortcuts to Win+X Menu and we can understand the dire need. Therefore, no more wasting of time better be started –
Way to Remove or Add Shortcuts to Win+X Power User Menu in Windows 11 and 10
Here is how to remove or add Shortcuts to Win+X Power User Menu in Windows 11 or 10 –
Step-1: Click on this link to download hashlnk.
Step-2: When done, go to the Downloads folder, extract the hashlnk_0.2.0.0 zip file.
Step-3: After extracting the file, open File Explorer by pressing Win+E at once. Insert the following path in the address bar of File Explorer and hit Enter –
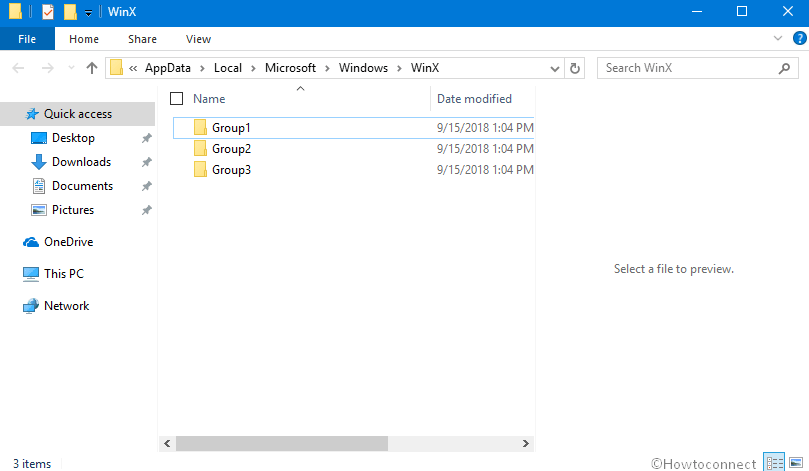
%LocalAppdata%\Microsoft\Windows\WinX
Step-4: You will view three folders named Group1 (bottom), Group2 (middle), and Group3 (top) here. Open any of them where you want to Add Shortcuts to Win+X Power User Menu in Windows 10 and 11.
Step-5: Create a shortcut for any app or item (For example, Group Policy Editor) you want in any of these Group folders. Now, don’t close this File Explorer window but leave it open.
Step-6: Moving ahead, go to the Taskbar search. Type cmd.exe in the text field and when the result shows up hit Enter.
Step-7: After it appears in the display, perform the following actions in the Command Prompt –
- Copy and paste the entire path of the hashlnk.exe file viewable between the quotes from step 3 into the Command Prompt.
- Add a space after the path.
- After adding a space, copy and paste the full path (with quotes) of the new shortcut (Group Policy Editor).
In the end, the command will look like –
"C:\Users\SAUJANYA\Downloads\hashlnk_0.2.0.0\hashlnk.exe" "C:\Users\SAUJANYA\AppData\Local\Microsoft\Windows\WinX\Group2\Group Policy Editor - Shortcut.lnk"
Step-8: To execute the command, hit Enter.
Step-9: Thereafter, you can close the Command Prompt and File Explorer if you wish to and delete the hashlnk.exe file from step 4.
Step-10: Finally, sign out or sign in or restart the explorer process. By doing so, you will successfully Add Shortcuts to Win+X Power User Menu in Windows 11 or 10.
Note – To remove the additional shortcuts, simply delete the shortcut from the Group1, Group2, or Group3 folder.
That’s all!!!