Method to Use Win+X Menu Editor v3.0 On Windows 10 with steps. – The Win+X menu in Windows 10 OS lists out all the items that you can access with a single click. But many users are out there who want to customize this menu as per their choices. So, in this concern, you will find a utility with a name Win+X Menu Editor v3.0 very helpful. You may also want to know How to Customize Windows 10 Taskbar.
In this guide, we present you with a series of steps that explain How to Use Win+X Menu Editor v3.0 in Windows 10. This light weighted application provides you various options, such as adding a program, removing an item, managing the groups or restoring to default. Find another similar guide on Use AskAdmin 1.5 to Prevent Opening Apps or bat, cmd, reg File Types.
Well, let us now head towards the steps and see how this tool works in Windows 10.
Use Win+X Menu Editor v3.0 in Windows 10
Note – This version of the application is also compatible with Windows 10 Creators Update.
Download and Install Win+X Menu Editor v3.0
Step 1 – To Use Win+X Menu Editor v3.0 in Windows 10, you have to first download the tool from its website.
Step 2 – After successfully downloading the file, extract its contents. Moving ahead, locate a file WinXEditor.exe and double-click on it.
Step 3 – The above action will immediately install and launch the Win+X Menu Editor v3.0 on your PC screen.
1. Add an item to Win+X Menu
a) Add a Program
This free utility allows you to add any application of your preference to the power user menu. To do so, follow the below steps.
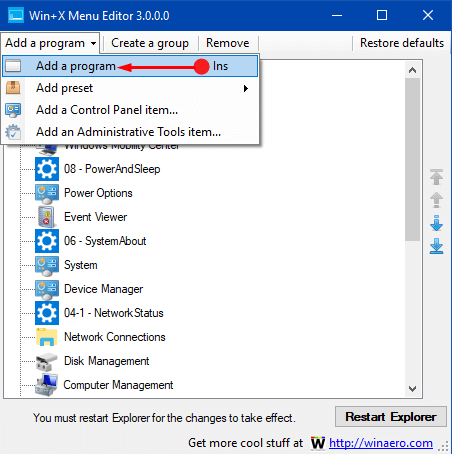
Step 1 – Click Add a program drop-down that appears at the top of the tool. From the sub-menu that shows up, again click Add a program.
Step 2 – The Open file dialog will come into view, browse to the location where your program is located.
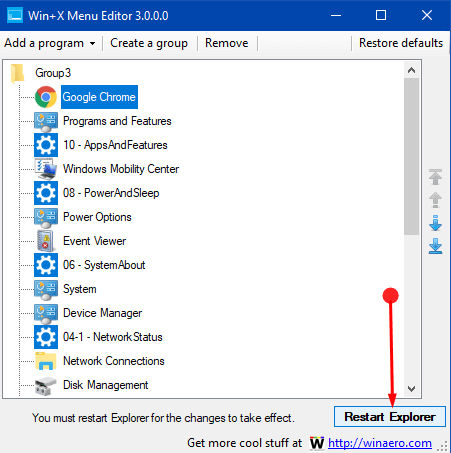
For example – I want to add Google Chrome to the power user menu but I don’t know the path of its file location. So, to know the location path of any program, make sure it is running. Next, launch Task Manager, right-click on the targeted program and click Open file location. This will open File Explorer showing the location of the program on your hard disk.
For reference, you can also read Default Files, Folder Location and Path Windows 10 List.
Step 3 – Select the .exe file of the program and henceforth click Open button. In this case, it’s chrome.exe.
See How to Add Chrome With Icon to Desktop Context Menu in Windows 10.
Step 4 – The application will ask you to rename the program you are going to add. Type the desired name or leave the default as it is. Click OK.
Step 5 – Now, go back to the tool’s interface and click Restart Explorer for the changes to take effect.
Step 6 – Open Win+X menu and you will find your new item added into the list which you can start using immediately.
b) Add a Preset
Win+X Menu Editor v3.0 also lets you include built-in tools to the menu.
Step 1 – Click Add a program tab at the top of the tool. From the drop-down that appears, hover on Add preset.
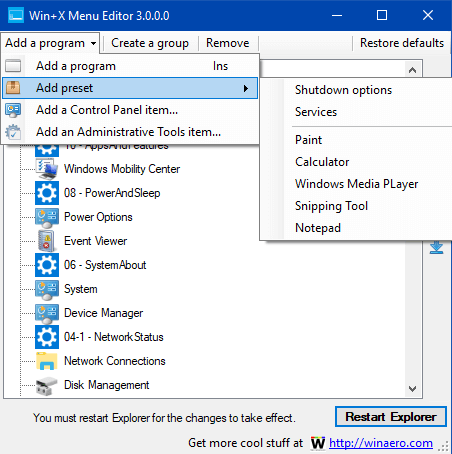
Step 2 – This will show a few built-in tools, select the one you wish to add, such as Notepad.
Step 3 – Finally, make sure to click Restart Explorer button to implement the change. Confirm the addition of Preset by opening Win+X menu.
Read How to Restart File Explorer Using Task Manager in Windows 10 to know more.
c) Add a Control Panel item
Step 1 – Here also, click Add a program button followed by a click on Add a Control Panel item.
Follow our other guide to Display Control Panel on Power User Menu Instead Settings Windows 10.
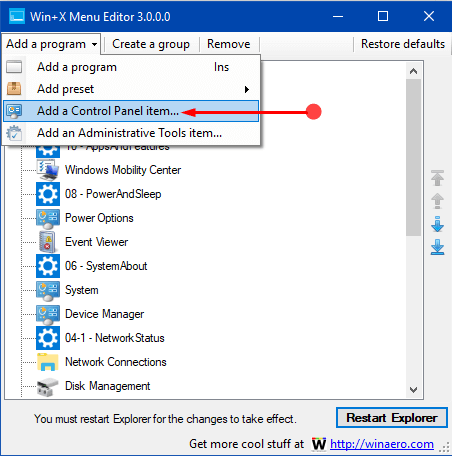
Step 2 – Add a Control Panel item dialog will come into view. Find and choose the item and click the Select button. Don’t miss out to click the Restart Explorer button.
d) Add an Administrative Tools item
Step 1 – Click Add a program tab followed by a click on Add an Administrative Tools item.
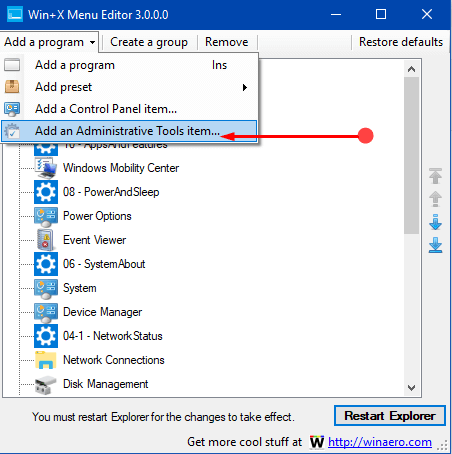
Step 2 – Pick up the item and click the Select button. Make sure to click Restart Explorer.
2. Remove Items from Win+X Menu
Step 1 – Open Win+X Menu Editor and search the item you desire to remove. For instance, I rarely open Disk management from the menu and so I am removing it.
Step 2 – So, select the item (Disk Management in my case) and click Remove button on the top.
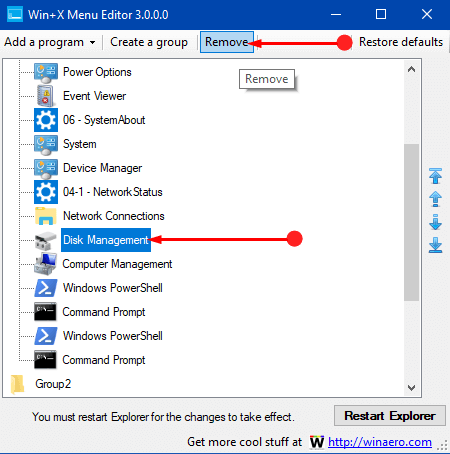
Step 3 – Click Restart Explorer button at the bottom to implement the change. Press Win+X keys altogether and the item will disappear from the menu.
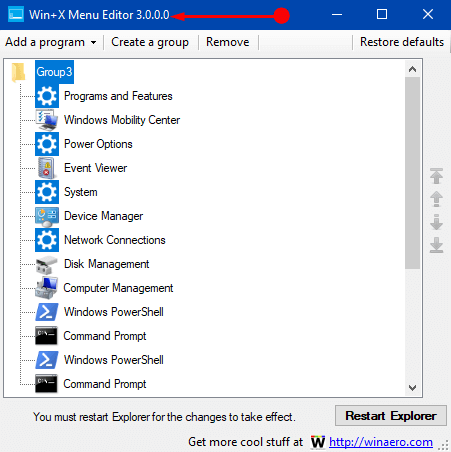
3. Manage Groups
Groups in the menu are the horizontal lines that separate the groups. In the application, you can recognize the groups with folder icons and are named as Group 1, Group 2 and Group 3 respectively.
Step 1 – To remove a group, select it on the application and click Remove button.
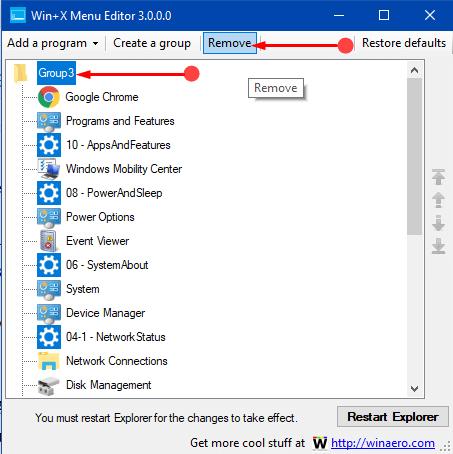
Step 2 – All the items of the group will be deleted from the menu. But the changes will only come into effect if you click Restart Explorer button.
Step 3 – Now, to create a new group, click the button namely Create a group on the toolbar of the tool.
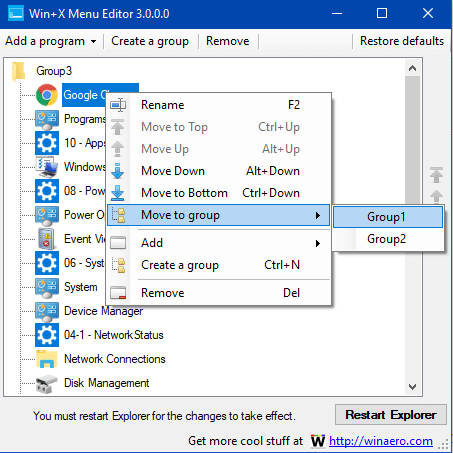
Step 4 – Add the items accordingly in the group by following the steps mentioned in the above section. Also, you can shuffle the existing shortcuts between the groups as per your need. To shift an item to another group, right-click on it and select Move to group. Now, click on the desired group number.
4. Restore Default Win+X Menu
Step 1 – In case, you prefer to use the default power user menu, click Restore defaults button on the application.
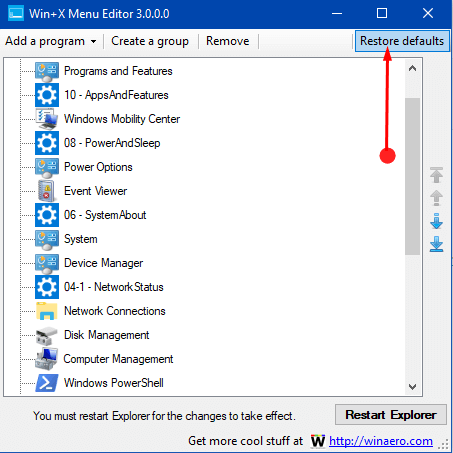
Step 2 – Click Yes on the confirm prompt and finally, click Restart Explorer button. Verify the menu and you will be reverted to the default.
Conclusion
Hopefully, you will be able to Use Win+X Menu Editor v3.0 in Windows 10 effortlessly. If you have more tips about this tool, write them to us.