Following the Ways to Use Google DNS Servers in Windows 11 and 10 might help you catch notably greater browsing speed. DNS works more or less similar to a phone book, where you access online resources through the domain names of various sites. It derives IP addresses of the servers of the websites you want to visit, by recognizing/translating the domain name. After all, you cannot remember the sites name if they were like 147.33.54.200, can you?
Windows 10 or 11 allows using Google DNS Server to access internet with a slight modification in Network settings. Now, you know that numbers of websites, as well as their structural complexities, are multiplying daily. Hence, the increased loads on DNS. This explains why Google stepped up to ease the life of network surfers a bit. Google’s free public Domain Name System provides a global coverage and uses techniques that can make internet surfing faster and safer. Read – How to Edit IP Settings for Network Connection in Windows 10.
Use Google DNS Servers in Windows 11 and 10
Here is How to Use Google DNS Servers in Windows 11 or 10 –
Step-1: Type Control Panel in the Taskbar search and when the result appears, click on Open in the right flap.
Step-2: change the View by option as Large icons and from the menu, select Network and Sharing Center on the applet.
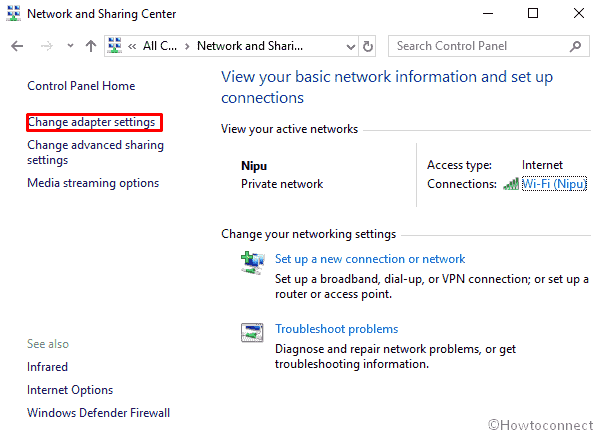
Step-3: Do a click on Change adapter settings from the left-hand side of the screen.
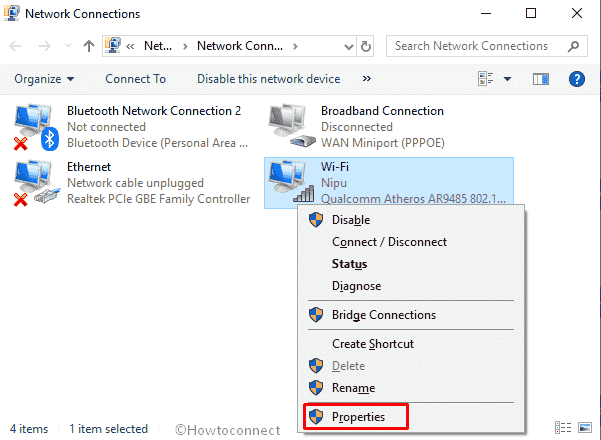
Step-4: A new window will present showing Ethernet and any other WiFi adapters that you might be using. Right click on the connection that is currently in action and select Properties.
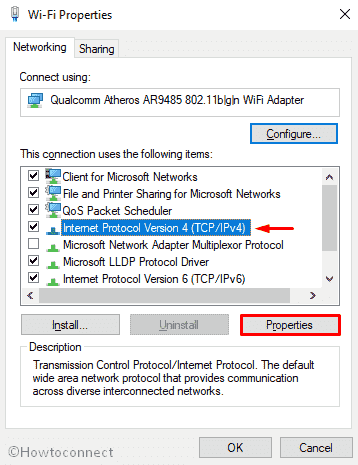
Step-5: On the following wizard, click on Internet Protocol Version 4 (TCP/IPv4).
Step-6: Next, Click on the Properties that would appear just below the list.
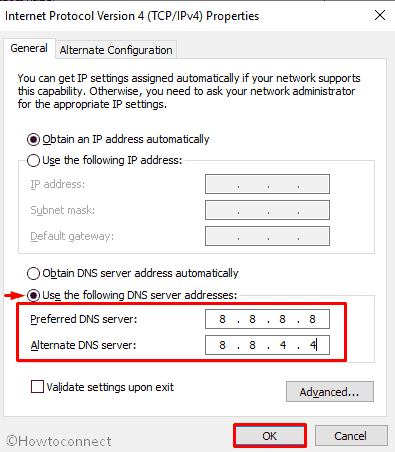
Step-7: Select the radio button of “Use the following DNS server addresses” and enter the below value –
Preferred DNS server: 8.8.8.8
Alternate DNS server: 8.8.4.4
Step-8: Click OK button to save the alterations.
Step-9: Finally, Restart your system and enjoy faster Web browsing.
That’s all!!