In Windows 10 computer, How to Install new font, Remove existing one, Show, and Hide Fonts for a better look at your presentation and trouble-free access of a web page is a serious question. Here we are manifesting a tutorial on for all the activities you can apply to Fonts in Windows 10.
There is no doubt that Windows 10 provides you numerous good quality fonts but you can still purchase the new ones or just download them if you talk about installing a font. Anyway, we will concentrate on the topic here.
How to Install, Remove, Show, Hide Fonts in Windows 10
Sometimes you could not access a web page because your Operating System does not have the font the website offers. In this case, you need to install a particular Font.
You may like to Read:
Windows 10 – How to Use Private Character Editor
Now, here the question arises in many users mind that how to install them. And there might be times when the installed font is no more needed, so you might want to know how to delete or hide them. With taking all these points in mind, I will be describing all the steps which will help you in installing the new fonts. And also, I will cover the steps of deleting or hiding fonts in Windows 10. Let me explain all the things in different sections.
1. How to Install Fonts in Windows 10
Log in to Windows 10 with all the Administrative authorities. Now, before you learn the installation process, make sure that you have downloaded the font in a zip or.rar file, which means in an extract format. After downloading the file, separate it and save it in the address which you can locate easily and quickly.
From here, I will show you the steps along with their respective screenshots. You have four methods of installing the fonts and all of them are absolutely simple.
From Microsoft Store
Step-1: First of all, open Windows Settings, the built-in application by hitting “Win + I” keyboard shortcut keys.
Step-2: Go to the Personalization category.
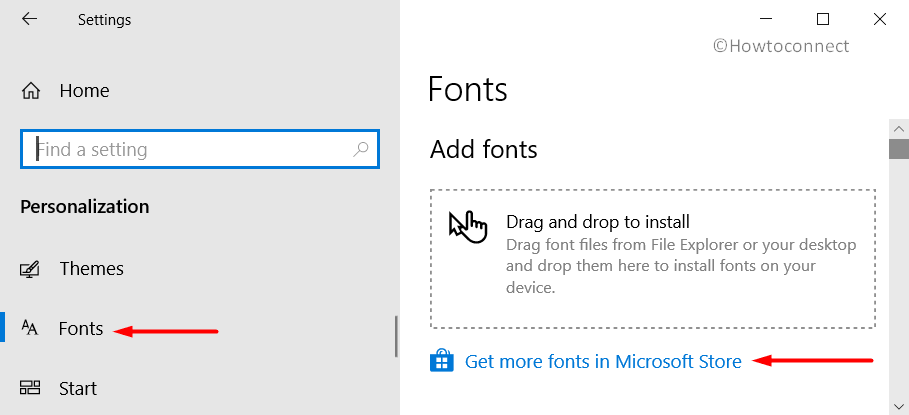
Step-3: Select Fonts on the left sidebar of the following page. Switch to the right pane and click on Get more fonts in Microsoft Store (see snapshot).
Step-4: This will launch Microsoft Store displaying the list of free or purchased fonts. Locate and choose the font that you prefer to install on the system. Click on the Get button to download the font.
Step-5: Once the font gets downloaded, click the Install button on Store. Fonts Settings will show up with the downloaded font.
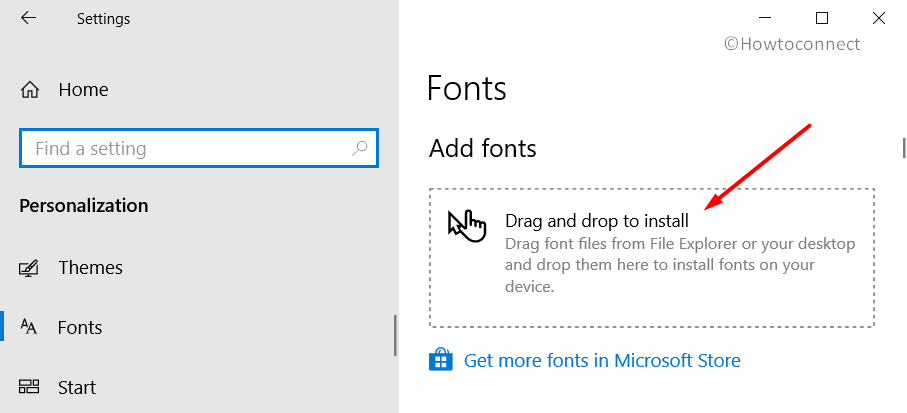
Drag and Drop
Windows 10 Fonts Settings page also includes a new option that lets you drag and drop the font.
- Navigate to Settings => Personalization => Fonts.
- Now, drag the font from the File Explorer and drop it on the on the right pane of the Fonts page.
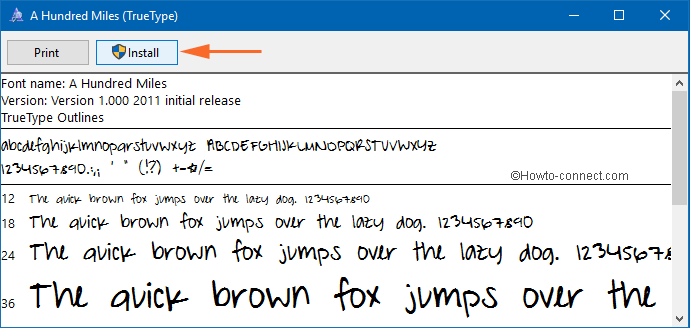
Double-click the Font
- Double click on the acquired font and you will see a window opened on your screen. Click on the Install button which can be seen on the top ribbon.
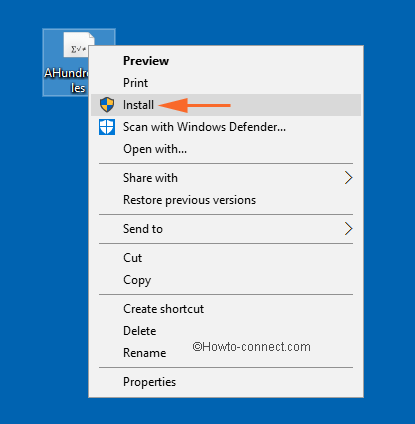
Right-click the Font
- The second method is generating a right click on the extracted font followed by a click on the Install option.
- Your downloaded font has been installed! Open the text document to see it which will be listed with the other obtainable ones.
2. How to Remove Fonts in Windows 10
Via Settings App
- Go to Start Menu and click the gear icon to access the Settings application.
- Select Personalization.
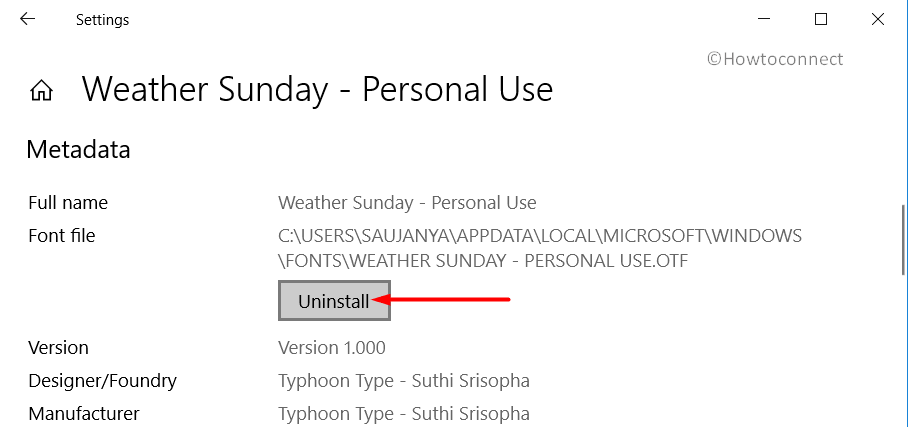
- Choose Fonts and on the adjacent right side, click the font that you wish to remove.
- Click Uninstall on the following page.
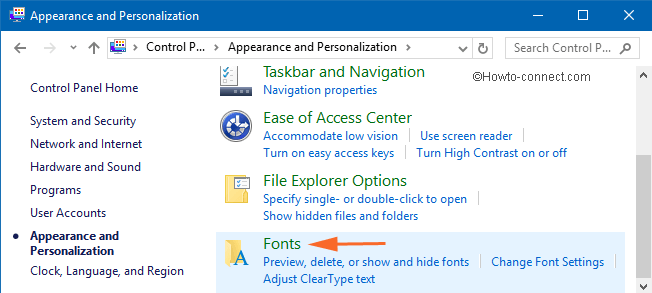
Using Control Panel
- The administration of the installed fonts is carried out from the Fonts window. You can access the Fonts window from Appearance and Personalization section in Control Panel.
- Or the Fonts window can be directly retrieved if the preview of the Small icon is selected in Control Panel.
![]()
- The other way of getting into the Fonts window is by making a search for it in the search field of Cortana underneath Windows 10 Start Menu. You just need to type fonts in the Search field. The appropriate option will arrive in the results.

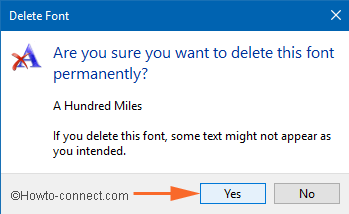
- Pick up whatever method suits you to get into the Fonts window. Once you are in this window, scan the listed fonts and when you get the one that you wish to remove, simply opt it and make a click on the Delete button.

- Now, to remove the font, click Yes button in the pop-up window.
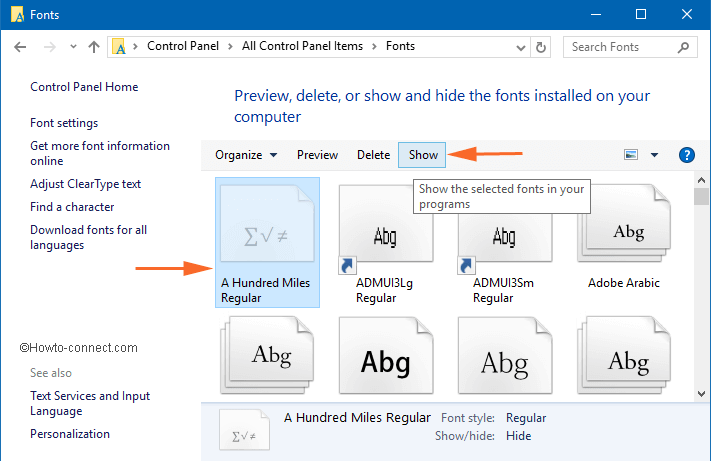
3. How to Hide or Unhide Fonts in Windows 10
- In some cases, you might feel of hiding the fonts because of some reason. And to do so, it is very obvious that you need to be into the Fonts window. Pick up the font that you wanted to hide and click the Hide button.
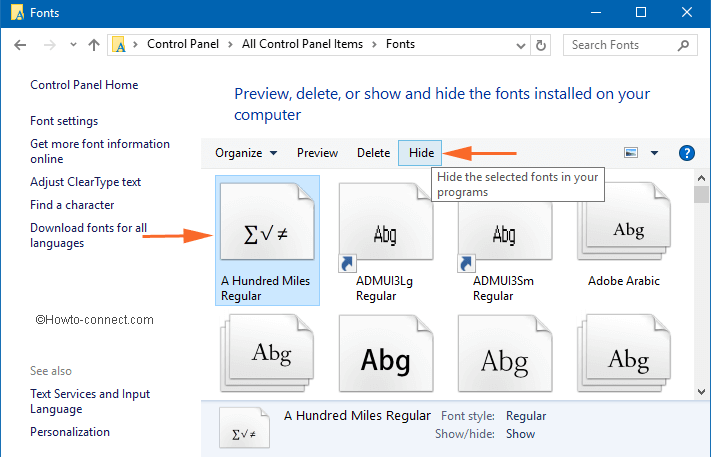
- Now, in the future, to finish any document you might need the font that you have hidden previously. To unveil the hidden font select it and hit the Show button which will bring back the concealed Font.
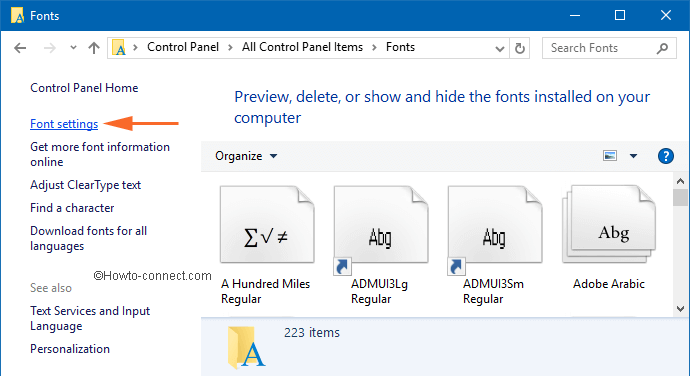
- all know that your computer is set to a particular keyboard language and so it follows the pattern of that keyboard only. So, Windows 10 does not carry the fonts of the other keyboard languages and put them in secret so that they cannot be viewed. For instance, the computer that has the Chinese language as its keyboard settings, will not be able to assist the fonts of the German or French or any other language and thus their fonts are not shown. To use them or see them you need to make a click on Font Settings link available on the left part of the Fonts window.
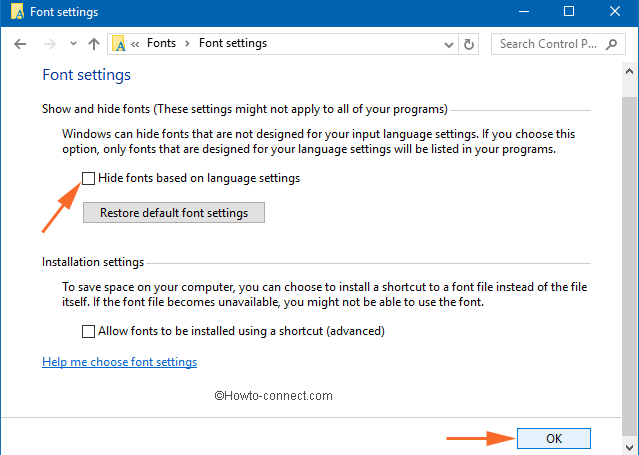
- The following Font settings window will have an option called Hide font based on language settings in the Font Settings section. You need to unselect its respective box so that you can see the fonts of other languages also. Now, to save the changes, click on the Ok button.
Conclusion
This is so easy to carry out. Parents can help their children by providing such new fonts in Windows 10 to their projects. After gathering a good quality of knowledge about the fonts, I am expecting all of you to put this into use. See how good you feel when you stand different from others. I have decided what I will do.
I will download a few funky and interesting fonts for my students and will see how good they are inputting them into the document. Keep one small thing in mind that when you use newly downloaded fonts in Windows 10 for your document and wish to share it with others, make sure that the other side reader has the same font installed in his system. Till then, you all create good documents and let me know how it turned out.
Hello, Carl, Click the combination of Windows logo key and I. Type Fonts in the Search bar of Settings app. Click on the result. You will Enter the fonts, so right click and Delete.
Hey, I have the same problèleme, I just installed lots of fonts on my Surface Pro 3, running Win 10, and now it doesn’t show any thing on “Control Panel\Appearance and Personalization\Fonts”. how can I uninstall some of them?… 65.000 items… +/-4Gb…
please help
Follow just next step dude.
Hey there,
I have a serious issue; I just installed lots of fonts on my Surface Pro 3, running Win 10, and now it doesn’t show any thing on “Control Panel\Appearance and Personalization\Fonts”. how can I uninstall some of them?