Backing up is an important process to keep your data safe and secure but sometimes you might be frustrated during the task. Particularly when you are on Windows 10 you can find error code 0x81000019. The Backup will stop in the middle when the issue appears showing you a dialog box.
The problem might occur when there is lack of space in the system reserved partition, incorrect setting of Volume Shadow Copy service, or availability of third party Antivirus. As in several problems, corrupted System files can also cause this backup error.
Backup Error Code 0x81000019
Here is how to fix Backup Error Code 0x81000019 in Windows 10 –
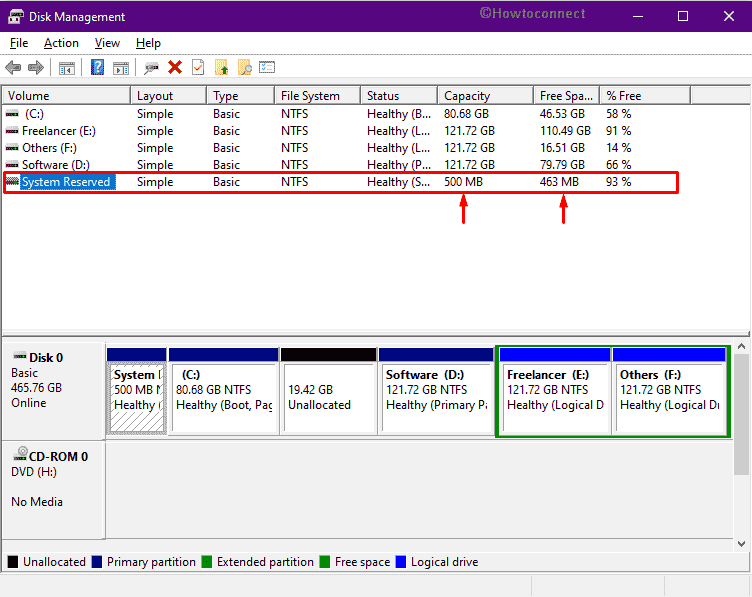
1] Check System Reserved volume
- Press – Windows + S.
- Type – disk management.
- Hit – Enter.
- Make sure the capacity of System Reserved is at least 100MB. If not, you will have to enlarge the System Reserved partition.
- Also, check if the volume has around 40MB free space. If it is less than 40 MB, delete unnecessary files to make space.
Enlarge System Reserved partition
This issue would occur in the process of creating a backup image that requires some minimum mandatory space (40 MB) in the system reserved partition to save the files. Anything shortage in the room under the partition folder may result in error 0x81000019. In order to fix this, you must allocate or relieve a minimum amount of statutory space for your PC to run smoothly.
Delete unnecessary files to free up System Reserved partition
A temporary data or “foo files” is created in order to enable high-speed functioning of your PC. The data is generated automatically on request and accumulated as redundant files over a long period of time. As a result, a significant amount of essential room on your computer is occupied unnecessarily by the cache. Clearing these files could release more space and help us solve the backup failed error 0x81000019. You can also delete other unwanted files from your system along with the temp by following this procedure –
- Click the – Search icon from the taskbar.
- Type in – cleanmgr.
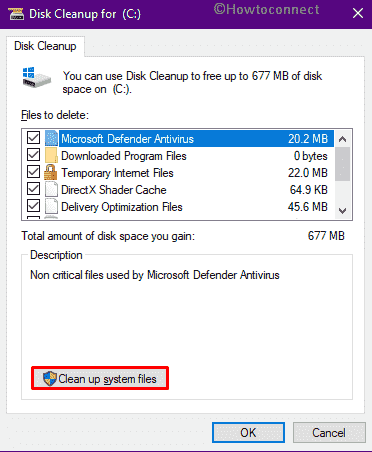
- On Disk Cleanup window, make sure C: is selected as the drive.
- Click – OK.
- Hit – Clean up system files.
- Again, click OK for the next pop-up.
- Check the items whose files you want to delete.
- Hit – OK.
- For final confirmation, click – Delete Files.
2] Make sure all associated services are running
The volume shadow copy service makes sure that the file system metadata is stored perfectly. Furthermore, it also ensures that the shadow copied data is written in a consistent format. Similarly, the system protection service ensures that any application installed on the PC meets the mandatory terms and conditions of the PC and doesn’t pose any potential threat to the PC.
If the parameters of these services are tampered with and are changed from “Automatic” to “Manual” could most certainly result in error 0x81000019. In order to resolve this error in a few simple steps, follow the below-given step by step process –
- Press – Windows key.
- Type – services.msc.
- Select – Services.
- Find – Volume Shadow Copy.
- Right-click the same and choose – Properties.
- Set Startup type – Automatic.
- If the service is not running, click – Start.
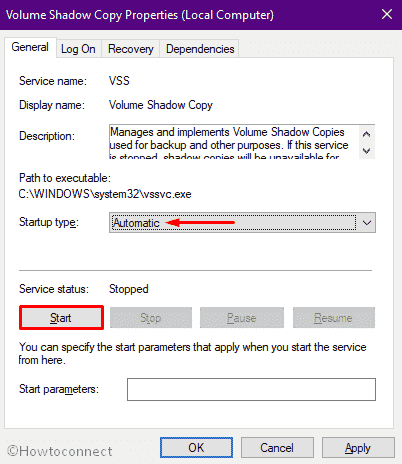
- Hit Apply and then OK to save the changes.
- Accomplish the same process for Software Protection Properties, Block Level Backup Engine Service, Remote Procedure Call, RPC Endpoint Mapper, and Windows Backup services.
You must close the services window and restart your PC.
3] Disable antimalware program for the time being
Often third-party antivirus programs interrupt essential services and could cause error 0x81000019 to occur. Many users from Microsoft community forum have come forward to report that they were able to fix the issue by simply disabling or uninstalling antivirus software.
Turn Windows Defender Firewall off
- Press – Windows + R.
- Type – control firewall.cpl.
- Click – OK.
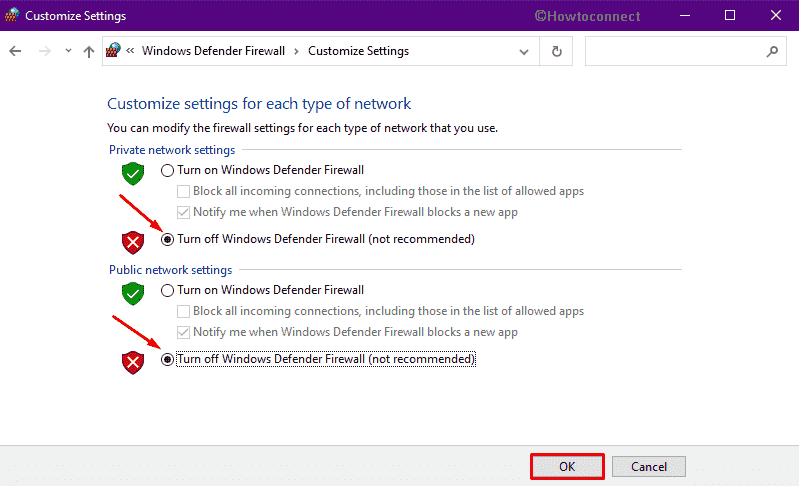
- Select the – Turn Windows Defender Firewall on or off.
- Check the – Turn off Windows Defender Firewall (not recommended) for both Private network settings and Public network settings.
- Click – OK.
- Reboot the PC.
Note – Once Backup Error Code 0x81000019 goes away, revert the changes you made with Windows Defender Firewall.
Disable third-party antimalware program
- Click the up arrow icon from the notification bar.
- Next, right-click on the icon of your antivirus software.
- Choose – Disable.
- Set a period of time for keeping it disabled.
4] Check drive for errors
Drive is an integral part of part a computer and any error in the local disk may also generate error 0x81000019 during taking backup. But Right from the beginning Windows 10 provides a built-in tool to repair the component. You can see – How to Use Disk Error Checking in Windows 10, 8. So run the tool by following steps –
- Press – Windows + E.
- From the left column, click – This PC.
- Right-click Local Disk (C:) and select – Properties.
- Shift to Tools tab.
- Click – Check.

- Hit – Scan drive.
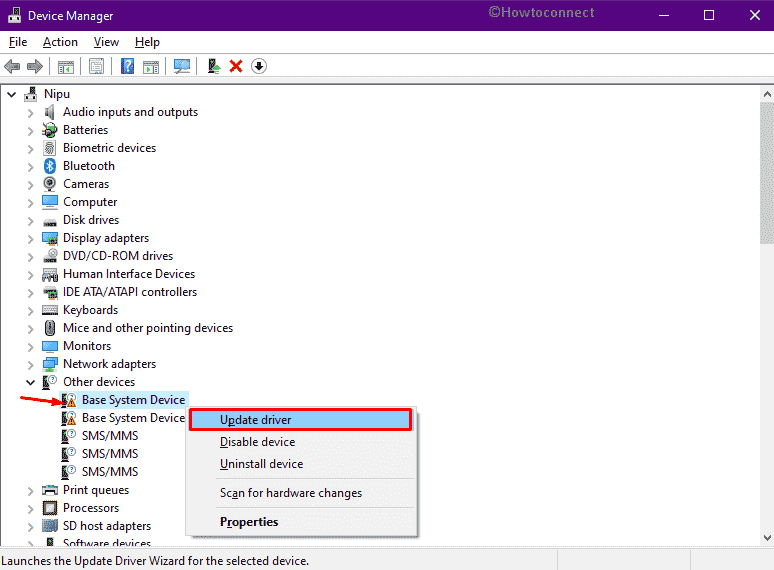
5] Make problematic drivers up-to-date
Not up-to-date drivers are the main reason behind interference during backup process in Windows 10. Device Manager is a great help in this condition that allows you to quickly and easily update any driver.
- Press – Win + S.
- Type in – devmgmt.msc.
- Select – Device Manager.
- Find the devices with yellow exclamation mark.
- Expand the same by double-clicking.
- Right-click on the driver that has a question mark beside it.
- Select the – Update driver.
- Click – Search automatically for drivers.
- Now, the utility will search for a recent version of the driver over the internet.
6] Run SFC and DISM command
Backup failed error 0x81000019 can also appear due to a corrupted system file, broken kernel file, or system image. So you need to run SFC and DISM tools one after another –
- Press – Win + S.
- Type – cmd.
- Select – Run as administrator.
- When User Account Control appears, click – Yes.
- Insert SFC /Scannow and hit – Enter.
- After this is completed reboot your PC and again launch the elevated command prompt.
- Type in – DISM /online /Cleanup-Image /RestoreHealth.
- Hit – Enter.
Again restart your computer and see if the backup error still persists.
7] Delete Restore points
Old restore points occupy a huge amount of space you wouldn’t ever want. Due to lack of space on the hard drive, error 0x81000019 may occur so you have to delete them.
- Press – Windows + D.
- Right-click – This PC.
- Choose – Properties.
- Next, click the – System Protection.
- Select a drive and hit – Configure.

- Once in the new window, click – Delete.
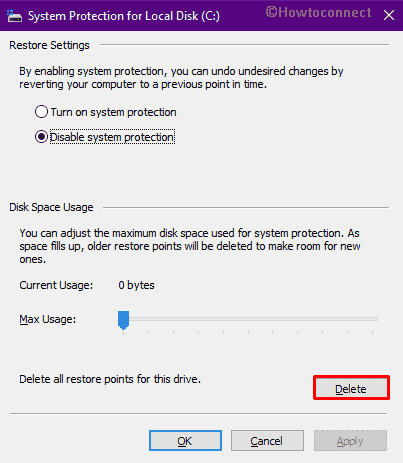
- For final confirmation, click – Continue.
- Do the same for every individual drive.
8] Uninstall unused language packs
Windows 10 lets download language packs from the Settings area but inside files occupy a large amount of space. You never know the size of the packs as the Settings app doesn’t show this information. Unknowingly you install multiple languages that may end up with the backup error. So uninstall them using the instructions below –
- Click the – Start.
- Type – language.
- Press – Enter.
- In the right pane, you will see downloaded languages under Preferred Language.
- Click on them and select the – Remove.
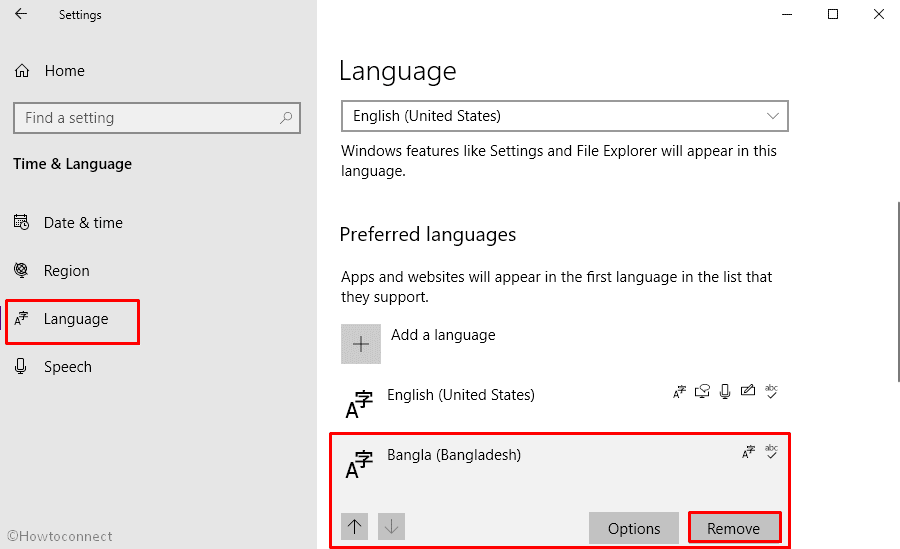
- Delete all other unwanted packs in similar way.
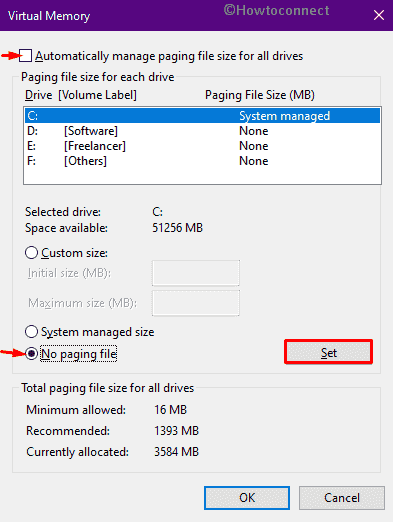
9] Disable paging file generation
An incorrect amount of virtual memory might cause backup error 0x81000019 in Windows 10. Paging file size is a matter of advanced users rather so instead of modifying disable the same.
- Press Windows logo and type – sysdm.cpl.
- Hit – Enter.
- Shift to the – Advanced tab.
- Click Settings button present under the Performance section.
- Move to Advanced tab of the newly appeared window.
- Click – Change.
- Uncheck – Automatically manage paging file size.
- Select – No paging file.
- Click – Set.
- When the system asks for approval, select– Yes.
- Click OK for all open windows.
10] Clean install Windows 10
If everything fails to fix the Backup problem then the last option before you is clean install. Microsoft has made the downloading and installation easy so nothing more to bother you except proceeding with the steps –
- Visit – Microsoft official Windows 10 download page.
- Click – Download tool now.
- Once the file is saved, double-click the setup file.
- For User Account Control, hit – Yes.
- Click Accept for the terms and conditions for the Windows setup.
- Select – Create installation media (USB flash drive, DVD, or ISO file) for another PC.
- Hit – Next.
- Verify if the Language, Edition, and Architecture are correct.
- Next, click – Next.
- Choose – ISO file.
- Hit – Next.
- Select a location where you want to keep the file.
- Click – Save.
- Finally, hit – Finish.
- Go to that location where you saved the file.
- Double-click the downloaded item to start the installation process.
- Follow on-screen guidelines to complete the procedure.
Methods list
1] Check System Reserved volume
2] Make sure all associated services are running
3] Disable antimalware program for the time being
4] Check drive for errors
5] Make all drivers up-to-date
6] Run SFC and DISM command
7] Delete Restore points
8] Uninstall unused language packs
9] Disable paging file generation
10] Clean install Windows 10
That’s all!!