Windows update errors are like a phantom for Windows 10 users as they often encounter the annoying issue. Here, we are talking about 0xc1900130 code that mostly occurs because of network or corrupt cache issue. You get a statement “Failed install attempt” error message while downloading feature or cumulative update.
Windows update error 0xc1900130 appears because of network connection interruptions between the client computer and windows update server. If you have been facing this or similar failure messages you might want to try the fixes that have been discussed here.
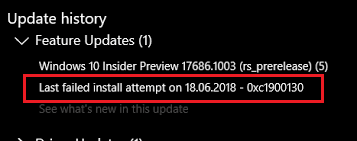
0xc1900130 Error Failed install attempt Windows Update Solutions
Here is how to Fix Error 0xc1900130 During Windows Update –
1] Repair internet connection
One of the first things that you should settle when you start getting an error related to update like 0xc1900130 is your internet connectivity. Several times, poor network leads to failure of the installation process and may cause tantamount issues.
Disconnect and then re-connect to the internet and in case the problem persists, switch to a wired instead of wireless.
Follow – How To Fix Unable to Access Internet In Windows 10
2] Simply Restart computer to fix 0xc1900130 update error
Sometimes, fixing the basic update related issues like error 0xc1900130 can be as simple and easy as rebooting your system.
- Simply press Windows icon from the far left of Taskbar.
- Click on the Power button
- Finally, select Restart from the options.
You may see instructions here – How to Restart Windows 10 PC
After your device completes the reboot process, check for updates and try getting the patches now.
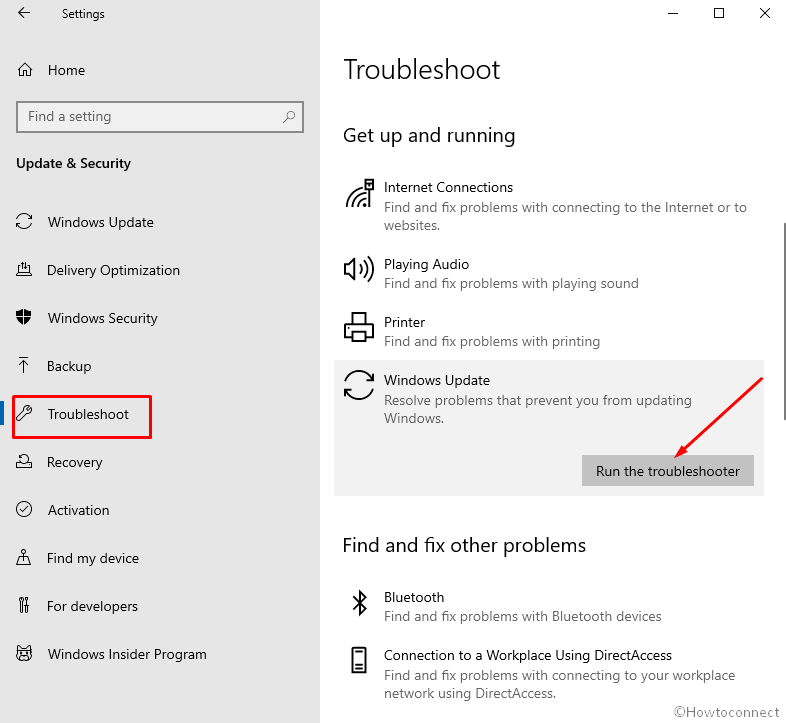
3] Run Windows Update Troubleshooter
Running a trouble-shooter is one of the simplest, yet most effective means of fixing various constraints that occurs in Windows. This type of program makes it way easier to fix a nasty failure. Nowadays, this feature is even better, now that it comes with special troubleshooters for specific issues like blue-screen errors, unsuccessful updates, etc. Here is how you can use a Windows update troubleshooter to fix the error 0xc1900130.
- First of all, click on the Windows icon to bring up the start menu.
- Hit the Gear cog.
- When the app comes up on the screen you need to select to the Update & Security.
- Select the Troubleshooter from the right part of the page.
- Now go to the right pane and click on Windows update to expand it.
- This action will reveal a button Run the Troubleshooter; click on it.
- Let the Diagcab app complete the troubleshooting and follow the instructions.
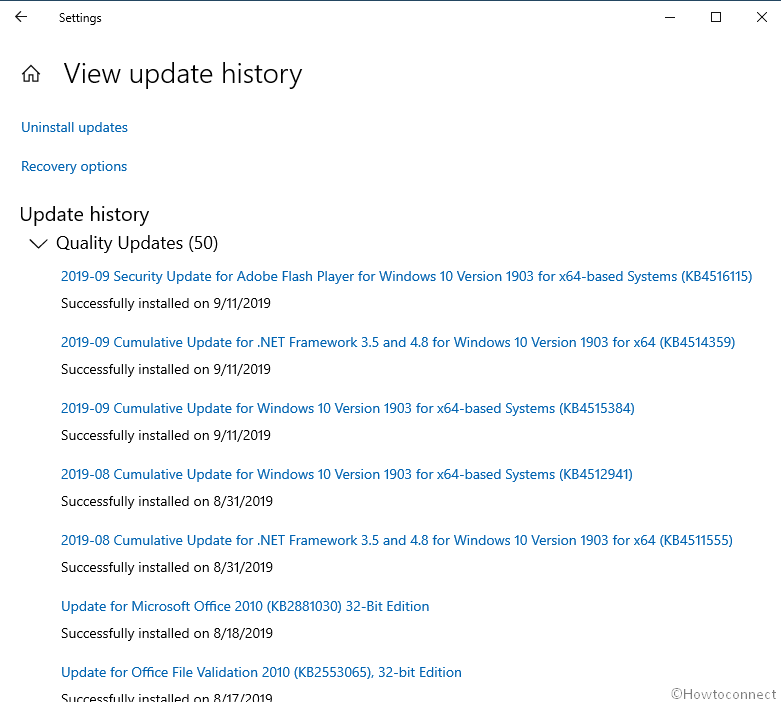
4] Manually download the latest Windows updates to solve 0xc1900130
Sometimes, the outdated OS also generates the issue like error 0xc1900130. But, while you are unable to get the automatic updates, or getting them through settings, try getting the patches manually from the Microsoft Download Center. This may work as a workaround against error 0xc1900130. Here is what you can do.
- Head to Update & Security section of the Settings by following the first two steps of the previous method.
- Go to the right part of the next page View Update history link.
- There, you will be able to see the list of patches that have been unsuccessful; note KB numbers of those.
- Now, navigate to the Microsoft Download Center. In the search box you see there, type the KB numbers of the patches you would like to install and search for each one.
- When the updates turn up, install them.
5] Reset DNS Cache
Clearing DNS Cache can often help to fix Error 0xc1900130. Some info often piles up in the memory and make the computer operation sluggish. Additionally, the DNS cache affects the network configuration at certain times that leads to Windows update issues.
- Press Windows key and type ‘cmd.exe’. Once the result popup appears, select Run as Administrator from the right flyout.
- Click Yes when a “User account control” dialog asks for permission to make changes.
- When the console opens, enter the following –
ipconfig /flushdnsand hit Enter.
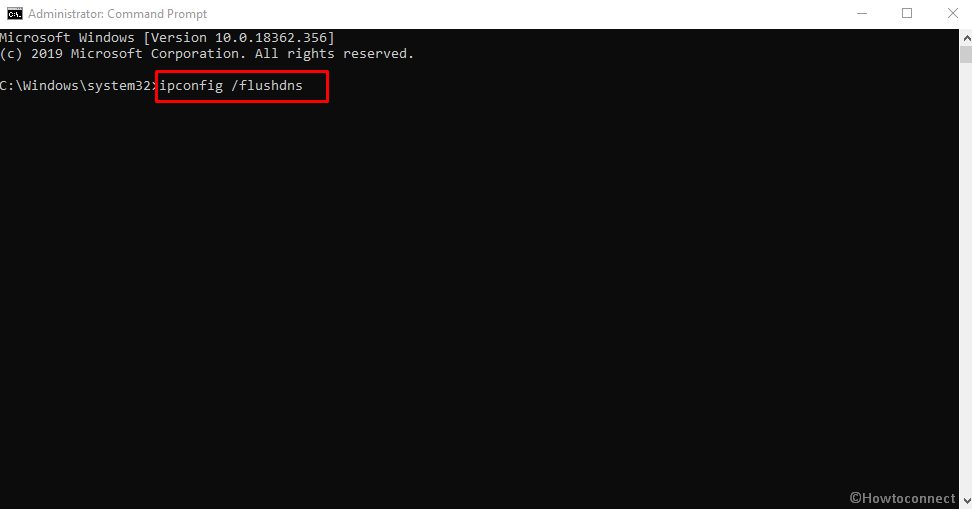
After completion, you will find a message stating that the DNS cache entries are cleared.
6] Rename or delete SoftwareDistribution folder
When you rename or delete the software distribution folder, Windows will be unable to find and the same Windows update will be forced to freshly-installed. It gives a non-corrupt and clear start in case there was something wrong earlier, resolving error 0xc1900130.
The folder we are referring to here can be found in the following location on your Windows.
C:\Windows\SoftwareDistribution
- First, reach out to the C: drive in This PC (assuming that this is your installation “drive”). Open it through a double click.
- Then locate Windows folder and launch.
- Finally, scroll through and see the Folder named SoftwareDistribution.
- Open the command prompt with administrative authority as you have done in the previous method.
- In the black window, copy-paste following commands one by one and press enter after each.
net stop wuauserv

net stop bits

rename c:\windows\SoftwareDistribution SoftwareDistribution.bak

net start wuauserv

net start bits
See if you stop encountering error message 0xc1900130 now. If the issue continues then enter the underneath commands one after another –
net stop wuauserv

net stop bits
- Now access the location of SoftwareDistribution folder as mentioned earlier.
- Select and delete all the contents residing here. You can see – Remove Items From C:\Windows\SoftwareDistribution\Download Windows 10.
- Run the following entries in the Command Prompt to restart the services you stopped.
net start wuauserv

net start bits
7] Clear Catroot2 Folder
Catroot located in the Windows system folder is very important while carrying out the installation of updates. When you receive the patches, this space stores the signature of the Windows Update package. Reset of the same has helped in numerous cases for fixing errors as 0xc1900130.
- Open Command Prompt as an administrator (discussed earlier).
- Paste the following entries and hit Enter there to reset the folder –
net stop cryptsvc

md %systemroot%\system32\catroot2.old

xcopy %systemroot%\system32\catroot2 %systemroot%\system32\catroot2.old /s
- Then, start the services back with this entry –
net start cryptsvc
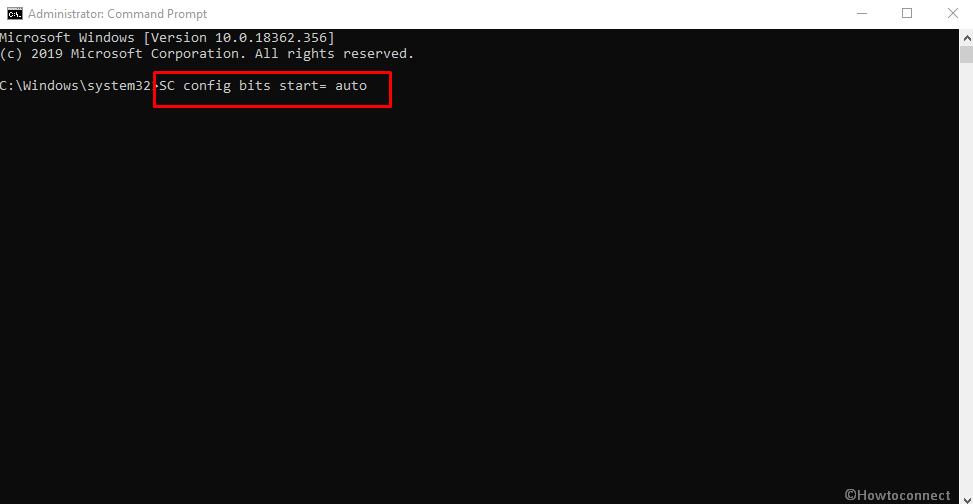
8] Get Windows Update service working
Error 0xc1900130 During Windows Update also arises because of the Service that stops working. So you need to start it and assign a correct startup type to deal with the issue.
- Launch elevated command prompt.
- Type the beneath syntax and one at a time and press enter –
SC config bits start= auto

SC config cryptsvc start= auto

SC config trustedinstaller start= auto
- Exit the Command Prompt and reboot your PC
Methods:
1] Repair internet connection
2] Simply Restart computer to fix 0xc1900130 update error
3] Run Windows Update Troubleshooter
4] Manually download the latest Windows updates
5] Reset DNS Cache
6] Rename or delete SoftwareDistribution folder
7] Clear Catroot2 Folder
8] Get Windows Update service working
That’s all!!