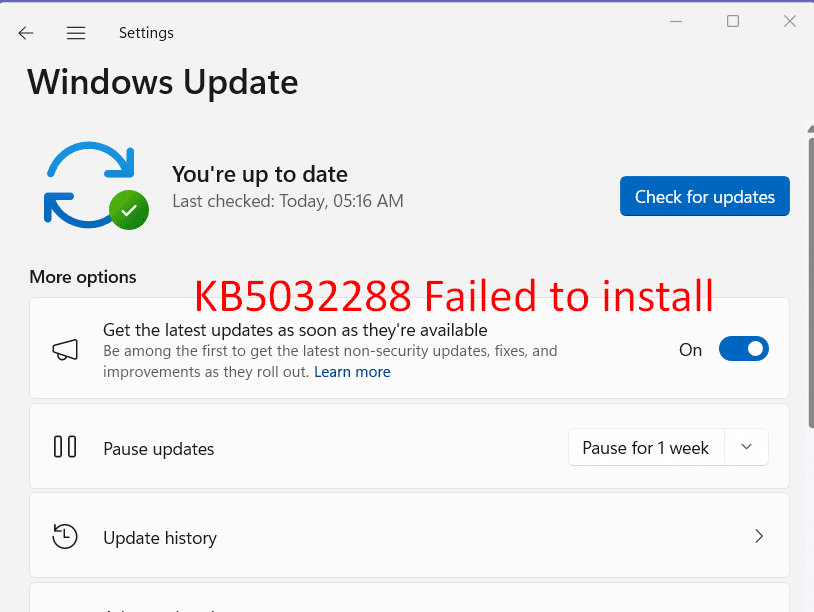
The LCU preview 04/12/2023 for Windows 11 23H2 introduces important improvements in Copilot and various bug fixes but several users can not receive this. KB5032288 failed to install issue occurs either with error or without error. In some cases, the Windows update gets stuck and undo installation after restarting computer. But in other, certain error codes appear when trying to install this cumulative update preview.
KB5032288 not installing issue seems to appear because of damaged Windows update cache, meddle with third party programs, wrong services status, and more. Furthermore, insufficient free space, incorrect DNS addresses, and flaws in system files may be responsible for the problem. Thankfully, the error can be dealt with so follow the methods sequentially and get rid of this:
Table of Contents
KB5032288 Failed to install in Windows 11 23H2
Here is how to fix KB5032288 Failed to install in Windows 11 23H2:
Install the Windows Update Manually
Manually applying this LCU can be a game-changer in resolving these persistent issues. Using this hands-on approach empowers you to deal with errors as they arise, resulting in a smoother and more efficient Windows 11 23H2 experience. Follow these steps:
- Head to Microsoft’s Update Catalog.
- Select the version aligning with your system specs.
- Download and install the corresponding update.
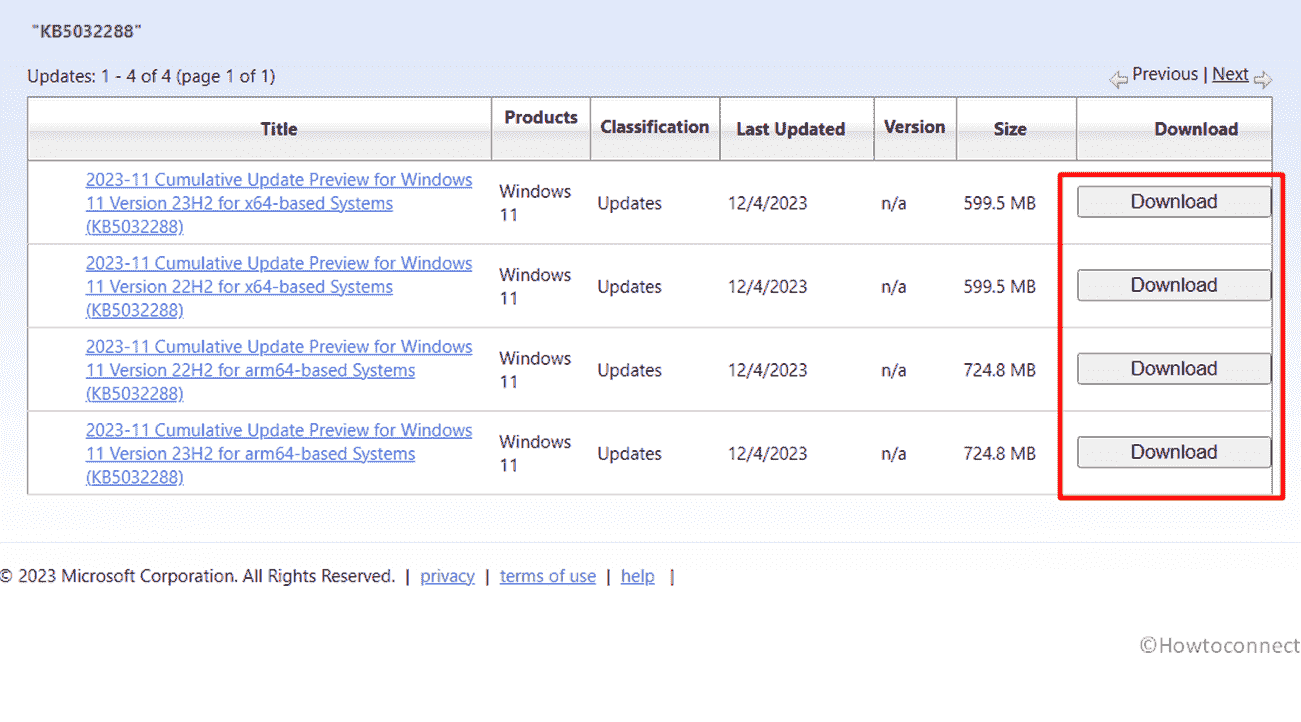
- Restart your system for the changes to take effect.
See: Fix KB5032190 failed to install in Windows 11 23H2 and 22H2.
Use Windows Update Troubleshooter
Facing KB5032288 failed issue on your Windows 11? Try Windows Update Troubleshooter, it’s a built-in tool designed to tackle such glitches and get your updates back on track effortlessly. Moreover, it scans, identifies, and fixes problem disrupting your update flow.
- Navigate to Settings > System > Troubleshoot.
- Click on Other troubleshooters.
- Locate Windows Update in the list.
- Click on Run.
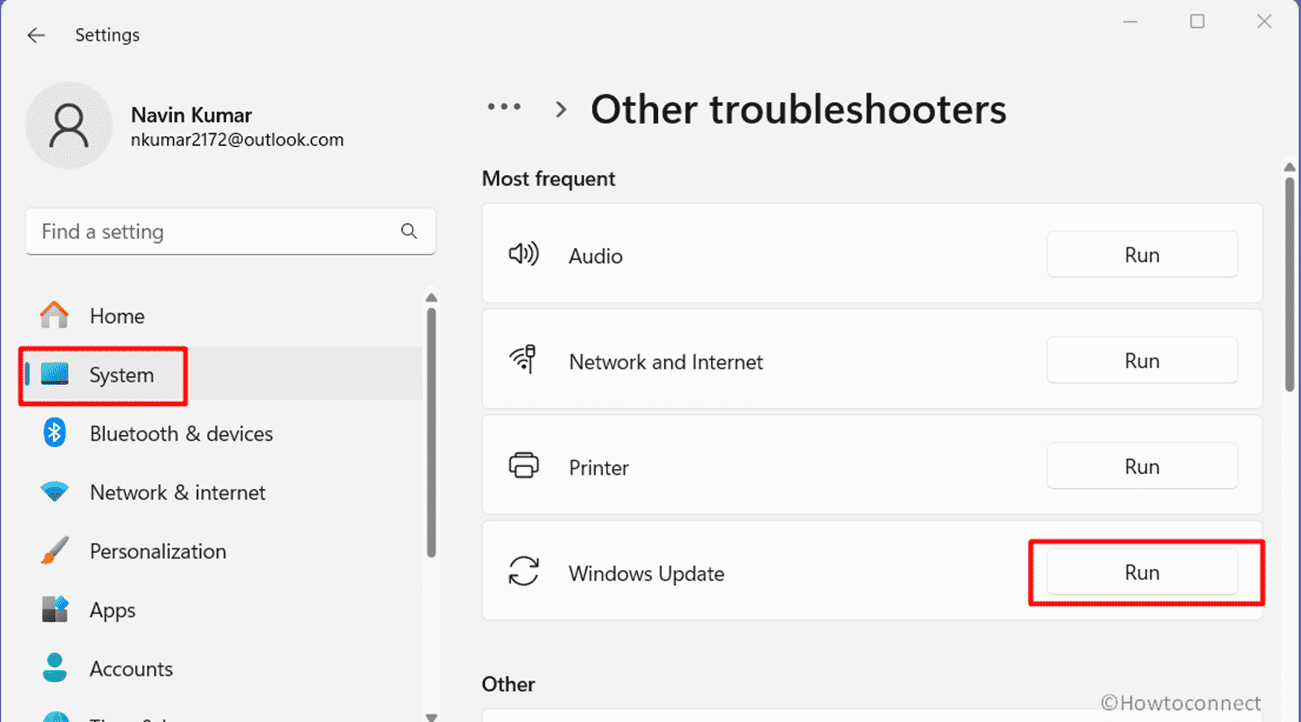
- Let the tool diagnose, fix issues, clear cache, and check for updates.
- Restart your computer and recheck for updates.
Run SFC and DISM Command line utiilities
SFC and DISM commands are built-in tools that act as digital-first responders, scan and repair corrupted system files, and fix Windows image issues. Furthermore, running these commands is like a digital clean-up crew, ensuring your system operates smoothly and minimizing the aforementioned KB5032288 Failed update error:
- Launch Command Prompt as admin.
- Enter the command below and press Enter:
SFC /SCANNOW - Wait for completion.
- Run the following commands one by one:
DISM /Online /Cleanup-Image /CheckHealth
DISM /Online /Cleanup-Image /ScanHealth
DISM /Online /Cleanup-Image /RestoreHealth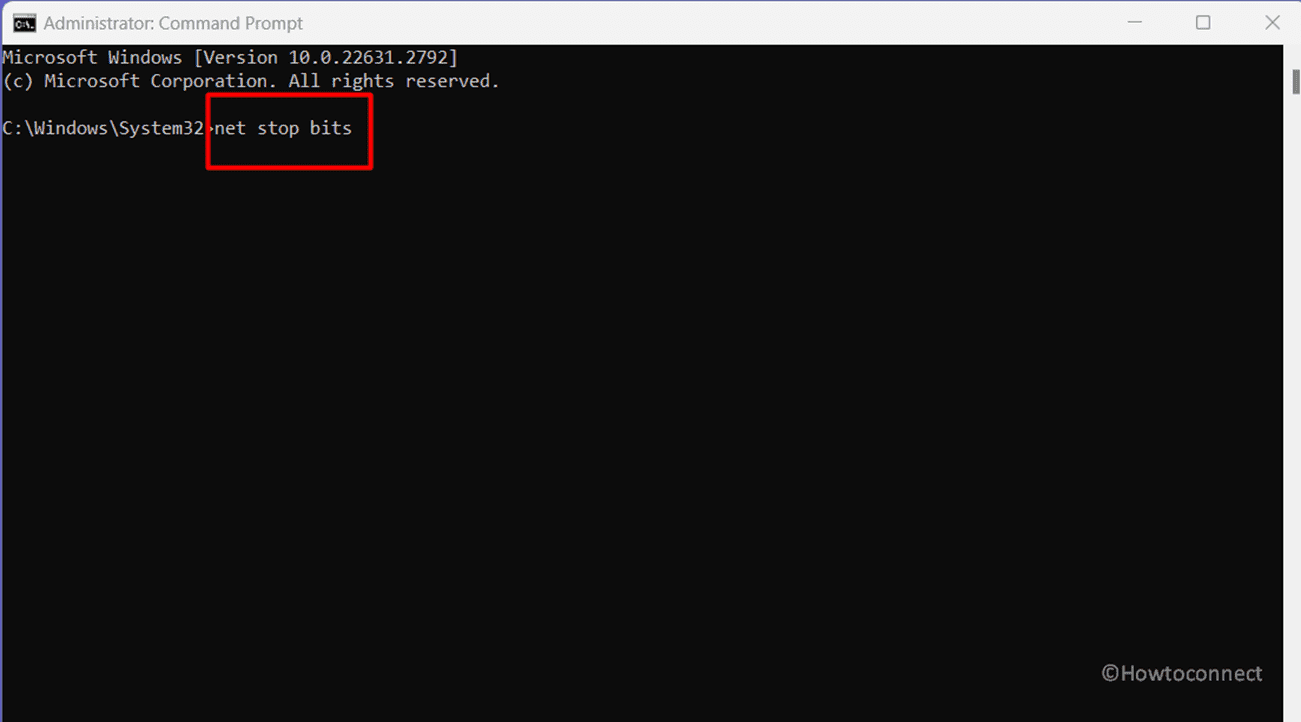
- Allow the process to conclude.
- Restart your PC.
Run Disk Cleanup
Another simple solution is to clear your disk space which involves removing unnecessary files and creating room for crucial updates. By freeing up space, you pave the way for smoother system operations and reduce the risk of KB5032288 failed to install update errors. Check out the steps mentioned below:
- Press Win + S and search for Disk Cleanup.
- Pick your drive (typically C:).
- Target Windows Update Cleanup and sections like Temporary Files.
- Hit OK to clear the selected categories.
Reset the Windows Update Components
Consider resetting the update components for a quick solution as this process acts as a digital refresh, resolving potential conflicts and paving the way for seamless updates. Let’s dive into resetting Windows update components and wave goodbye to such pesky issues:
- Launch Command Prompt as Administrator.
- Copy and paste the commands below, and press Enter for each:
net stop bits
net stop wuauserv
net stop appidsvc
net stop cryptsvc
Del “%ALLUSERSPROFILE%\Application Data\Microsoft\Network\Downloader\*.*”
rmdir %systemroot%\SoftwareDistribution /S /Q
rmdir %systemroot%\system32\catroot2 /S /Q
regsvr32.exe /s atl.dll
regsvr32.exe /s urlmon.dll
regsvr32.exe /s mshtml.dll
netsh winsock reset
netsh winsock reset proxy
net start bits
net start wuauserv
net start appidsvc
net start cryptsvc
- Restart your PC.
Pause or Disable Third-party Antivirus
If you are still battling with the KB5032288 failed to install issue, it’s time you temporarily disable your third-party antivirus, given its protective measure it may prevent certain Windows update files from running smoothly and leading to such an issue. Follow these steps:
- Locate the antivirus icon in the system tray.
- Right-click on the icon.
- Find and choose Disable or Pause.
- Set a duration or select Until I turn it back on.
- Confirm your choice.
- Install the Windows update.
- After installation, re-enable the antivirus by right-clicking the icon and selecting Enable or Resume Protection.
Restart Vital Services
Think of services as the unseen architects of your computer’s functionality. Addressing the installation challenges of KB5032288 in Windows 11 23H2 often involves restarting key services, particularly those linked to updates. By following these steps, you should encounter minimal trouble installing the update:
- Enter Services in Windows search, then press Enter.
- Locate Background Intelligent Transfer Service (BITS).
- Right-click and choose Restart if active.
- If inactive, double-click and set the Startup type to Automatic.
- Click Start, Apply, then OK.
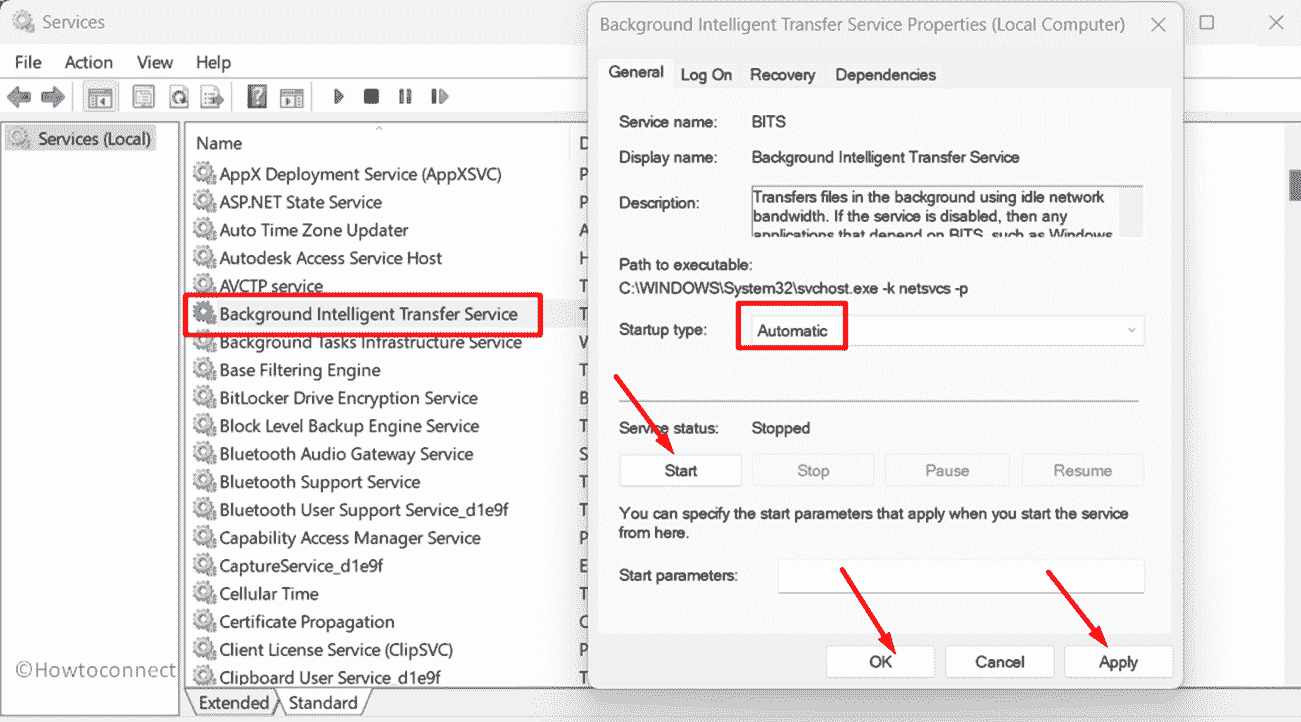
- Repeat for Windows Update and Cryptographic services.
Look for a better Internet Connection
Sometimes checking your Internet connection can be one of the easiest fixes to the aforementioned problem, all you need to ensure is you have a stable connection without any frequent obstructions:
- Power off the router for at least 10 seconds.
- Restart the device, reconnect to the internet, and check for updates.
If the internet connection is not working or creating any severe issues then reset it:
- Press Winkey+I.
- Navigate to Network & Internet.
- On the right side, scroll and click Advanced network settings.
- Opt for a Network reset.
- Click Reset now.
- Confirm with a Yes.
- After completion, attempt the installation again.
Clean Windows Update Directory
Another nifty way you can try to resolve this issue is by resetting the Windows Update Directory, where, you need to clear out old files and grab brand-new ones from Microsoft’s server. Here’s how:
- Press Windows + R.
- Type services.msc and press OK.
- Access the Windows services console.
- Find Windows Update, right-click, and choose Stop.
- Navigate to C:\Windows\SoftwareDistribution\Download.
- Delete all files and folders; new ones will be fetched from Microsoft.
- In the services console, locate the Windows update service, right-click, and choose Start.
- Open Windows Update Settings and search for updates.
Adjust DNS Settings
Last but not least, another potential solution lies in tweaking your DNS settings. By adjusting these crucial network parameters, you can often circumvent installation roadblocks and ensure a smoother update process. Let’s explore the steps to fine-tune your DNS settings and pave the way for a seamless Windows 11 experience:
- Press the Windows key + R.
- Type ncpa.cpl and press OK.
- Right-click the active network adapter, and select properties.
- Choose Internet Protocol version 4 (TCP/IPV4), and click properties.
- Opt for the radio button, set Preferred DNS to 8.8.8.8, and Alternate DNS to 8.8.4.4.
- Alternatively, use 1.1.1.1 and 1.0.0.1 for Cloudflare.
- Then, click OK.
- Retry Windows Update.
Execute In-place upgrade
Another way to settle the hurdles with Windows updates is to rely on In-place upgrade. If the previously mentioned methods fall short, this tool can navigate you through the challenges of KB5032288 failed to install issue on Windows 11 23H2.
- Navigate to this link.
- Scroll down the section – “Download Windows 11 Disk Image (ISO) for x64 devices”.
- Click on the “Select Download” drop-down and pick “Windows 11 (multi-edition ISO for x64 devices)”.
- Then click on the button – Download Now.
- Select “Choose one” and determine a language.
- Then, click Confirm.
- Your selections will be validated now; select “64-bit Download”.
- Reach the folder where ISO file is saved.
- Right click on the file named Win11_23H2_Language_x64.iso and choose “Mount”.
- Then, right-click on the setup.exe and select Open.
- Select Yes on the verification dialog.
- Once the Install Windows 11 wizard is open, click Next.
- Permit the license agreement by choosing Accept.
- Check the option Keep personal files and apps, on Ready to Install window.
- Finally, select Install and allow the process to complete.
Methods:
Install the Windows Update Manually
Use Windows Update Troubleshooter
Run SFC and DISM Command line utiilities
Run Disk Cleanup
Reset the Windows Update Components
Pause or Disable Third-party Antivirus
Restart Vital Services
Look for a better Internet Connection
Clean Windows Update Directory
Adjust DNS Settings
Execute In-place upgrade
That’s all!
