The latest KB5094126 launched in the June 2026 update, offers an array of features, including security fixes and performance improvements for Windows 11 24H2 and 25H2. Now, error 0x800f0920 usually occurs when Windows Update cannot complete the installation process. The usual allotted time for the Windows Installer service to complete the update installation is 15 minutes, upon failure of which the system reverts back to the old state.
By following the methods mentioned in this article, you will be able to fix the KB5094126 Install error 0x800f0920 in Windows 11.
Method-1: Fix problems using Windows Update
- In the Search bar, type Settings.
- Go to System.
- Scroll down and click on Recovery.
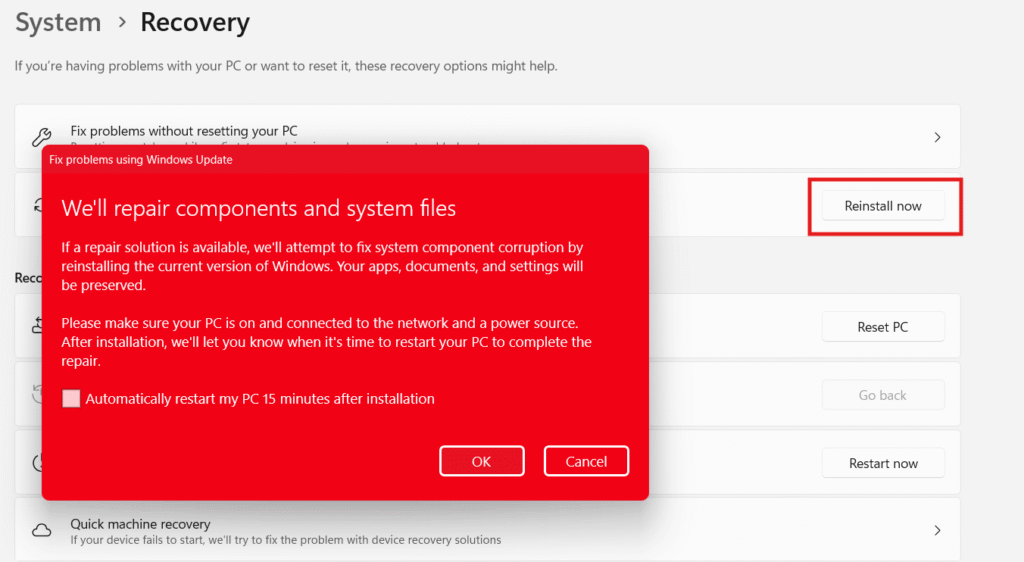
- Select Reinstall Now option near Fix Problems using Windows Update.
- Click Ok when the pop-up appears.
- Now, the Windows Update section will show that the system is checking for updates. A repair version of Windows 11 compatible with your Windows version (24H2 or 25H2) will be downloaded.
- Wait for the download to finish, then click the Restart Now button.
- After restarting, open Windows Update on Settings.
- Now you can check for updates and install the security patch.
Method-2: Resetting Windows Update components
- Click the Search button.
- Type cmd.
- Right-click on the Command Prompt. Select Run as administrator.
- In the pop-up window, you can press Yes.
- You can reset the Windows Update components by typing the commands below in the Command Prompt, one line at a time and pressing Enter.
net stop bits
net stop wuauserv
net stop CryptSvc
ren %systemroot%\softwaredistribution softwaredistribution.bak
ren %systemroot%\system32\catroot2 catroot2.bak
net start bits
net start wuauserv
net start CryptSvc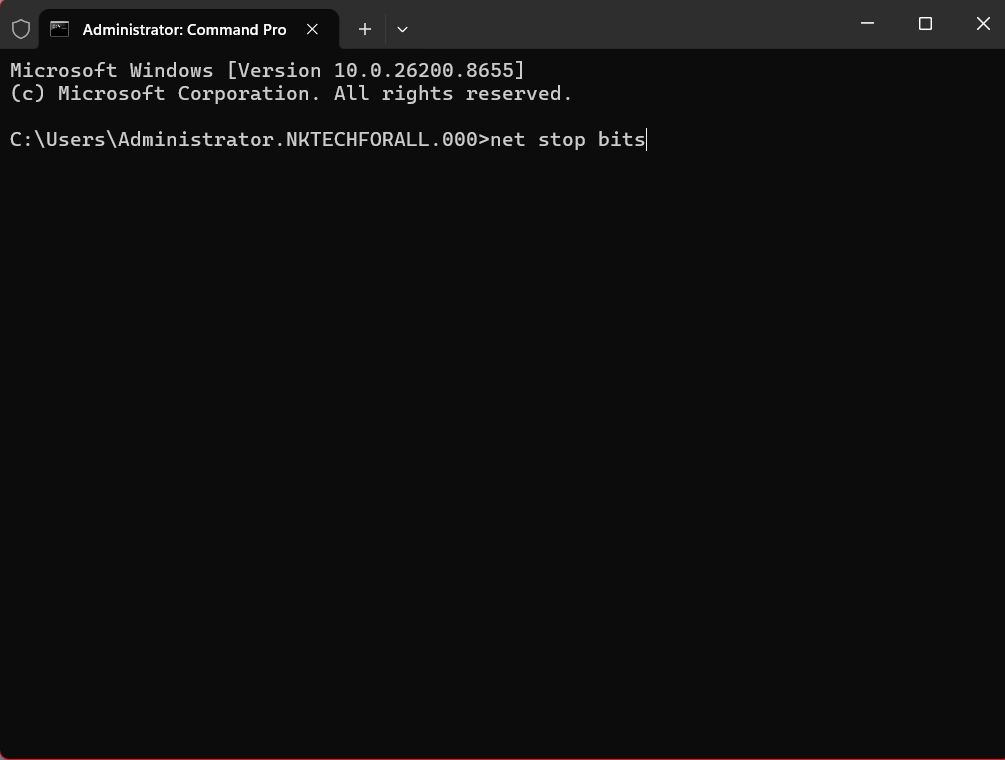
- After running the commands one by one, close the Command Prompt.
- Close the other running tasks and restart the system.
- You can check for updates in the Windows Updates section on Settings.
Method 3: Modifying the Service settings
Method-3: Modifying the Service settings
- Click the Search button.
2. Type Services.
2.1. In the Services menu, navigate to the Windows Update section.
2.2. Right-click on the Windows Update option to select Properties.
2.3. In the Windows Updates Properties pop-up box, set the Startup type to Automatic. Click Apply.
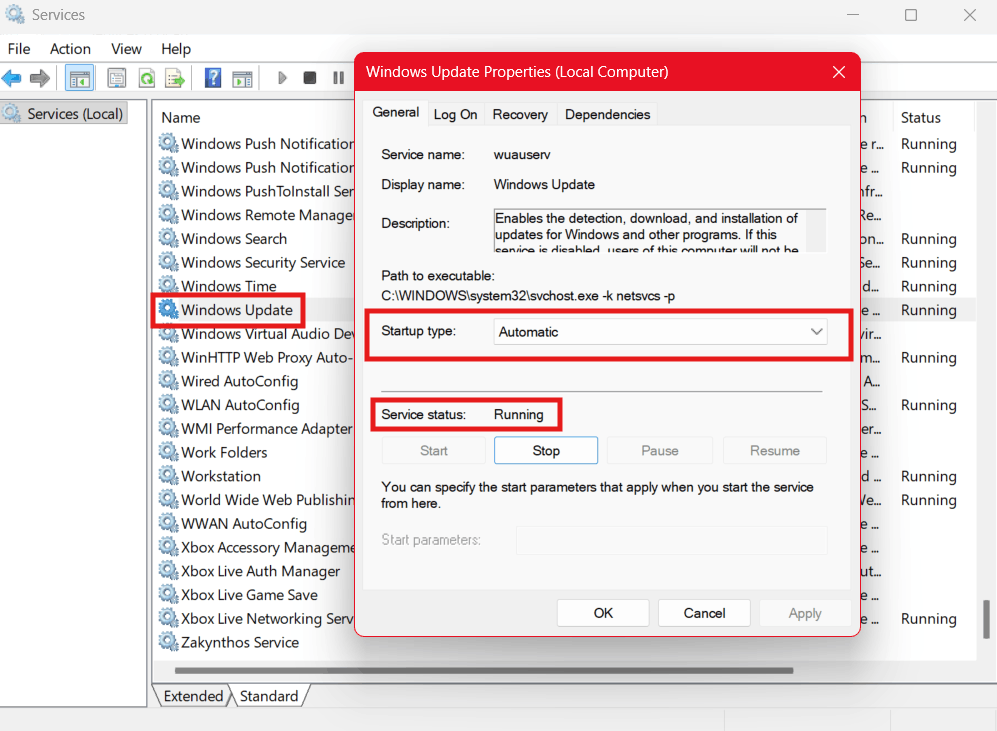
2.4. Click on Start if the Service status is Stopped.
2.5. Click Ok.
3. In the Services menu, look for Background Intelligent Transfer Service.
4. Repeat Steps 2.2 to 2.5 for the Background Intelligent Transfer Service.
5. Now in the Services menu, look for App Readiness Service.
6. Repeat Steps 2.2 to 2.5 for the App Readiness Service.
9. After completing the above steps, close the Services window.
10. Now, you can check for updates in the Windows Update section.
Method-4: Run SFC and DISM scans
- Click on Search.
- Type cmd.
- By right-clicking on the Command Prompt you canselect Run as administrator.
- Type the SFC /SCANNOW command in the Command Prompt and press Enter. Let the process achieve 100% completion.
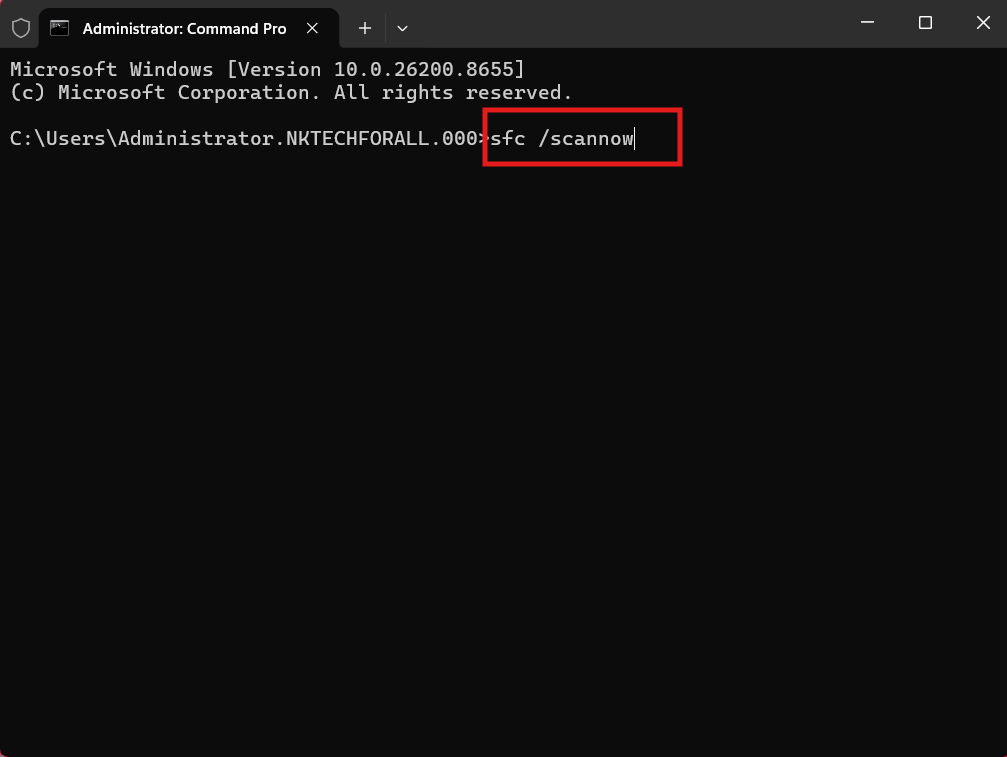
- Next, type DISM /Online /Cleanup-Image /Restorehealth in the Command Prompt and press Enter. Wait for 100% completion.
See: SFC /Scannow, DISM.Exe, CHKDSK Windows 11 or 10
Method-5: Install the update from Microsoft Update Catalog
- Open the link https://www.catalog.update.microsoft.com/Home.aspx.
- TypeKB5094126 in the Search bar on the site.
- From the list of results, click the file compatible with your system. For this you need to know the Windows version and system architecture. If not sure:
- In your system, click on Start.
- Click Settings.
- Go to System.
- Scroll down and select About.
- Here, you will find information about the Windows version (24H2 or 25H2) and architecture (x64 or ARM64).
- Now you can download the compatible file from the Windows Update Catalog.
- Click on the link that includes KB5094126.
- Once the download is completed, you can right-click the just-downloaded MSU file.
- Select Open.
- Follow the on-screen instructions on your computer and install the updates.
Method-6: In-place upgrade
If you have tried all of the above-mentioned methods and yet nothing worked, you need to perform an in-place upgrade. For in-place upgrade:
- Open the link https://www.microsoft.com/en-us/software-download/windows11 to download Windows 11.
- Navigate and find Download Windows 11 Disk Image (ISO) for x64 devices. There is also an option for Windows 11 ISOs for Arm64 devices. Select as per your system architecture (x64 or ARM64).
- Select product language when prompted. If not sure, you can find product language by the following:
- Click on Search.
- Type Settings.
- Scroll down and select Time and language.
- Click on Language and Region.
- You can see the product language at the Window Display Language option.
- Select the same language as the product language in the prompt window.
- Press Confirm.
- Select Download.
4. From Downloads, right-click the recently downloaded ISO file. Click on Mount.
5. On the Open File Security Warning pop-up, click Open.
6. Right -click setup.exe. and click Open.
8. Uncheck the box at the end of the Install Windows 11 window. This can save considerable time in the process of completion.
9. Accept the Notice and License Terms.
10. Click Install.
11. Wait for the installation process to be completed. Your system will restart a couple of times.
12. Windows 11 will be installed completely, including the security updates.
If you follow the above-mentioned methods, you must resolve KB5094126 Install error 0x800f0920 in Windows 11.