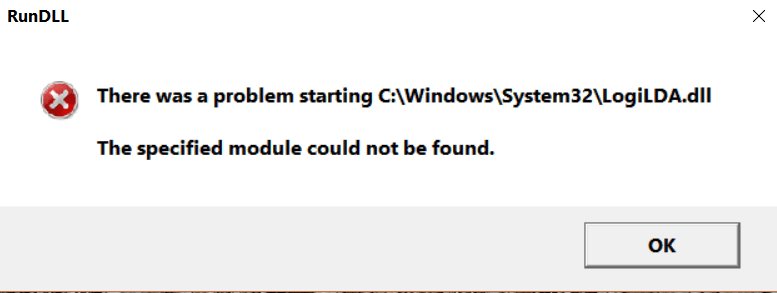
If you have recently upgraded, you may encounter LogiLDA.dll – The specified module could not be found in Windows 10 during Startup. Generally, this issue appears when DLL file is missing or cannot open in your system. The main culprit behind this problem is Logitech Download Assistant.
You might have deleted it to fix LogiLDA.dll file but that won’t work in most of the cases. Therefore, we have researched a lot and find out most likely workarounds to resolve this dll issue. The full statement on the message is “There was a problem starting C:Windows System32 LogiLDA.dll The specified module could not be found”. See the screenshot of the error on your screen. Now let’s walk through the solutions –
Table of Contents
LogiLDA.dll – The specified module could not be found in Windows 10 Solutions
Here’s how to fix LogiLDA.dll – The specified module could not be found in Windows 10 –
Fix-1: Disable LogiLDA from Startup
As Logitech Download Assistant starts automatically when your computer boots so you need to stop it first. To do so follow the below steps –
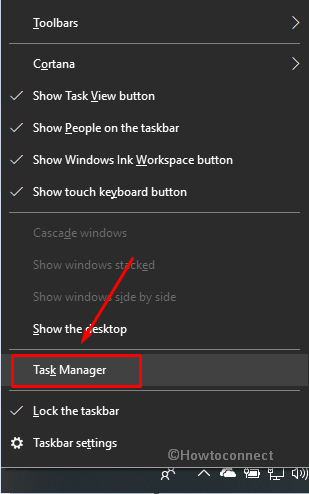
Step-1: Make a right click on Taskbar and Select Task Manager from the visible list.
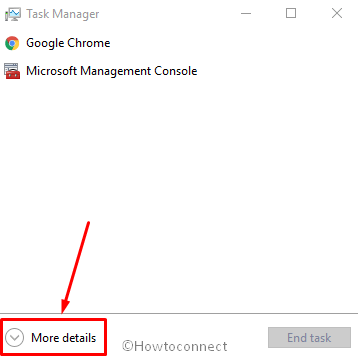
Step-2: Click on More details if it is not expanded already.
Step-3: Now shift to the Startup tab, Perform a right click on LogiLDA and Select Disable.
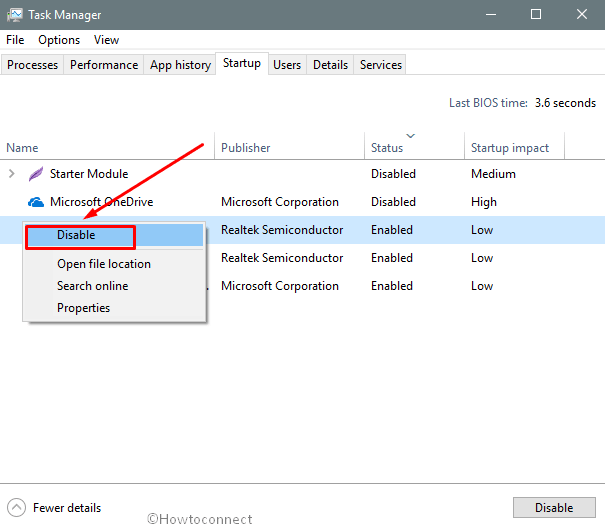
Do the same for other Logitech options that exist in the Name column.
Fix-2: Uninstall Logitech Setpoint Software
If above method didn’t work for you, then follow this workaround to fix logilda.dll Error in Windows 10
- Combinedly pressWin+R to open the Run dialog.
- Now type appwiz.cpl in the available space and hit Enter on your keyboard.
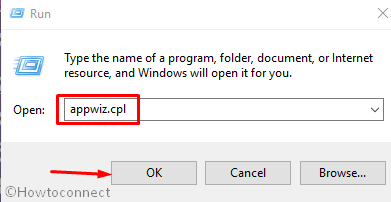
- Locate Logitech SetPoint from the list located under Uninstall or change a program.
- Do a right click on Logitech SetPoint and Select Uninstall.
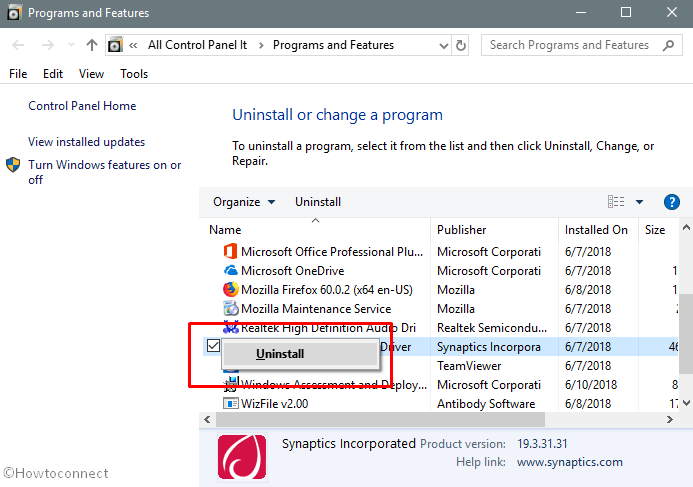
- Once it asks for final confirmation, Click on Yes in order to remove it from your system.
At last, Restart your PC and again download Logitech SetPoint from this link. Then install it again and check if the issue is resolved.
Fix-3: Remove Logitech Download assistant traces from Registry
After uninstalling Logitech Assistant if you are still experiencing the error then you need to delete the registry traces. Here is the procedure –
- Type run in taskbar search and when the result appears Press Enter.
- Now write down regedit in the text box do a click on OK. When a UAC pops up select Yes. You can also get the instructions here – How to Access Registry Editor in Windows 10.
- Navigate the following path in Registry Editor –
Computer\HKEY_LOCAL_MACHINE\SOFTWARE\Microsoft\Windows\CurrentVersion\Run- In the right pane, you will see Logitech Download Assistant key. Perform a right click on it and Select Delete.
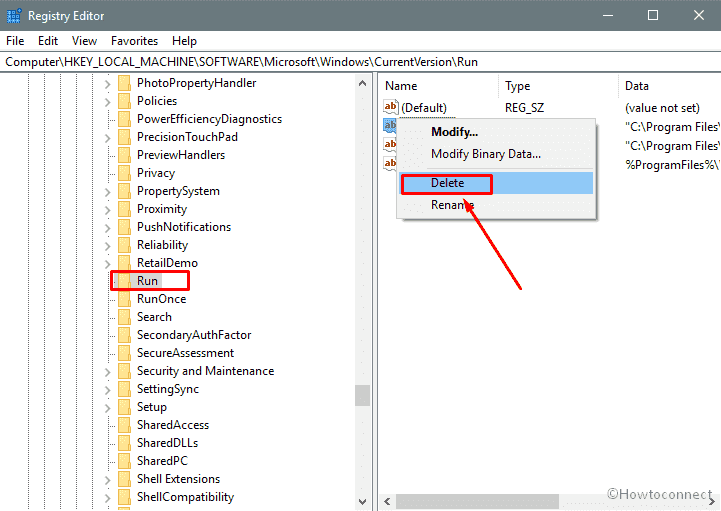
Fix-4: Erase Logitech Registry key with Batch file
You can also remove the registry key of Logitech Download assistant with a batch file. Here’s how –
Press Winkey, type notepad and then press Enter.
Now Copy the following text by simply Pressing Ctrl+C simultaneously –
echo Startecho #echo ######################## Default dirctory for x86 x64 ########################echo #echo this command is default system32 directory for x86 OS or x64 OScd %windir% & cd system32reg delete “HKCUSoftwareMicrosoftWindowsCurrentVersionRun” /v “Logitech Download Assistant” /freg delete “HKLMSOFTWAREMicrosoftWindowsCurrentVersionRun” /v “Logitech Download Assistant” /fecho #echo ######################## Change the dirctory for x64 ########################echo #echo this command is x86 application’s registry for x64 OScd %windir% & cd syswow64reg delete “HKCUSoftwareMicrosoftWindowsCurrentVersionRun” /v “Logitech Download Assistant” /freg delete “HKLMSOFTWAREMicrosoftWindowsCurrentVersionRun” /v “Logitech Download Assistant” /fecho End
Paste it in the notepad by Pressing Ctrl+V and do a click on File and Select Save as.
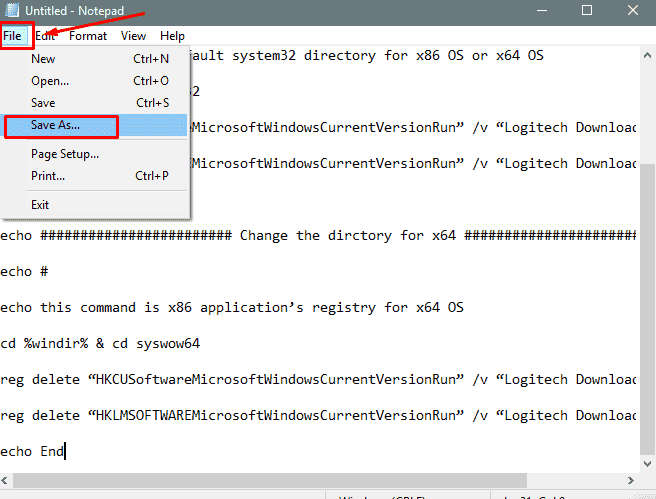
Type Logitech.bat in the File name box. Now perform a click on Save.
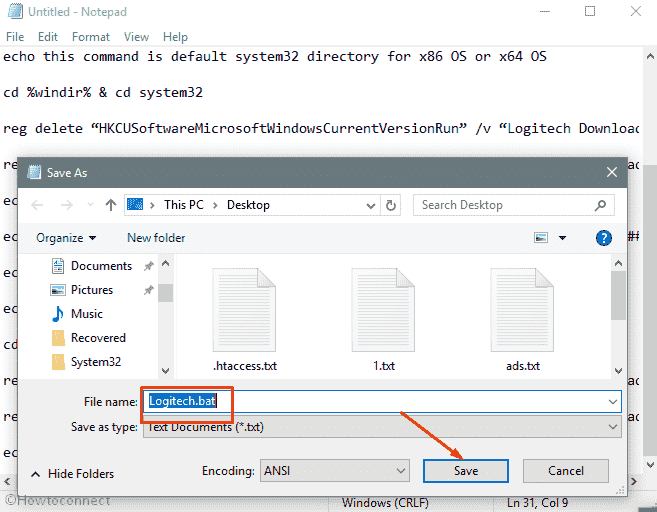
In the end, do a right click on Logitech.bat you just saved and select Run as administrator.
Fix-5: Reinstall Logitech mouse Driver
As a substitute of the above fix, you can try to reinstall Logitech Driver. Here’s how –
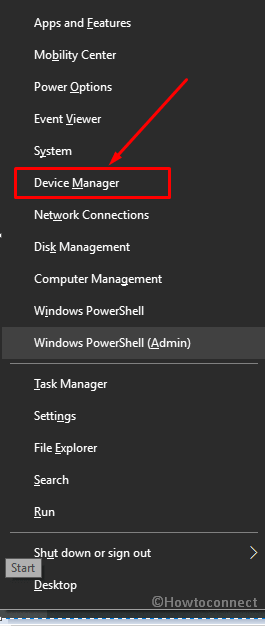
- Perform a right click on Start icon and choose Device Manager.
- Once it appears, locate Mice and other pointing devices and do a double click on it to expand the listed device.
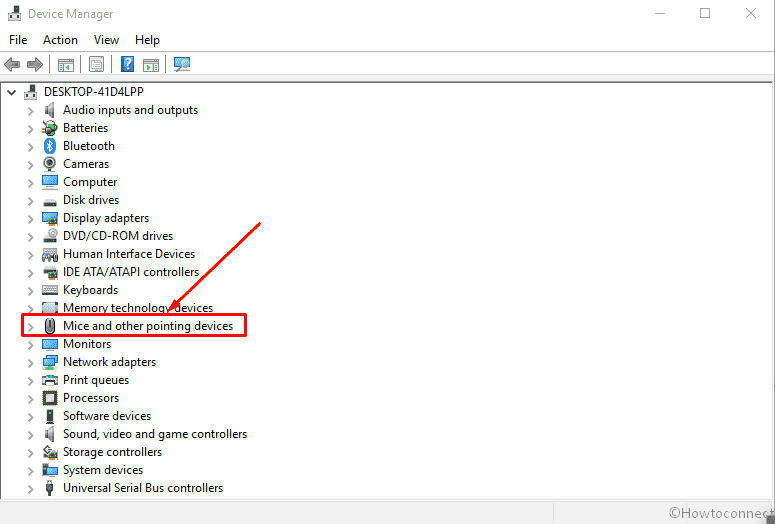
- Do a right click on “Logitech HID” mouse furthermore pick Uninstall device.

Now Restart your computer and allow the system to reinstall the driver automatically.
That’s all. Hope this context helped you to resolve your issue.
