Annoyance during Windows update is quite a common thing as the process can anytime fail and show some error. 0x8007010B is such an issue that appears when trying to install a security or functional update.
The issue prevents the computer from installing the patch or build whatever it is and throws a message – Update failed. Some users might see “0x0000010B, ERROR_DIRECTORY The directory name is invalid” when the error occurs. Main reasons for this error are not working update cache, missing system resources, broken Windows image, or low disk space. Sometimes, buggy Windows update files may also cause error code 0x8007010B.
Windows 11 or 10 error 0x8007010b during trying to install
Here is how to Fix Windows 11/10 update Error 0x8007010B –
1] Run DISM Restore health tool
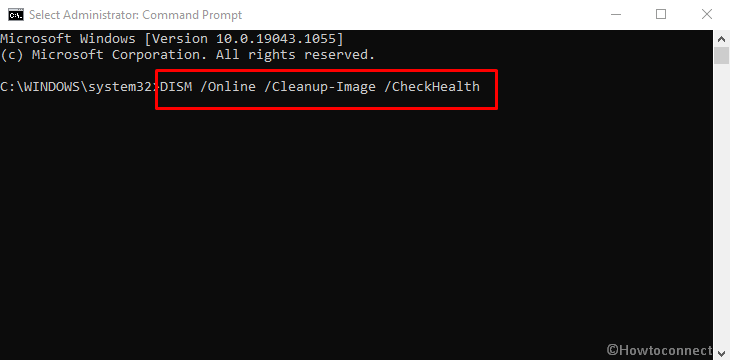
This update problem commonly appears when Windows image is defective and fails to install drivers, packages, and other components. DISM is the tool that repairs the problem using servicing commands and solves the error ending up in resolving this error code. Follow the steps –
- Hit the – Win+R.
- Type – cmd.
- Press – Ctrl + Shift + Enter.
- A user account control dialog will prompt up on the desktop, select – Yes.
- Once the command prompts appears, type the following codes one by one and hit enter –
DISM /Online /Cleanup-Image /CheckHealth

DISM /Online /Cleanup-Image /ScanHealth

DISM /Online /Cleanup-Image /RestoreHealth
- Running the tool may take some amount of time so wait patiently after running each command.
- Restart your PC and see if error code 0x8007010B is fixed.
2] Use System File Checker
In order to rectify Windows update errors sometimes, SFC utility works like a trick particularly when it occurs because of corrupt system files. Actually, malfunctioning or missing system resources might be a reason for blocking the update files from installing. So use the tool according to the following guidelines –
- Access elevated command prompt as explained in the above method.
- Type –
SFC /Scannow.
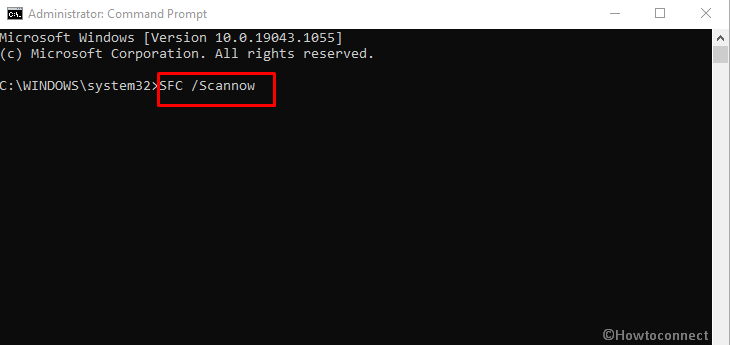
- Press the – Enter.
- When the repairing is finished, reboot your PC and check if the error code is solved and you can now install the update.
3] Perform CHKDSK
Windows update failed to install 0x8007010B error code might also occur because of either low space or bad areas in a disk. Thankfully, you can easily execute the CHKDSK tool is to check status and repair if any issue with the integrity of the filesystem. This will give you a way to install the patch without encountering the error code –
- Once more open the command prompt having administrator right (Click Start, type cmd.exe, and press Ctrl+Shift+Enter).
- Type –
chkdsk C: /f /r /x - Hit the Enter key.
- You will be asked to check the volume the next time the system restarts; select – Yes.
4] Reset Windows update
The most common cause behind Windows 11/10 update Error 0x8007010B is the broken update cache . Windows 10 as well as 11 stores the updates into C:\Windows\SoftwareDistribution\Download and when anything wrong with this folder throws the error code. However, you can reset the component using the following instructions –
- Download Reset_Windows_update
- Unpack the file and double click on WuReset2.0.bat.
- Once a CMD Window appears, press any key to continue.
- At last, reboot your PC and check for updates if it runs smoothly.
5] Download the update from Windows Update Catalog
If the error still persists, Windows update catalog provides all the patches and files rolled out time and again. Simply, download the relevant update (in the form of a standalone file) from there in MSU format and install it. You can take help from this post – How to Download and Install Update from Microsoft update catalog on Windows 11/10. Furthermore, you can follow the method –
For Windows 11
- First of all, Open Windows Settings (Win+I).
- Select Windows Update from left column
- Move to right and click on Update history.
- From the next page, note the KB number generating the error.
- Now, click this link and go to the catalog website.
- Paste the KB number you noted in the given box and hit the – Enter.
- Determine which file matches your system architecture and click Download from the right.
- An isolated page is prompted; click the link there.
- After downloading gets finished access its location.
- Right click on the .MSU file and choose – Install.
For Windows 10
Press – Windows + I.
Click – Update & Security.
Move to the right of appearing Windows Update page.
Click – View update history.
6] Windows update troubleshooter
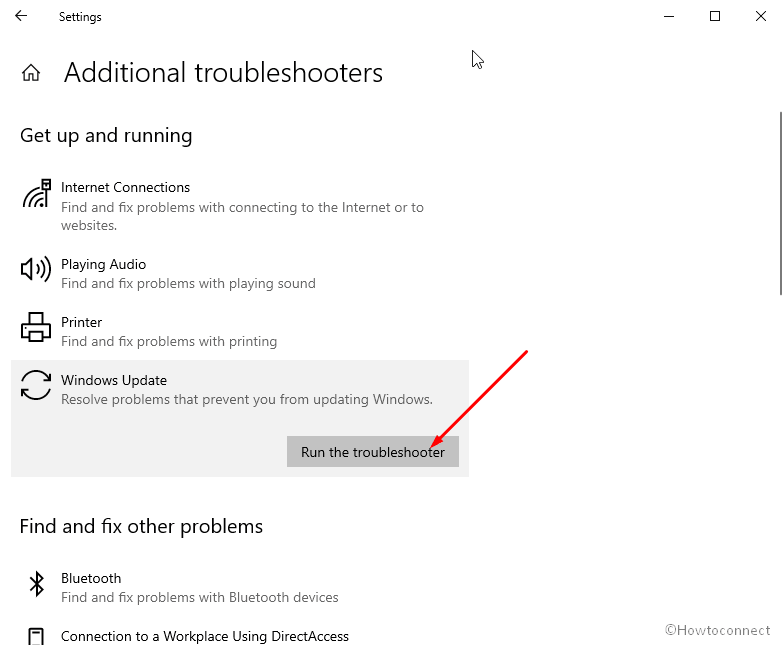
Error 0x8007010B sometimes can be fixed directly by running Windows update troubleshooter. The tool is a built-in Fixit resource from the operating system that helps you to diagnose and repair the issue. You are able to run this utility using only a few clicks by following below steps –
- Click on the – Start.
- Type – troubleshoot.
- Hit the – Enter.
- From the Settings page, click on – Additional troubleshooters. For Windows 11, click – Other troubleshooters.
- Next, Select – Windows update.
- Click – Run the troubleshooter or Run as in the following screenshot –
- The utility will Start detecting a problem if any and instruct you to follow some actions.
- Pursue till end to fix 0x8007010B and finally, restart the system.
7] Upgrade using the media creation tool
In case, all the solutions fail to work you are left with this option in which you will have to install the current version using media creation tool. This will upgrade the operating system where you will experience no hassle or any error on your computer. Keep in mind to have a backup of your data before advancing with this method.
- Navigate to – this page.
- Click – Download tool now.
- Double click on the .exe file of the tool and select Yes on User account control pop up.
- Accept the license terms.
- Select Upgrade this PC now.
- Click – Next.
- Windows Setup will download the files, Click – Install (ensure that Keep personal files and apps option is checked.
Methods list:
1] Temporary solution
2] Install Windows update
3] Uninstall Windows 10 21H11] Run DISM Restore health tool
2] Use System File Checker
3] Perform CHKDSK
4] Reset Windows update
5] Download the update from Windows Update Catalog and install
6] Windows update troubleshooter
7] Upgrade using the media creation tool
That’s all!!