Windows update is a crucial piece of programs that allows the system to download and install feature updates and security patches to help avoid any complications. But unfortunately, Windows 10 or 11 creates issues while receiving them. Update Error 0x8024a21e is one such problem that you might come across while trying to download or install an update.
Most of the update errors are not much labyrinthine and often get fixed with simple tweaks. In the below part, we have listed some methods that will easily fix 0x8024a21e error. Before you follow the diagnostics, check your internet connectivity to ensure it is not a metered connection furthermore not dropping. Restarting the system many times solely fixes any Windows update issue so also try this simple trick. Now go to the methods –
Windows 11 and 10 Update Error Code 0x8024a21e
Here is how to fix Windows 11/10 Update Error Code 0x8024a21e –
1] Check if BITS is running
Background Intelligent Transfer Service is a core component of Windows and without it, your system won’t be able to download update files from the internet. This service mainly lets the system establish a connection with HTTP or SMB file server whenever a program asks Windows to download or upload files. A system with disabled BITS service is more likely to throw an update error, therefore, check the status of the same and make sure it is running. To do so –
- Press – Win+R.
- Type in – services.msc.
- Click – OK.
- When the Services window shows up, locate Background Intelligent Transfer Service and double-click the same.
- Set the Startup type to Automatic.
- Click the Start.
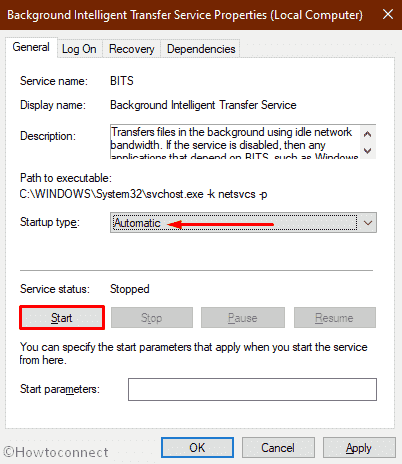
- Select Apply followed by – OK.
- Restart your device.
- Once the system powers up, press the – Win+I.
- Continue with – Update & Security.
- Move to the right and click the – Check for updates.
- Hopefully, this time you will be able to download and install the recent version of Windows.
2] Restore the default state of Windows update component
0x8024a21e might be the result of corruption in the Windows update component. Softwaredistribution folder stores all the files you receive through rollout but sometimes buggy or low coded programs cause to corrupt the directory. Similarly, catroot accumulates the signature of the update files. Any malfunction in both the folders might lead to the Windows update error.
When you reset Windows update, the system deletes all older cache, re-register the component, furthermore, re-establish the network connection. As a result, any issue that was causing error code 0x8024a21e goes away. To reset the component, follow the below steps precisely –
- Click the – Start.
- Write the – cmd.
- Select the – Run as administrator.
- Click Yes for the prompted User Account Control dialog.
- Copy the below syntax one at a time and then paste in the command prompt. Don’t forget to hit the Enter after each –
net start wuauserv
net stop cryptSvc
net stop bits
net stop msiserver
ren C:WindowsSoftwareDistribution SoftwareDistribution.old
ren C:WindowsSystem32catroot2 Catroot2.old
net start wauserv
net start cryptSvc
net start bits
net start msiserver
- After executing all the commands, exit the console.
- Reboot the PC and check if the issue persists.
3] Configure Windows update services to start automatically
Error code 0x8024a21e might appear if the services related to Windows Update are not set to start automatically. Configuring them to start automatically, may help to resolve the issue. For that –
- Open Command Prompt as administrator.
- Insert the following lines one after another into Command Prompt and press the Enter after every single –
SC config bits start= auto
SC config cryptsvc start= auto
SC config trustedinstaller start= auto
SC config wuauserv start= auto
- Close Command Prompt and thereafter restart the system.
4] Take help of Windows Update troubleshooter to fix 0x8024a21e error
To fix issues occurring while downloading and installing update files, Windows 10 and 11 has a built-in troubleshooter. The tool scans the system to find out what caused error 0x8024a21e and come up with a solution. Steps to run it are as followed –
For Windows 10 –
- Open Windows Settings (Win+I).
- Click the – Update & Security.
- Choose the – Troubleshoot.
- Move to the right.
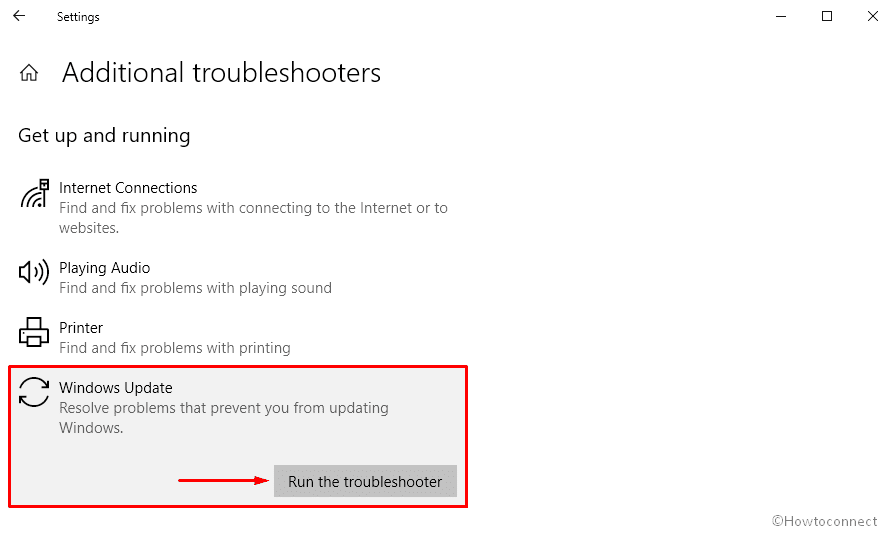
- Select the – Additional troubleshooters.
- Next, click the – Windows update.
- Finally, select the – Run the troubleshooter.
- After detecting the issues that are causing the update error, the utility will present a resolution.
- Click – Apply this fix.
- Wait for the tool to solve 0x8024a21e.
- Close the troubleshooter and then reboot Windows 11 and 10.
For Windows 11 –
Go to System > Troubleshoot > Other troubleshooters > Windows update > Run.
Run the tool to solve the issue.
Note – If Windows update troubleshooter doesn’t provide an automatic fix, follow the guidelines the utility rolls out after detecting problems.
Methods list
1] Check if BITS is running
2] Restore the default state of Windows update component
3] Configure Windows update services to start automatically
4] Take help of Windows Update troubleshooter
That’s all!!