Several users encounter the “You Cannot Shrink a Volume Beyond the Point” error while attempting to shrink volumes in Windows 11 and report the inability to shrink the volume at all or being restricted to a specific size reduction. The root cause lies in hidden Windows components requiring additional space which are not initially visible. In this case, Hibernation, System Protection, and Paging File must be temporarily disabled to resolve the issue instantly. If it does not work, you will have to go for critical methods to apply and get the solution.
Full error message when you encounter this error is “You cannot shrink a volume beyond the point where any unmovable files are located. See the “defrag” event in the Application log for detailed information about the operation when it has completed”. This shrink error in Windows 11 can be frustrating when attempting to manage disk space. That is where this article has you covered. Here, we will reveal the best possible and effortless methods to help you resolve the ‘cannot shrink a volume’ error. We have first enlisted the basic yet proven ways with detailed steps and screenshots followed by some advanced methods to make things convenient for you.
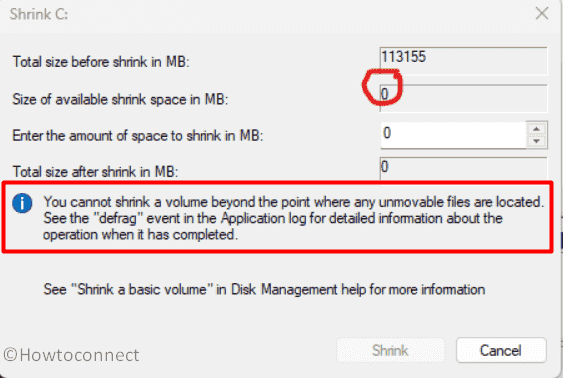
Table of Contents
You cannot shrink a volume beyond the point where any unmovable files are located
Here is how to fix You Cannot Shrink a Volume Beyond the Point error in Windows 11:
Make Hidden Files Visible
As mentioned earlier, some hidden components such as Hibernation, System Protection, and Paging File cause this issue most of the time.
That is why you first need to make them visible to your PC to disable them temporarily and shrink disk space. Here is how you can make them visible.
- Press “Win+E” to open “File Explorer”.
- Navigate to “View > Show”.
- Now, select “Hidden items”.
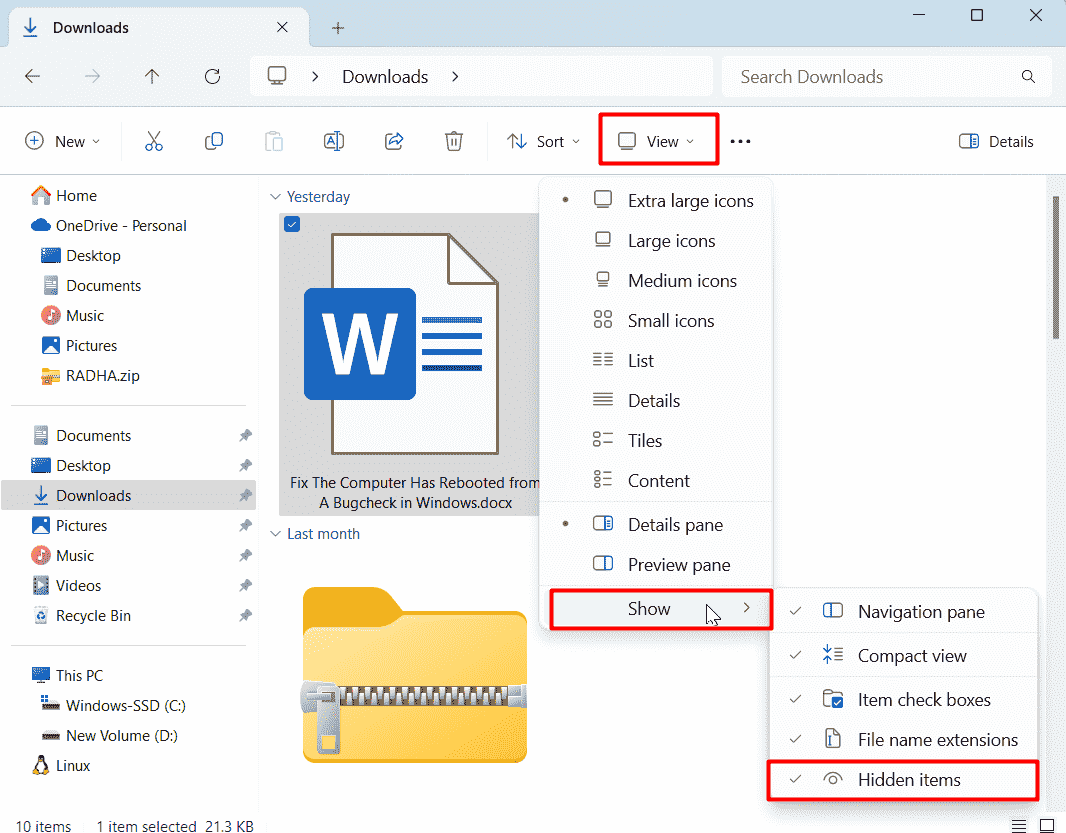
- Then, Click three dots (See more) and choose “Options” from drop-down.
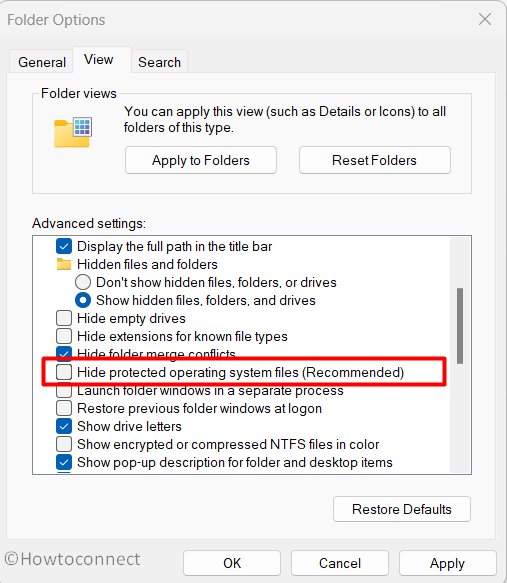
- Go to “View” and uncheck “Hide protected operating system files (Recommended)”.
- Finally, click “OK”.
Temporarily Disable the Hidden Files
Now that you have the hidden components visible, it is time to temporarily disable them to resolve the Shrink error. You have to disable System Protection, Hibernation, and Paging File.
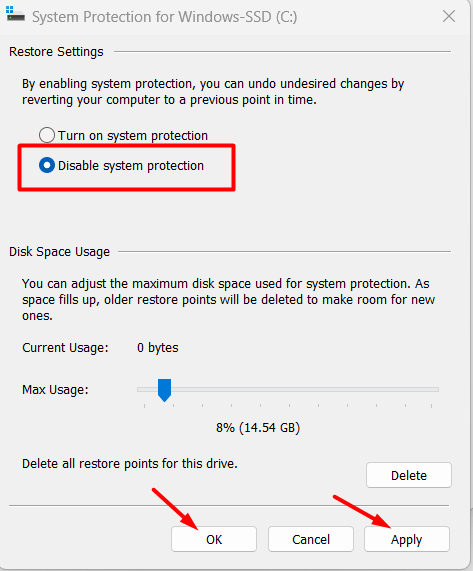
Here is how you can disable System Protection:
- Type “Control Panel” in your PC’s search bar and click on the result.
- You will see the “View by: Category” in the top-right corner of the screen. From here, click on “Category” and choose “Small icons”.
- Now, select “System”.
- Scroll down in the new window to find and click on “System protection”.
- Now, pick your system drive and click on “Configure”.
- Finally, choose “Disable system protection”, click Apply, and then “OK”.
Here is how you can disable Hibernation:
- Type “cmd” in your Windows search bar.
- Select the option “Run as administrator”.
- Click on “Yes” when the User Account Control appears.
- A command prompt will be visible to you where paste the
powercfg.exe /hibernate offcommand.
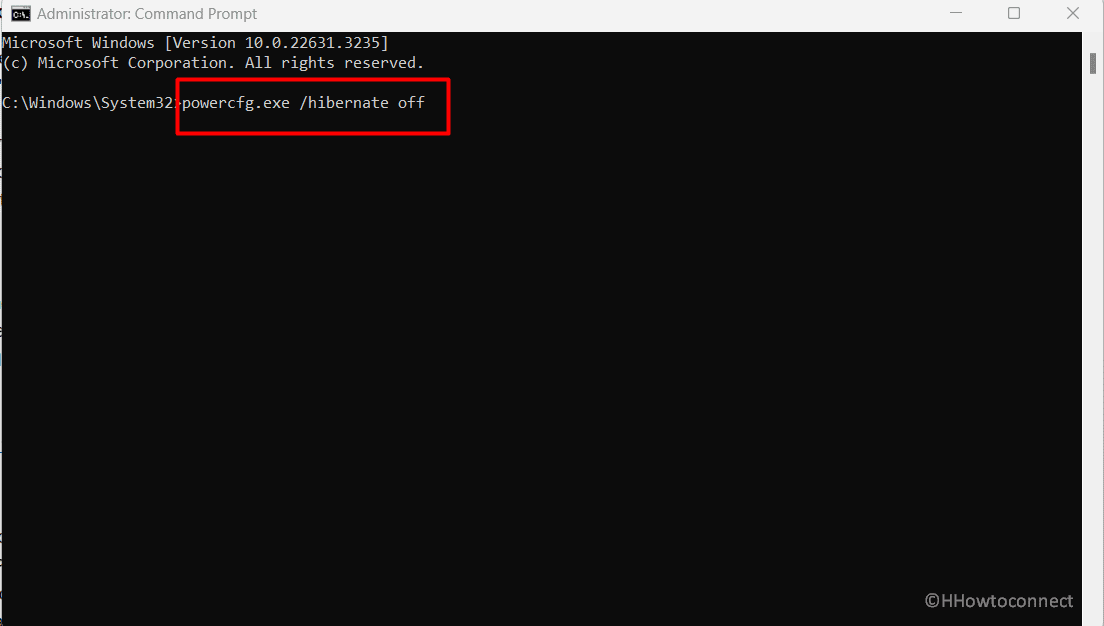
- Hit “Enter” and close it.
Read: How to Enable Hibernate in Windows 11 (3 Easy ways)
Here is how you can disable Paging File:
- Press “Winkey + R” and type %windir%\system32\SystemPropertiesAdvanced.exe.
- Press “Enter” to launch the System Properties window.
- Click on “Settings” situated under “Performance”.
- Now, go to the “Advanced” tab and click on “Change” situated under “Virtual Memory”.
- Then, uncheck “Automatically manage paging file size for all drives” and select the main drive.
- Check “No paging file” and click on “Set”.
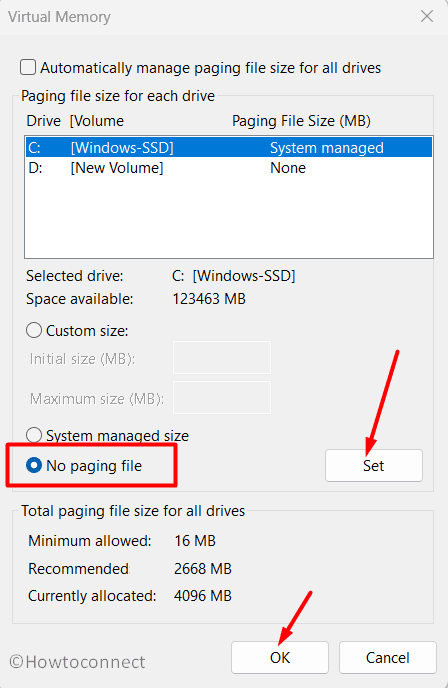
- Finally, click on “OK” and restart your computer to check whether the You Cannot Shrink a Volume Beyond the Point error is gone.
See: How to Tweak Paging File for better Windows 11 or 10 Performance
Consider Defragging the Drive
The defragging of your drive can come in handy to solve the You Cannot Shrink a Volume Beyond the Point error on your Windows if you haven’t found the solution applying the above methods. Here is the process to defrag your drive:
- Search for “defrag” in your search bar.
- Choose “Defragment and Optimize Drives”.
- Now, pick your main drive and click on “Optimize”. The optimization will take some time to be completed.
- Reboot your computer system now.
15 Ways to Defrag Computer in Windows 11 or 10
That’s all!!