Procedures and Shortcut to Take Selected Area Screenshot on Windows 10 with Steps. – Do you often capture screenshots using default tools on Windows 10? If so, then there is good news as Microsoft rolled down a new improvement through which you can directly capture a specific part of your screen. And you can perform so important work using just a hotkey.
Simply press the key combinations of Win + Shift + S and you are all set to Take Selected Area Screenshot on Windows 10. This method becomes possible because of the Build 15002, which combines OneNote feature to this OS Version.
Well, after snapping the specific region, you need to paste the content in either of the image editing tools. In addition, there is also an improvement in the Snipping Tool which makes it possible to create a shortcut for the same task. Let us now proceed to the steps and shortcuts now.
How to Take Selected Area Screenshot on Windows 10
Step 1 – First of all, press the combinations of Windows logo + Shift + S keys. This will at once turn the entire screen into dim white color.
Step 2 – Now, you will see the mouse cursor into a cross sign in at the middle of the screen.
Step 3 – Next, with the help of your mouse simply select the region whose screenshot you wish to take. This will take selected area screenshot and moreover, the content will get saved on a clipboard.
Note – Windows will not prompt to save the screenshot, however, by default, the content will be accumulated in the clipboard. For transformation of the screenshot into an image with required image format, you will have to take the support of certain image editing tool, for instance, Paint.
If you want the Old MS Paint then follow – How to Get Old MS Paint on Windows 10 Remove Annoying 3D Preview
Step 4 – Moving on, paste the captured region into an image editing tool. For example, launch WordPad or Paint app and use Ctrl + V keys to paste the content on the canvas.
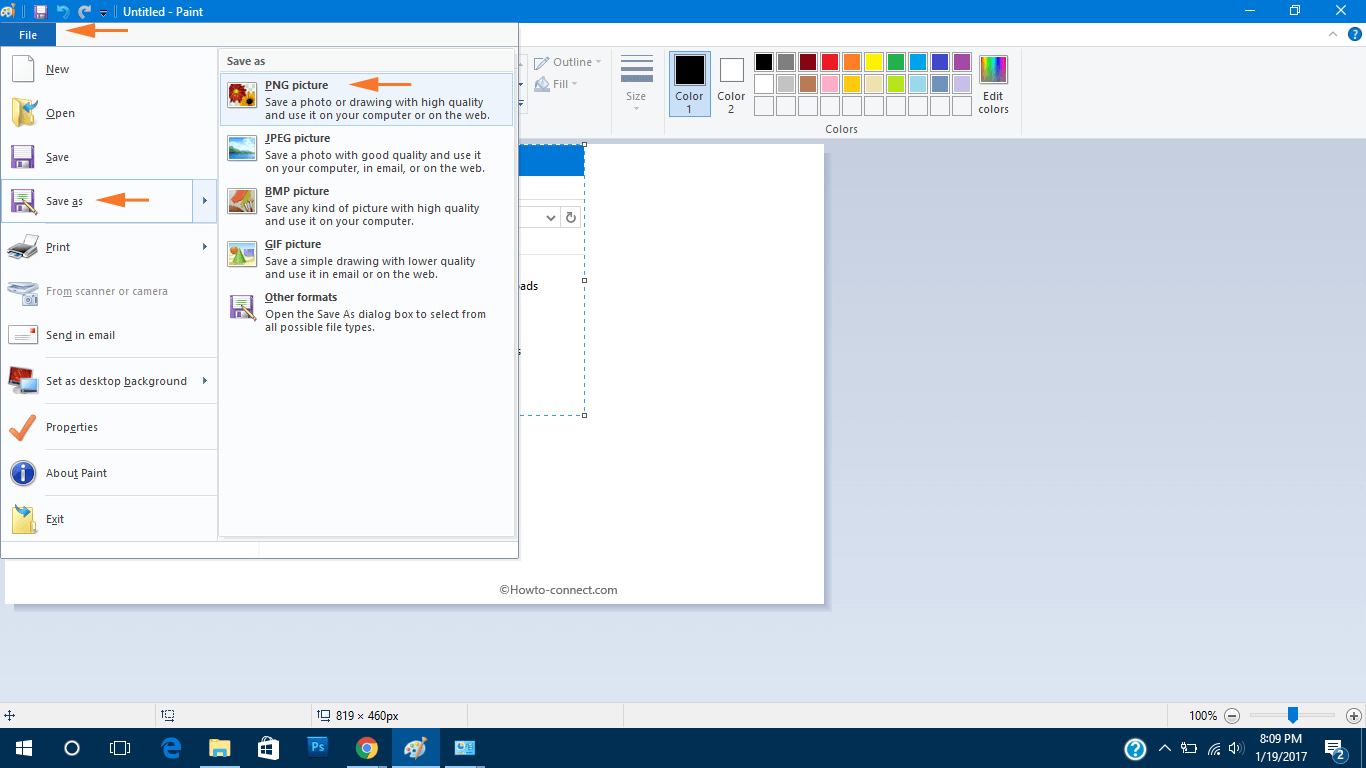
Step 5 – Now, gather the image in any supportable format by following File => Save as => PNG (or other) on your preferable location.
Create Shortcut to Take Selected Area Screenshot on Windows 10
If you always Take Selected Area Screenshot on Windows 10, then creating a shortcut for the same will make the task much easier. Well, all credits to Windows 10 Build 15002 Important Improvements that made it possible enough to create a shortcut in this regard.
In this recent build, the modified Snipping Tool and supports a new command line switch /clip. When you include this switch in the Snipping Tool shortcut command, it directly opens the region capture mode.
Step 1 – While you stay in the desktop, perform a right-click on some blank space.Navigate to New option on the context menu and Shortcut on the Submenu to open.
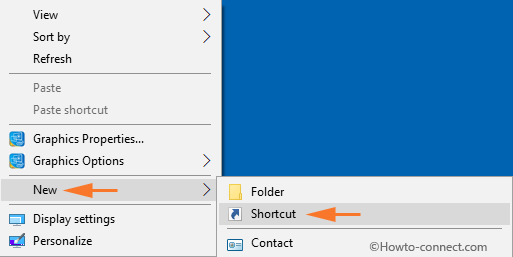
Step 2 – On the Create Shortcut wizard, paste the below command line. To move ahead, select Next.
snippingtool.exe /clip
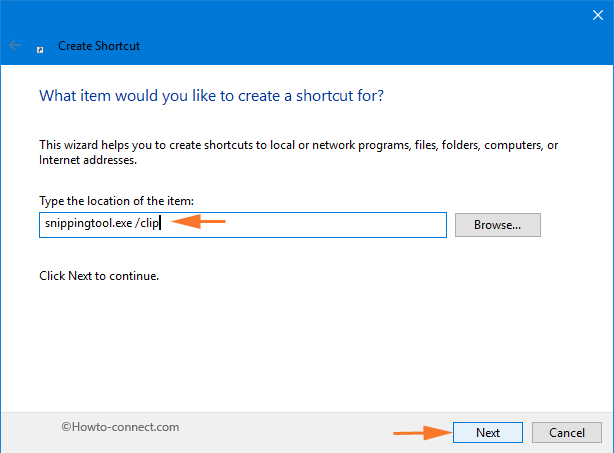
Step 3 – To proceed further, give any name of your choice for the shortcut, such as – Take Selected Area Screenshot.

Step 4 – Finally, select Finish button.
For easily accessing, you can pin the shortcut to the taskbar and to give a personal touch to the shortcut, you can use a different icon.
Conclusion
We are expecting that there will be more improvements in the future builds where it might allow users to directly save the screenshot into some file. So, the behavior of this feature can be improved in the final version of Windows 10 Creator Update.
Hello, Jame. Kindly elaborate your question.
When I take a screen shot and many, how to I make a “only folder of a specific company or action and label, then put both/all previous screen shots into this folder, instead of having 100 of screen shots looking for a certain screenshot.. ?