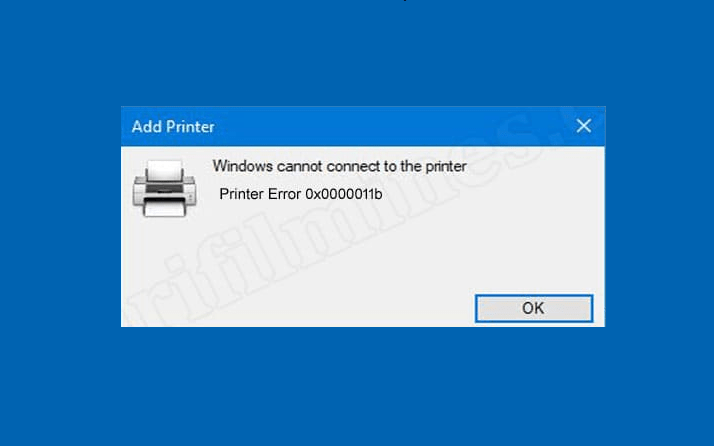
Do you encounter shared printer problems after installing an update on Windows 10? Recently, several users have reported getting error code 0x0000011b after they received the 14 September cumulative update. You might not get printed paper in return for your document when trying to print after installing KB5005565 on Windows 10 21H1, 20H2, or 2004. Commonly, the error message is “Windows cannot connect to printer”.
There are not many days when Printnightmare vulnerability has been resolved and now it seems that a bug causing printing problem is here. 0x0000011b printer issue seems to be a result of a potential bug in the LCU rolled out on 14 September 2021. There may be 2 solutions to this error – one is to uninstall the patch and the next is setting up static IP address for the printer. However, you should check Spooler service to ensure that whether it is not creating annoyance.
Table of Contents
0x0000011b Printer Error in Windows 10
Here is how to fix Printer Error 0x0000011b in Windows 10 –
Way-1: Uninstall KB5005565
The easiest method to fix this printer error is to remove the cumulative update from your computer. You can follow 2 ways to uninstall the patch – from Settings and using command prompt. Let’s see one by one –
a] Using Settings
- Press Windows and I keys on your computer.
- Click Windows update from the left pane of the Settings app.
- Go to the right and select Update history.
- From the next page, click on Uninstall updates.
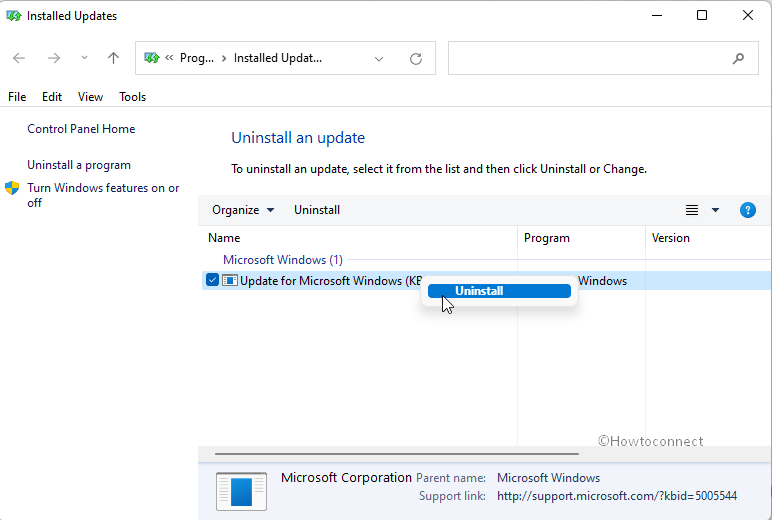
- Installed Updates Window will prompt up from Control panel.
- Right click on KB5005565 and select “Uninstall”.

- Click Yes on the confirmation prompt.
- Give a little time and after the uninstallation and reboot your PC.
- Check if 0x0000011b still appears when printing.
You can see here users confirming the installation – Print server and Print Nightmare update
b] Via command prompt
- Click the Search icon from the taskbar.
- Type cmd.exe.
- Press Ctrl + Shift + Enter.
- Select the Yes option when a UAC dialog shows up.
- This will open Command prompt as administrator.
- Type the command – wusa /uninstall /kb:5005565.
- Hit Enter and click Yes if you are asked for the removal.
Way-2: Set static IP address for the printer
Another solution to 0x0000011b error code that appears after installing KB5005565 on Windows 10 21H1, 20H2, and 2004 is manually setting the IP address of the printer. Several people complain that Network printer is not working in this case and configuring the IP manually has worked for many. So follow –
- Click Start and select Settings.
- Next, click on Devices from the app.
- Select – Printers & scanners.
- Move to the right pane and click on +Add a printer or scanner.
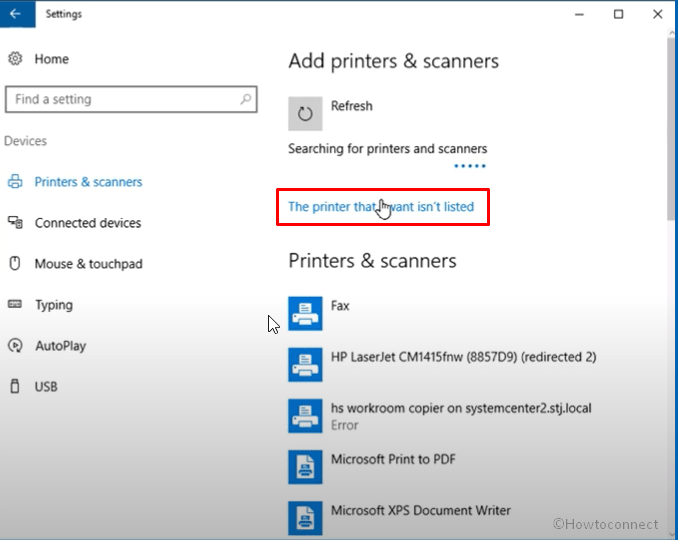
- After scanning for a while the Settings page will show a link – The printer I want isn’t listed.
- Now, click this link.

- ‘Add a printer’ window will appear.
- Check the option – Add a printer using a TCP/IP or hostname.
- You need to click – Next.
- On the coming wizard, type the Hostname or IP address of the printer and click “Next”.
- The system will contact the printer and show its name.
- If you want you can change the name. Again click on Next.
- In case, other people use this device check the option saying – Share this printer so that others on your network can find and use it.
- Otherwise, select – Do not share this printer and click Next.
- Now, you can check your device by clicking Print a test page.
- Click – Finish.
In case you have any problem finding the IP address of the printer then –
- Go to Control panel > Devices and printers (in small or large icons view).
- Right-click on the printer and select Properties.
- A pop up will open go to the Location field.
- This will have the IP address inside.
Additional workarounds –
However, the above 2 ways are the main solutions to the printer error 0x0000011b that occurred due to KB5005565 cumulative update in Windows 10 19044.1237, 19043.1237, 19042.1237, and 19041.123 but you can give a try to a few more fixes. Let’s see ahead –
Way-3: Run Printer troubleshooter
Printer troubleshooter is a built-in fix it tool to detect and repair printing problems on Windows 10. Until Microsoft officially confirms this bug you should give a try to this troubleshooting tool –
- Right-click on Start and select Settings.
- Go to the right pane of the app and move down.
- Click – Troubleshooter.
- Select – “Other troubleshooters”.
- Next, click Run in the Printer section.
- The tool will start detecting problems checking the spooler service and repair them accordingly.
Way-4: Check Print Spooler service
This service handles the printing operations in Windows and when it is stopped or not correctly configured the print jobs can not be performed. Therefore, it is relevant to check the status of the Spooler service. Although this article might also help- How to Disable/Enable Print Spooling Service Windows 10, see the instructions below –
- Press – Win+R.
- Type – Service.msc.
- On the Services window, go to Print Spooler.
- If it is showing “Running” and “Automatic” in Status and Startup type columns then it is perfect.
- Otherwise, double click on Print Spooler.
- On the pop up that appears, click the drop-down for Startup type and select Automatic.
- Click on Start under Service status.
Way-5: Make sure that the system has installed the latest printer driver
Microsoft has come up responding about the possible malfunctions for network printers and print servers caused by the latest cumulative update and suggested having the most recent driver version installed. The company says – Use the same version of the print driver on the print client and the print server. This issue will be solved externally by managing the print drivers in your environment. Still, the issue persists then contact the OEM support means manufacturer’s support.
- Right click on – Start from the taskbar.
- Select – Device Manager.
- On the application, find Printer or Print queues.
- Double-click on the device to expand the drivers’ list.
- Now, right-click on the driver for the currently running device.
- Next, select – Update driver.
- Click on the option – Search automatically for driver.
If this method doesn’t fix Windows cannot connect to printer with 0x0000011b error code then go to the manufacturer’s website. Discover the latest printer driver there and download it. Manually install the same and reboot the PC.
You can also see – here as a reference.
Helpful –
Methods list:
Way-1: Uninstall KB5005565
Way-2: set static IP address for the printer
Way-3: Run Printer troubleshooter
Way-4: Check Print Spooler service
That’s all!!
