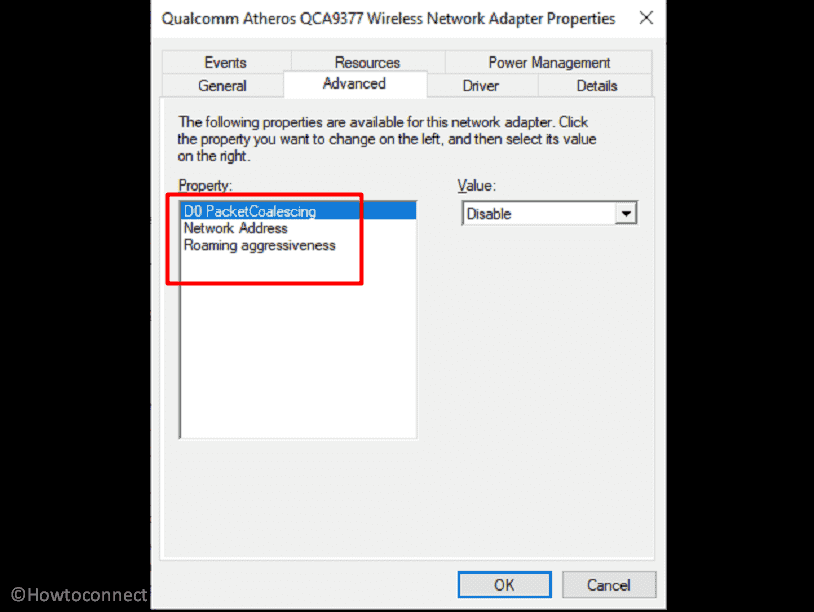
Windows 11 and 10 allow manually selecting 2.4G and 5G bands in WiFi card Properties. However, the computer automatically chooses the appropriate band based on factors such as signal strength, network congestion, and device compatibility. But, there are reports that Preferred Band missing from Wi-Fi Properties issue occurs for some Windows 11 or 10 users making them unable to choose the appropriate one. You will find the solutions to the not showing option in Wireless card properties.
Advanced Wi-Fi router or network adapters have additional settings to prioritize or specify the band preference. However, this would typically be configured on the device managing the Wi-Fi network rather than in the properties of individual devices connecting to the network. It’s important to note that specific options and settings may vary depending on the operating system, device manufacturer, and Wi-Fi hardware being used. Let’s see the ways to fix missing Preferred Band problem:
Table of Contents
Preferred Band Missing from Wi-Fi Properties in Windows 11 or 10
Here is how to fix Preferred Band missing from Wi-Fi Properties in Windows 11 or 10 –
Method-1: Add the Bands manually using PowerShell
Windows PowerShell can effectively help in the case when you can not see Preferred Band Property on your Wi-Fi card. Some cmdlet adds the option after running in the tool so follow the steps:
- Press Windows key.
- Type PowerShell.
- Select Run as administrator.
- Confirm the prompt by clicking on Yes.
- Once the Administrator: Windows PowerShell appears, copy the following cmdlet, paste it into it, and hit Enter –
Get-NetAdapterAdvancedProperty -Name "*"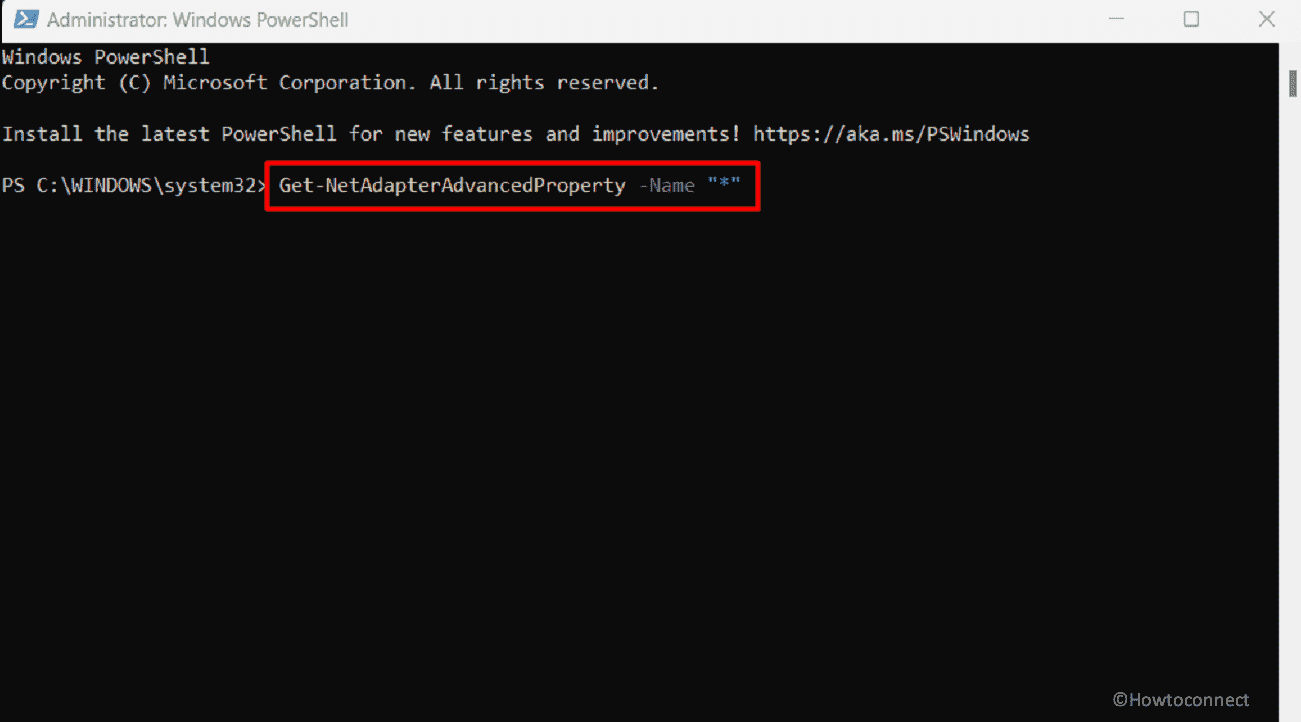
- This will show all the Settings of your Network adapter properties. Note the Wi-Fi adapter name from here.
- Now, in the below command, write preferred band name in the correct location and run the command into Windows PowerShell –
Set-NetAdapterAdvancedProperty -Name "Wi-Fi" -DisplayName "Preferred Band" -DisplayValue "3. Prefer 5GHz band"Note that Wi-Fi is the name of Wireless adapter.
See: How to Fix WiFi not working in Windows 11 (Solved with 18 easy ways).
Method-2: See if the adapter has compatibility with a certain band
To enable preferred bands like 2.4G and 5G you need to check that your device is compatible with these bandwidths. Follow the guide and ensure compatibility:
- Click on Start and type cmd.exe.
- Press Enter and confirm the prompt.
- In the Command Prompt, copy-paste the below command and hit ‘Enter’:
netsh wlan show drivers
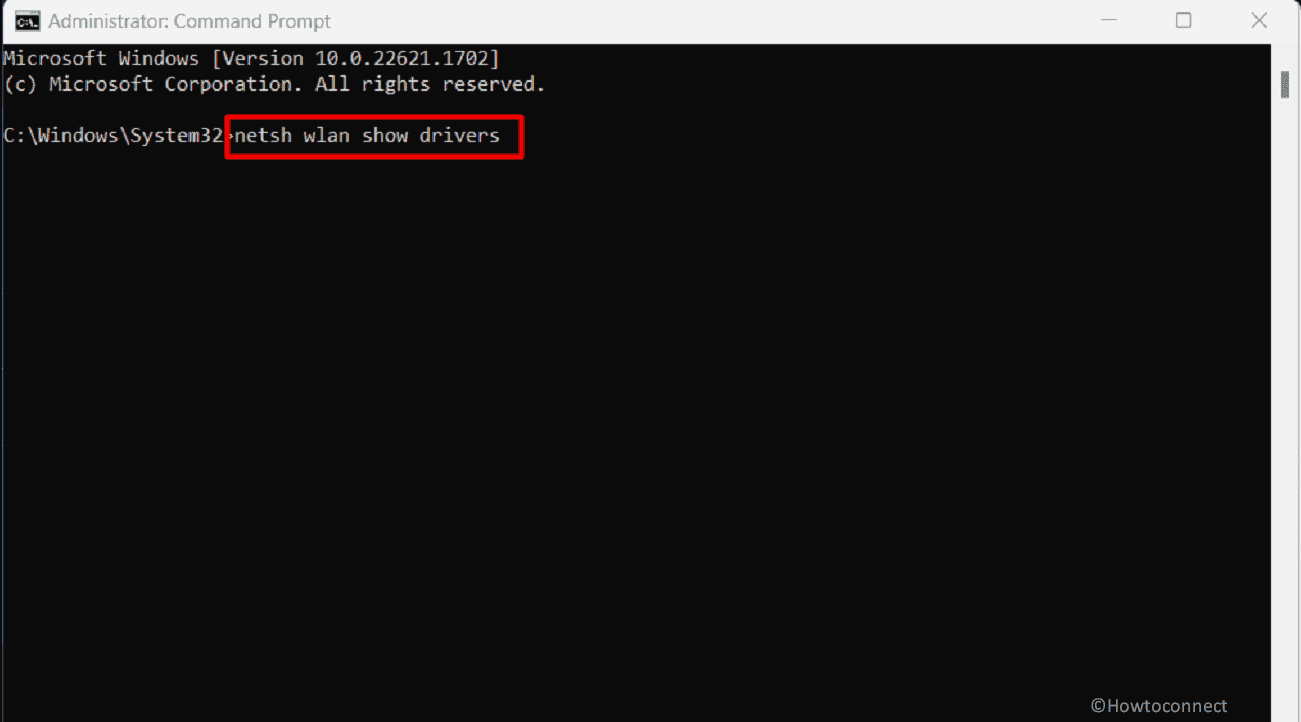
- This will return the wireless LAN Driver properties; locate Radio types supported in the list.
- Here, 3 network modes are shown. Below are the network modes with what they indicate:
1] Compatible with 2.4GHz bandwidth – 11g 802.11n.
2] Compatible with 2.4GHz bandwidth – 11n 802.11g 802.11b.
3] Compatible with 2.4Ghz and 5GHz bandwidth – 11a 802.11g 802.11n.
In cases of 1] and 2] Radio types supported, you need to upgrade the Wi-Fi Adapter Hardware. If the Radio types supported is 11a 802.11g 802.11n then your computer is compatible with 5 GHz. Then, all you need to do is follow method-1 using Windows PowerShell.
Read: How to automatically Switch to Strongest WiFi in Windows 10.
Method-3: Check the Band that your modem Supports
Every modem comes with a box that has information about the band that the device supports. To know the compatibility check the box.
Else, navigate to the manufacturer’s website of the router and find the product with exactly the same model name. Google search results may also tell you whether the device you are using has 5GHz band or 2.4GHz band support.
If it does, then proceed with the first method to solve Preferred Band missing from Wi-Fi Properties in Windows 11 or 10.
Method-4: Update WiFi Driver to fix Missing Preferred Band from Wi-Fi Properties
Since Band is a new feature on Windows, therefore, your computer might not be having it up to now. Updating the WiFi adapter Driver may add the feature to the Wireless driver and fix the missing Preferred Band in Windows 11 or 10.
- Right-click on Start and select the Device Manager option.
- Double-click on Network adapters from the Device Manager to expand it.
- Then, right click on the correct adpater, and select Update driver from the context menu.
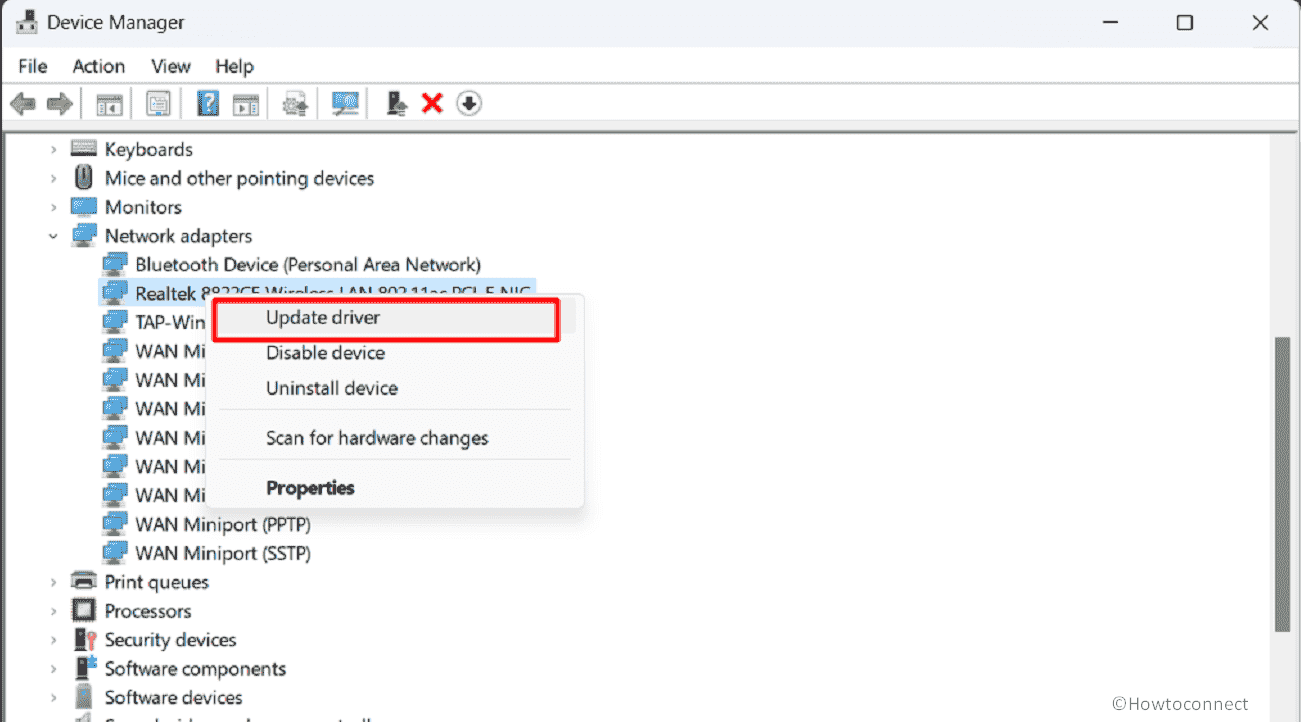
- Click on the Search automatically for drivers.
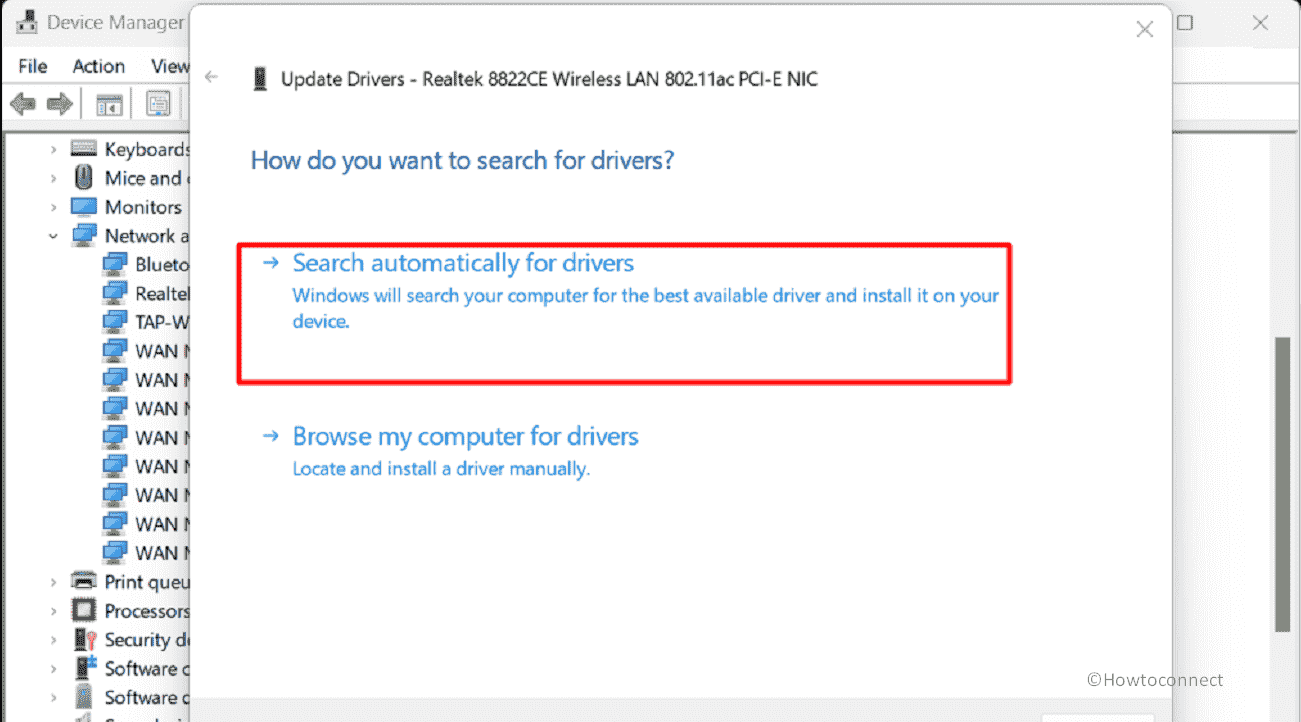
You might see that the best drivers for your device are already installed. In this case, try to manually update the WiFi driver.
Method-5: Update the WiFi Driver Manually
To fix the Preferred Band missing from Wi-Fi Properties in Windows 11 or 10 issue, you may need to download the latest Wireless Driver and install it on your computer manually. For this, navigate to the manufacturer’s website of the machine. Enter the model number and find the latest version of the WiFi Driver supporting your Operating System. Download the driver and install using the setup file.
Fix WiFi Missing from Network & Internet Settings in Windows 10
Method-6: Reinstall the WiFi driver from your computer
Sometimes, corrupted installation of driver might prevent showing Preferred Band on the Wi-Fi Properties window. In this case, you will have to reinstall the driver using the following steps:
- Press Windows and R keys.
- Type devmgmt.msc in the Run dialog box.
- Expand the “Network adapters” and right-click on the Wi-Fi adapter.
- Select “Update driver”.
- From the Update Window that will open, select the Browse my computer for drivers option.
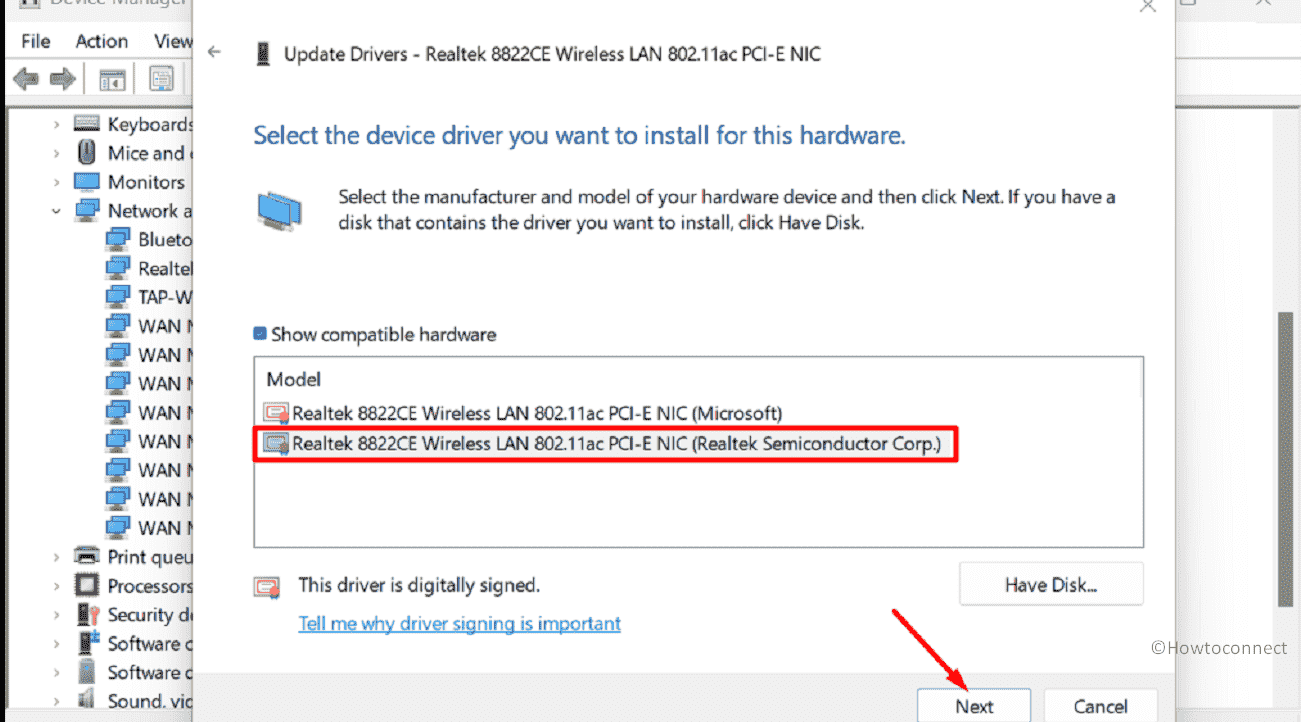
- On the next window, click on “Let me pick from a list of available drivers on my computer”.
- Select the correct driver and click on “Next”.
Method-6: Roll Back WiFi Driver Update
This method to fix Preferred Band missing from Wi-Fi Properties in Windows 11 or 10 is for those users who were able to access the Preferred band previously but now can not. In this case, rolling back the driver to the previous version might work wonder to solve the problem:
- Launch Device Manager as mentioned in the previous method.
- Right click on the device and select Properties.
- Go to the Driver tab.
- Then click on Roll Back Driver.
- Follow the further guide to complete rollback.
- Once completed, Restart your computer.
Method-7: Edit router Settings
- Run the IP address of the router in a browser and log in to the website
- Find 5G WiFi settings and change the channel to 36.
- Save the modification.
We hope these methods will fix Preferred Band missing from Wi-Fi Properties in Windows 11 or 10.
Methods:
Method-1: Add the Bands manually using PowerShell
Method-2: See if the adapter has compatibility with 5GHz band
Method-3: Check if the modem Supports 5GHz Band
Method-4: Update WiFi Driver Automatically
Method-5: Update the WiFi Driver Manually
Method-6: Roll Back WiFi Driver Update
Method-7: Edit router Settings
That’s all!!
