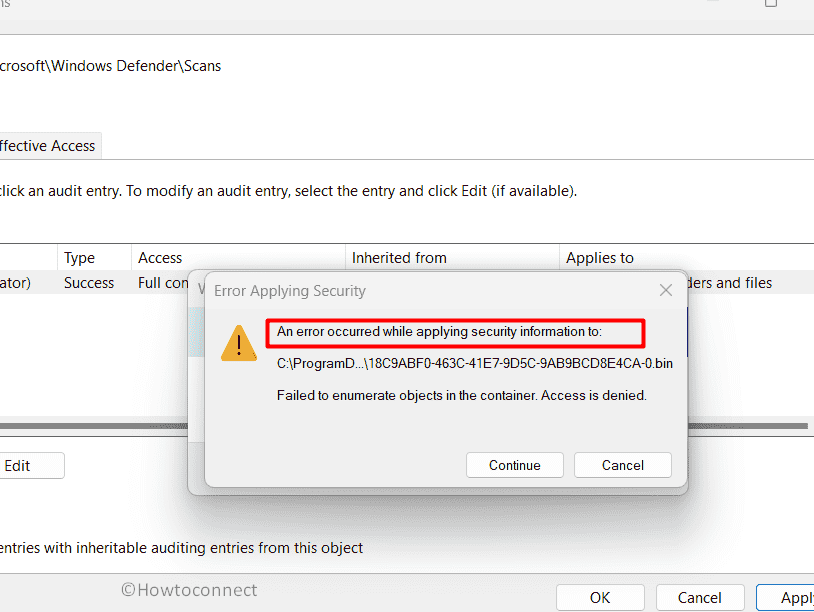
Are you frustrated by the perplexing “an error occurred while applying security information” message when attempting to modify file or folder security settings in Windows? This pesky error often accompanies an “access denied” warning, obstructing your ability to manage files effectively, be it copying, moving, or deleting them. It can be a real roadblock, leaving you without the proper permissions to use your files.
This issue can plague both your local computer and any external media connected to it. When confronted with this error, you’ll find yourself caught in a quandary, with Access Denied staring back at you from the Error Applying Security window. This typically happens when a file is stuck in read-only mode or if your current account lacks ownership rights to the file. But fret not! We’ve compiled a list of potential solutions to help you tackle this predicament. In this post, we’ll guide you through the steps to resolve this issue and put you back in control of your Windows file and folder security settings.
Table of Contents
An Error Occurred While Applying Security Information
Here is how to fix An Error Occurred While Applying Security Information in Windows:
Take Ownership of the File
Taking ownership of a file becomes necessary when you face an error that occurs while applying security information issues in your system. When you take ownership of a file, you become the principal user with complete control and access to it. This allows you to bypass any limitations or permissions issues that may be triggering the error, allowing you to make the appropriate security modifications.
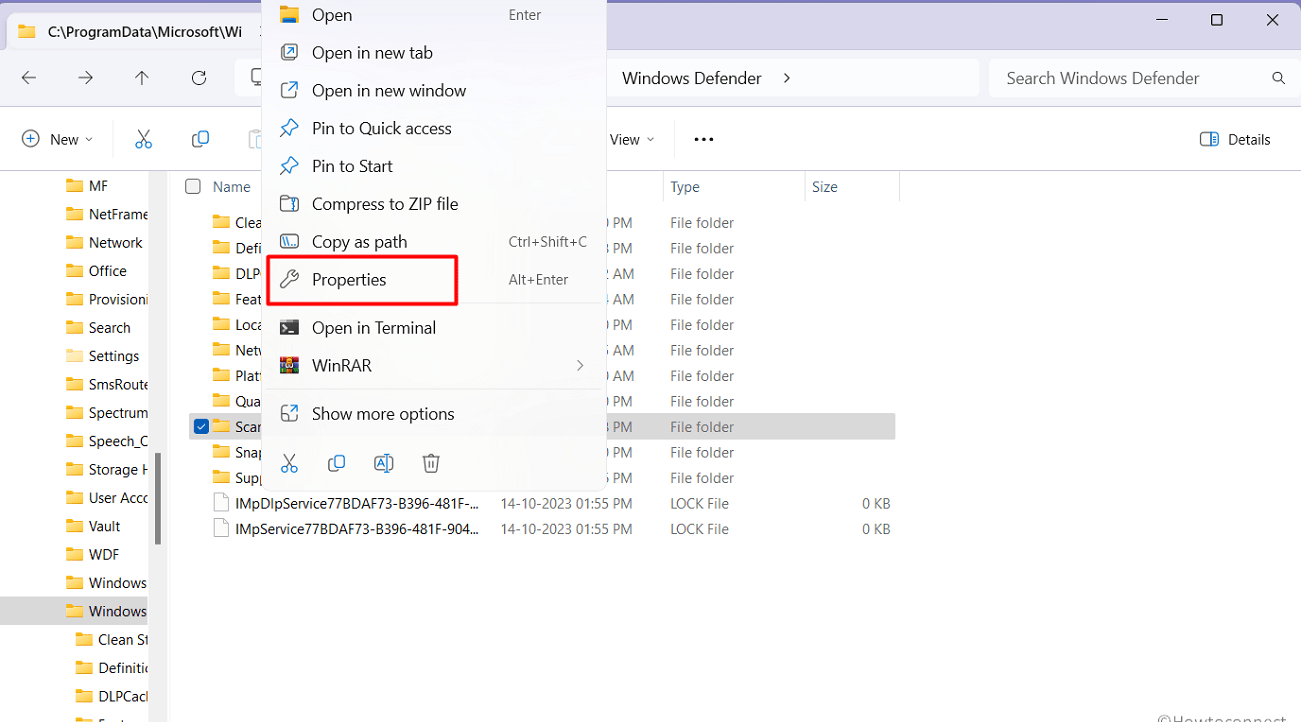
- Right-click the file or folder.
- Select Properties.
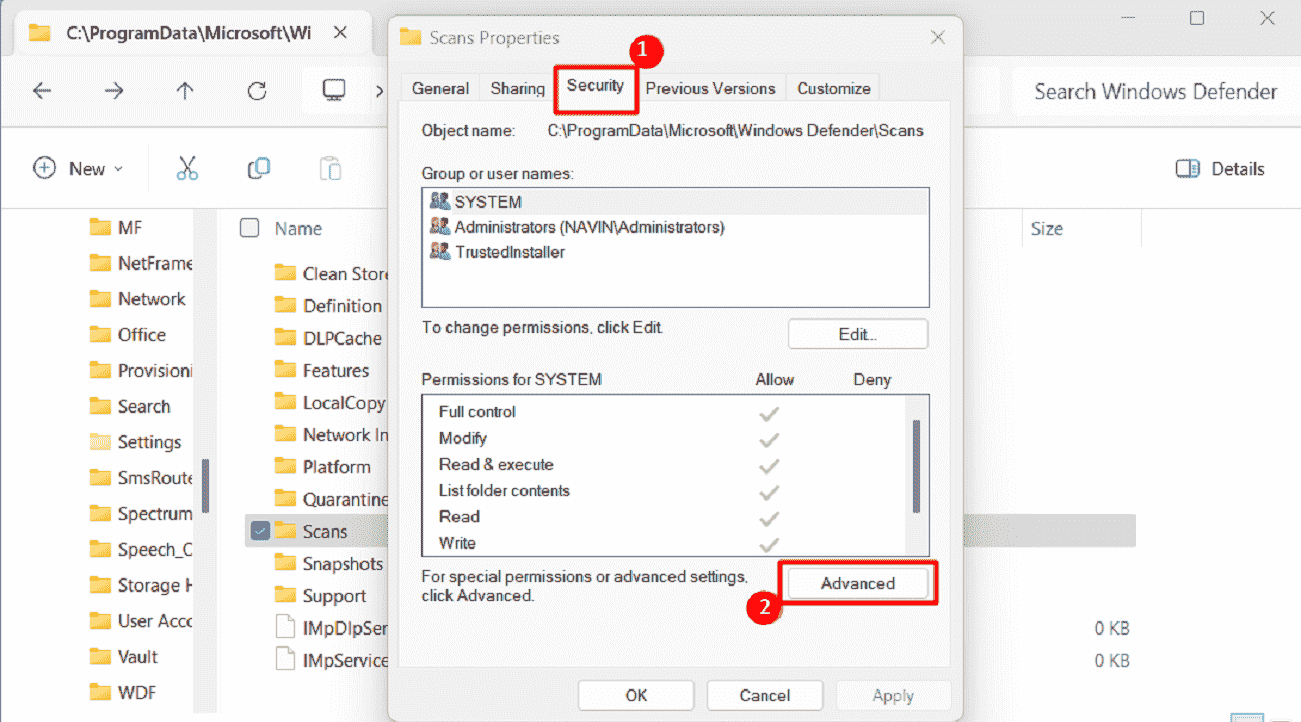
- Navigate to the Security tab and click Advanced.
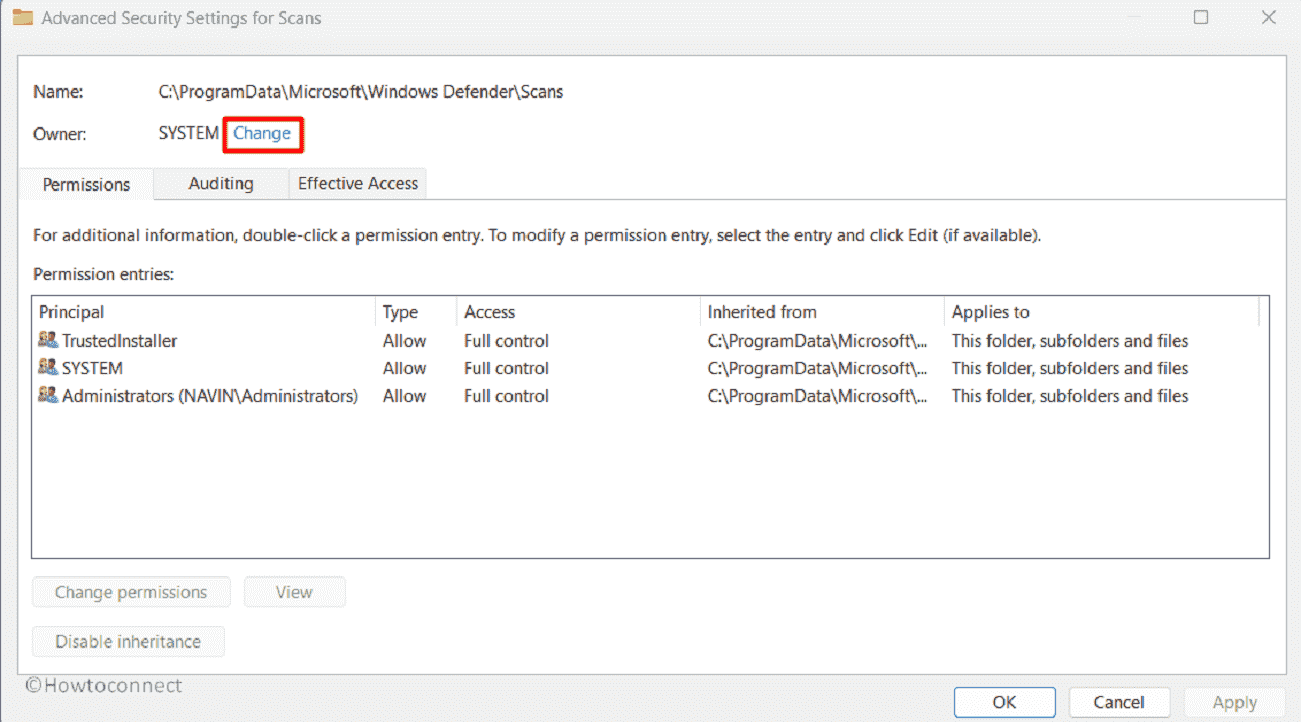
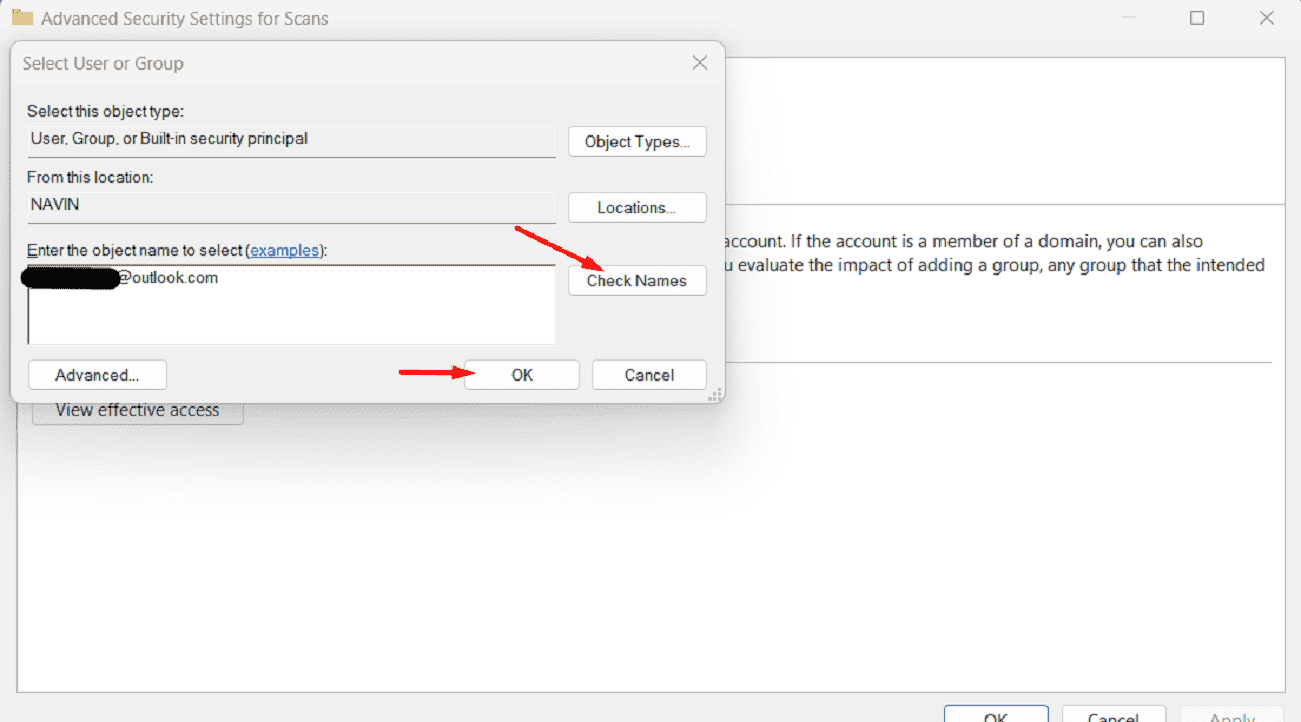
- In the Advanced Security Settings window, click Change.
- Enter your administrator email ID, validate it by clicking Check Names, and select OK.
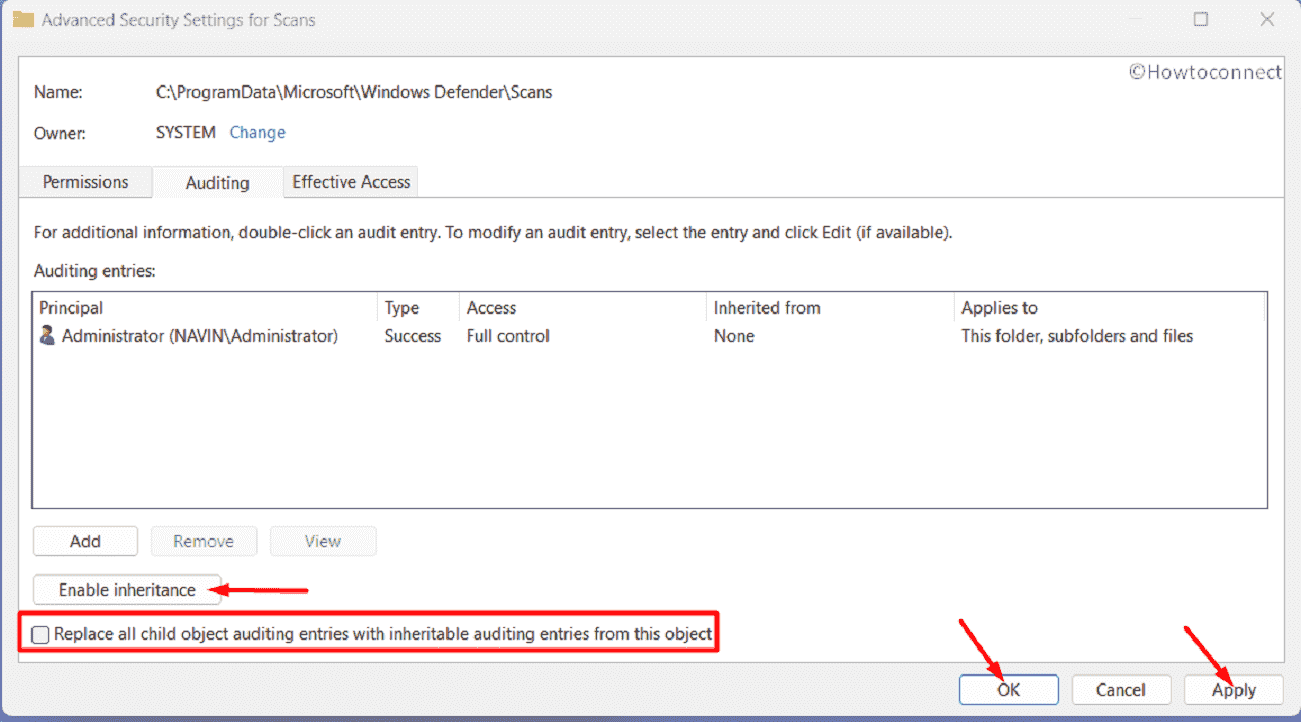
- Back in the Advanced Security Settings window, click on the Auditing tab and enable the two options:
1} Replace owner on sub-containers and objects
2} Replace all child object permission entries with inheritable permission entries from this object.
- If needed, revisit the Security tab in the Properties window, click Edit, and grant Full control for the file or folder.
Alternative Method
- Search for Command Prompt and Run as Administrator.
- Alternatively, press Win + R, type cmd, and use Ctrl + Shift + Enter.
- Enter these commands, pressing Enterafter each:
takeown  /f   "F:\ProblemFolder"   /a   /r   /d y
icacls "F:\ProblemFolder"  /t /c /grant administrators:F  System:F  everyone:F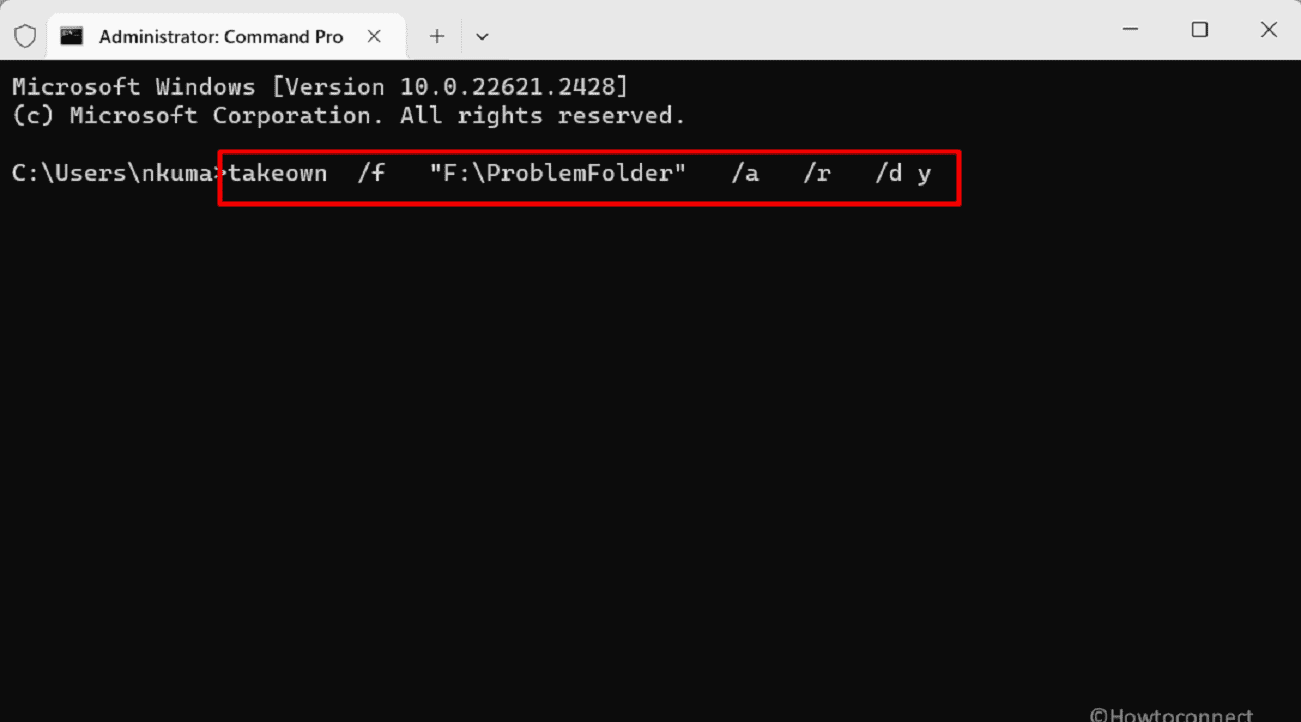
- If no errors appear, you’ve successfully changed permissions and ownership.
See: Fix The Directory is not empty “Error 0x80070091” in Windows 11 or 10
Read: How to Change File Permission to Grant Ownership in Windows 10.
Switch off Read-only Mode
Another effective way to resolve this issue is to turn off read-only mode. By disabling this mode you regain control and easily settle out the concerned error. Follow these steps:
- Right-click the troublesome file or folder.
- Choose Properties.
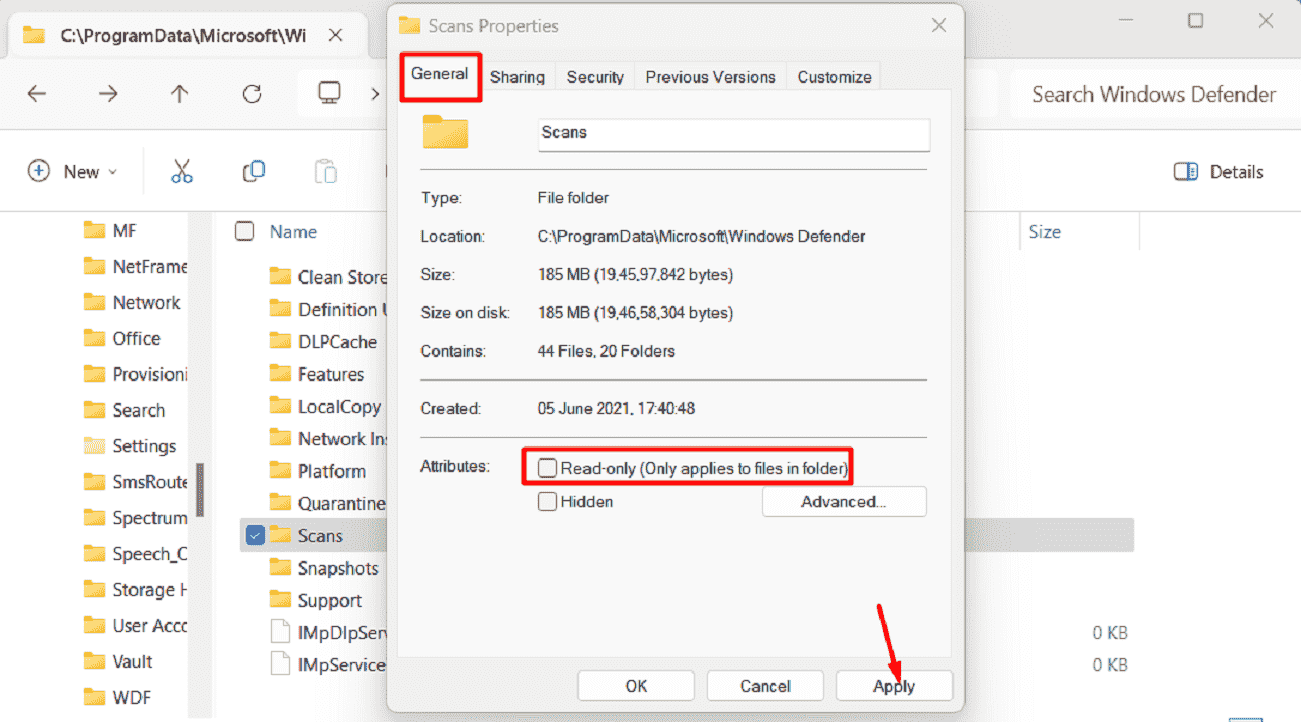
- Navigate to the General tab.
- Uncheck the Read-only option in the Attributes section.
- Click Apply.
- Click OK to confirm the change.
Modify UAC Settings
User Account Control (UAC) settings can be adjusted to remedy this error. This function is a Windows security feature that may prevent access to file/folder security settings. By temporarily disabling or lowering the UAC level, it is possible to obtain the necessary permissions to modify security settings and resolve the “an error occurred while applying security information” error. Check out the steps here:
- Press Windows + R.
- Open Run.
- Type secpol.msc and click OK.
- Navigate to Security Settings > Local Policies > Security Options.
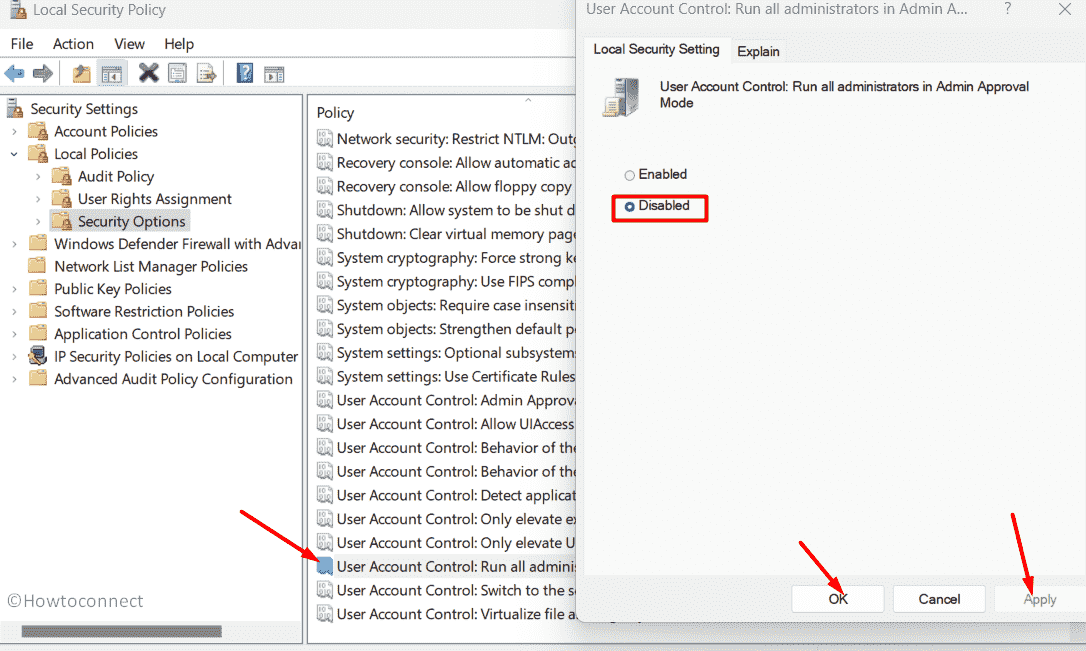
- Double-click User Account Control: Run all administrators in Admin Approval Mode.
- Choose Disabled, then click Apply and OK.
- Restart your PC.
Alter Drive Ownership
If you are still battling this error you can’t quite effectively fix it by changing drive ownership. You can resolve difficulties with file or folder security settings by confirming that you have ownership rights for the disk in question. This allows you to manage the disk and its contents. So, check out the ways mentioned below:
- Open elevated Command Prompt by clicking on Search, typing cmd, and selecting “Run as administrator”.
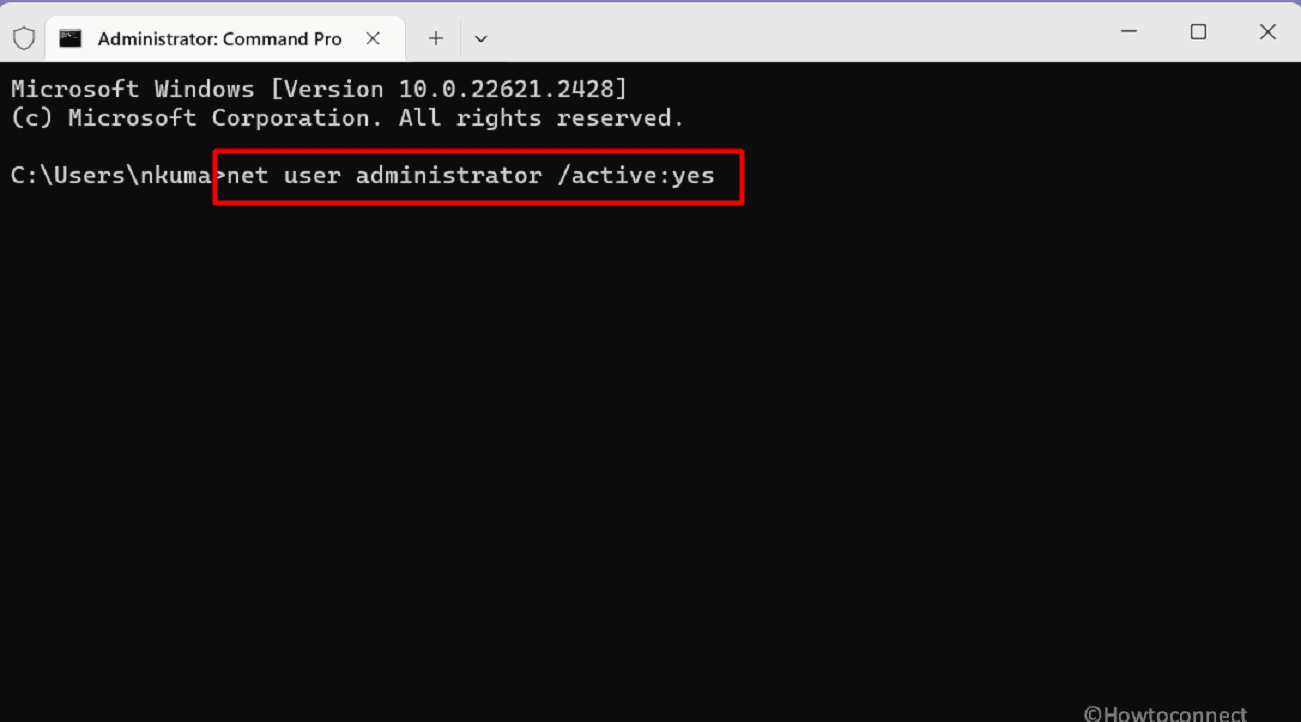
- Enter and execute the provided command:
net user administrator /active:yes
- Log into the admin account.
- Press Windows +X.
- Select Disk Management.
- Locate the (C:) drive under the Volume column.
- Right-click the drive and choose Properties.
- Go to the Security tab and click Advanced.
- Click Change next to Owner.
- Select Advanced > Find now.
- Choose Administrator from the list.
- Check the necessary options for subfolders and objects.
- Confirm security prompts when they appear.
- Restart your system and check if error is fixed.
Methods:
Take Ownership of the File
Switch off Read-only Mode
Modify UAC Settings
Alter Drive Ownership
That’s all!!
