Visiting this page means you are trying to set up your Windows 11 and encountering some error. Correct, OOBELANGUAGE is a matter of concern that can prevent you from completing the Out of Box Experience process. Don’t worry, you are not alone who face this error instead multiple users complain that they stick on OOBE with different errors such as OOBEAADV10, OOBEMSANGCENROLL, OOBEIDPS, and several other. So here we are providing solutions to OOBELANGUAGE Error in Windows 11.
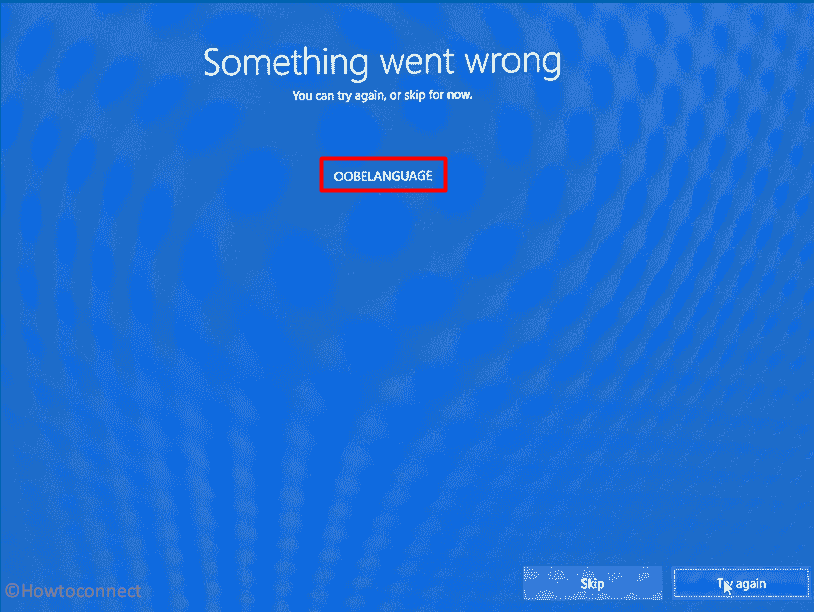
OOBELANGUAGE error may occur when trying to select or change language on the OOBE screen. The error message is “Something went wrong You can try again or skip for now OOBELANGUAGE” When you choose a language and click on Try again the same screen returns. See: Fix OOBESETTINGSMULTIPAGE Error in Windows 10. Let’s directly go to the methods:
Table of Contents
OOBELANGUAGE Error in Windows 11
Here is how to fix OOBELANGUAGE Error Something went wrong in Windows 11 –
Way-1: Use Registry Editor from OOBE Screen
OOBE stands for Out Of Box Experience and it refers to the initial setup experience that users go through when setting up a new Windows 11 device for the first time. During this process, users are prompted to configure basic settings such as language, time zone, and Wi-Fi network. Additionally, users may be asked to sign in with their Microsoft account or create a new account.
When you are stuck on the Out of Box Experience Screen and getting the error message repeatedly despite clicking on Try again a Registry change can help you. Follow the simple steps only to get rid of the issue:
- When you are on OOBELANGUAGE error screen, press Shift + f10.
- The Command Prompt will appear; type regedit.exe and press Enter.
- Click on Yes on the Confirmation prompt.
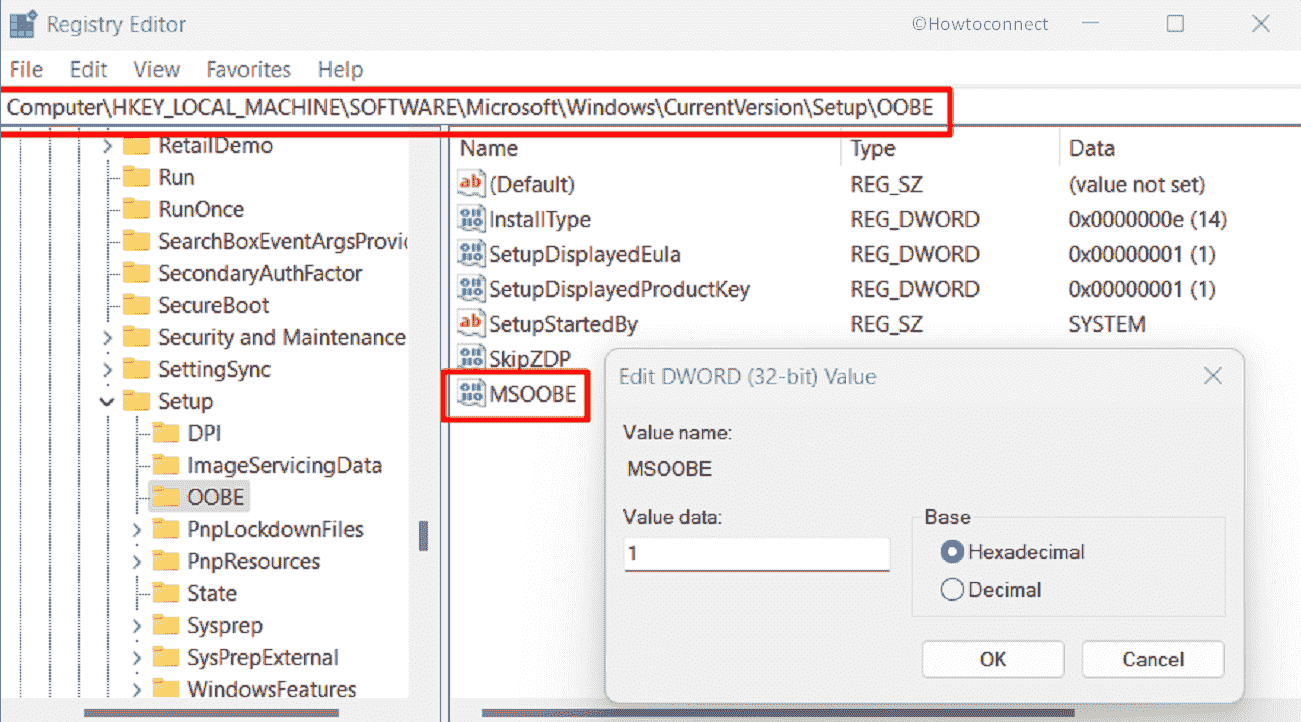
- Once Registry Editor appears, navigate to the following string –
HKEY_LOCAL_MACHINE\SOFTWARE\Microsoft\Windows\CurrentVersion\Setup\OOBE- Go to the right panel and right-click on an empty space.
- Select New > DWORD (32-bit) Value.
- Rename the value to MSOOBE.
- Double-click on this value and enter value data 1.

- Restart the device and check if OOBELANGUAGE error is solved.
Way-2: Factory reset from Out of Box Experience screen
When facing OOBELANGUAGE you might need to factory reset your machine. Factory reset is a process of wiping out all the data and settings on your computer and restoring it to the original state when it was first purchased. Since the desktop can not be accessed the process will be exited from the OOBE screen using a command line.
But before starting, remember that this will erase entire data from your computer. If you are ready follow the steps:
- Press Shift and f10 function key simultaneously.
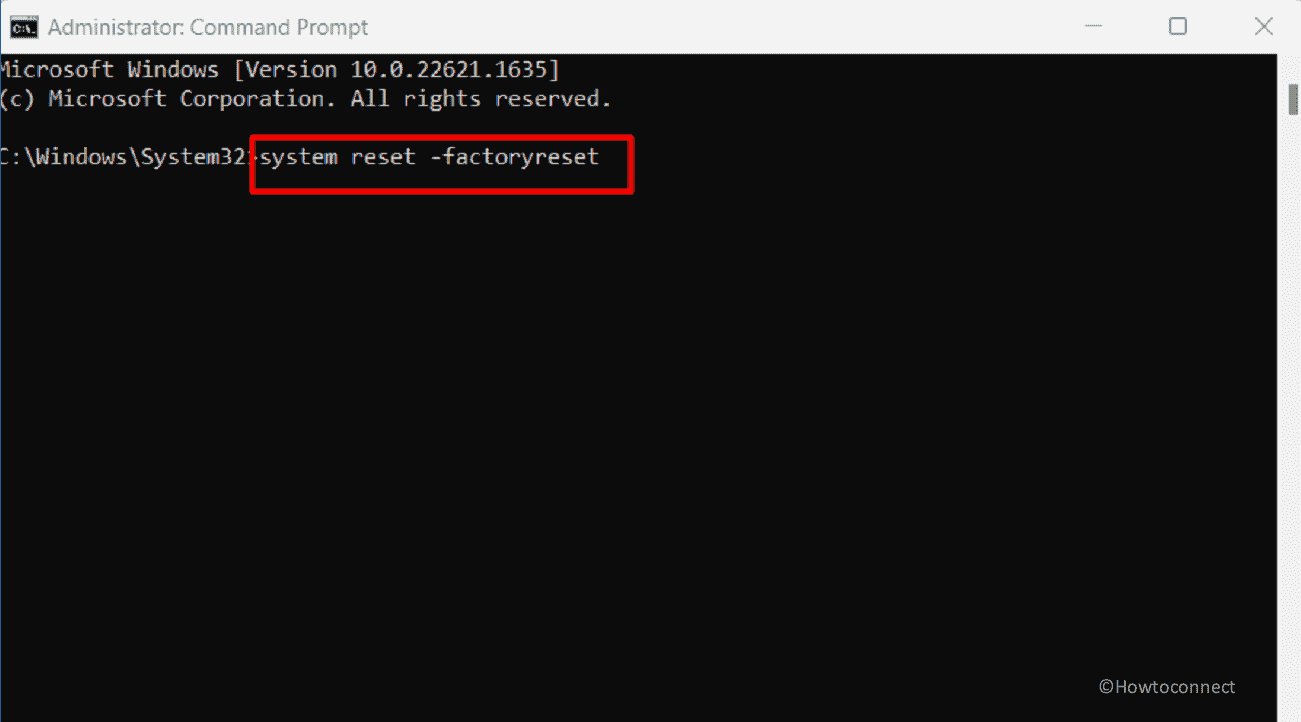
- Once Command Prompt appears, type
system reset –factoryresetand hit Enter.

- Give some time to complete the process and check if you can now configure the language on Out of Box Experience.
Way-3: Reload OOBE to fix OOBELANGUAGE
Sometimes, reloading the Out of Box Experience may solve the OOBELANGUAGE error in Windows 11. Windows 11’s OOBE aims to simplify the initial setup process by presenting users with clear, concise instructions to guide them through the process. This allows users to personalize their experience by choosing their preferred language, keyboard layout, and region.
Once the OOBE refreshes you have a chance to try again to set up the language:
- Press f10 and Shift keys altogether.
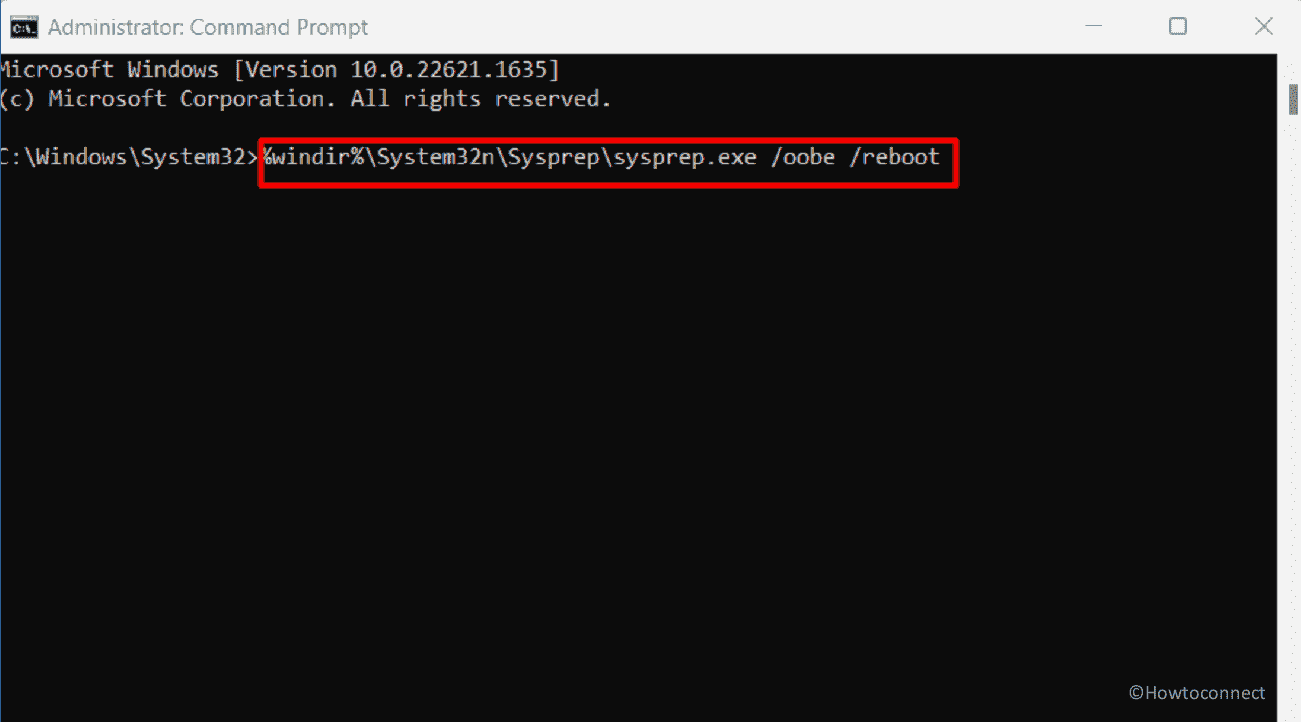
- On the command prompt, type in –
%windir%\System32n\Sysprep\sysprep.exe /oobe /reboot
- Hit Enter and once again give an attempt to set a language.
Way-4: Create a temporary account and switch to the administrator account after setting up
OOBELANGUAGE Something went wrong error is likely to be triggered because the existing account creates an issue. Therefore, create a temporary one and switch to the administrator account after the problem is solved. Later, you can delete this after getting access to the desktop.
- Hold down Shift and F10.
- In the following command, change newusername and newuserpassword as per your preference and paste the command into the prompt.
net user administrator /active:yes
net user /add newusername newuserpassword
net localgroup administrators newusername /add
cd %windir%\system32\oobe
msoobe.exe- Hit Enter.
- This process may consume 15-20 minutes to complete the task.
- In case, it stops working in the middle force shut down the PC and then turn it on again.
- You will reach the login screen.
- Log in with the newusername and newuserpassword (Note: if you have changed them use those ones).
- Once you have accessed desktop, press Winkey and R both at the same time.
- In the Run dialog box, type lusrmgr.msc. and press Enter.
- Select Users folder from the left panel.
- From the middle, right-click on Administrators.
- Then, select Properties.
- You will notice a window; check the box for – Account is Disabled.
- Select Apply and then OK.
- Right-click on Defaultuser0. and choose Delete.
- Press Windows and I.
- Select Accounts.
- On the Accounts Settings page, navigate to Your info.
- Click on Sign in with Microsoft account instead.
- Follow the onscreen instructions and use your Microsoft account credentials to log in with the administrator.
See: Windows 11 KB5025800 OOBE Update Rolled out to 22H2
Hope these 5 methods will fix OOBELANGUAGE Error in Windows 11.
Methods:
Way-1: Use Registry Editor from OOBE Screen
Way-2: Factory reset from Out of Box Experience screen
Way-3: Reload OOBE to fix OOBELANGUAGE
Way-4: Create a temporary account and switch to the administrator account after setting up
That’s all!!
