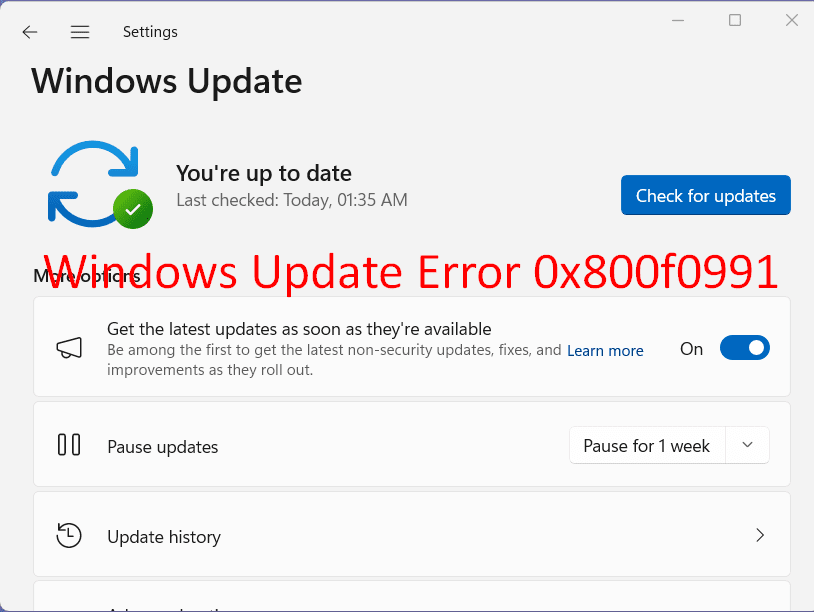
Windows updates ensure better security and a robust operating system after being downloaded and installed on computer. Unfortunately, sometimes error code 0x800f0991 may appear with failure of installation which is obstacle in this process. Windows 11 and 10 automatically receive updates but this issue prevents the operation in the middle depriving you from getting improvements and bug fixes. No need to worry, as solutions might be easier than you anticipate.
Install error 0x800f0991 might occur because of corrupted system files not-supported device drivers or interference of third-party programs. In some cases, malware, interruption in internet access, incorrect configuration of services, and incorrect registry entries might also fail the Windows update download or installation process. See solutions to a similar issue – How to Fix the Windows Update Error 0x8007371c (Solved!). But the error is fixable so let’s walk through the methods and steps.
Table of Contents
Windows update Error 0x800f0991
Here is how to fix Windows update Error 0x800f0991:
Use System File Checker and DISM
In order to address the troublesome Windows update error 0x800f0991, our initial approach involves employing the command line tools SFC Scan and DISM. The System File Checker (SFC Scan) will be applied to rectify corrupted files, while the Deployment Image Servicing and Management (DISM) tool will be utilized to resolve any disruptions within the Windows image structure.
By executing these specific commands, you can readily come across and eliminate the obstacles that are impeding the progress of the Windows update.
- Press Windows key and R.
- Type cmd.
- Then, press Ctrl + Shift + Enter.
- Select Yes on the UAC dialog box.
- This will open Command Prompt as administrator.
- Type the following command and hit “Enter” –
Sfc /Scannow. - After the checking is finished, you may see “Verification 100% complete. Windows Resource Protection did not find any integrity violations”; restart the system.
- Navigate to Settings > Windows Update and click on “Check for updates”.
- If the installation fails, once more open Command Prompt as administrator.
- Now, run the below-given command lines one at a time:
DISM /Online /Cleanup-Image /CheckHealth
DISM /Online /Cleanup-Image /ScanHealth
DISM /Online /Cleanup-Image /RestoreHealth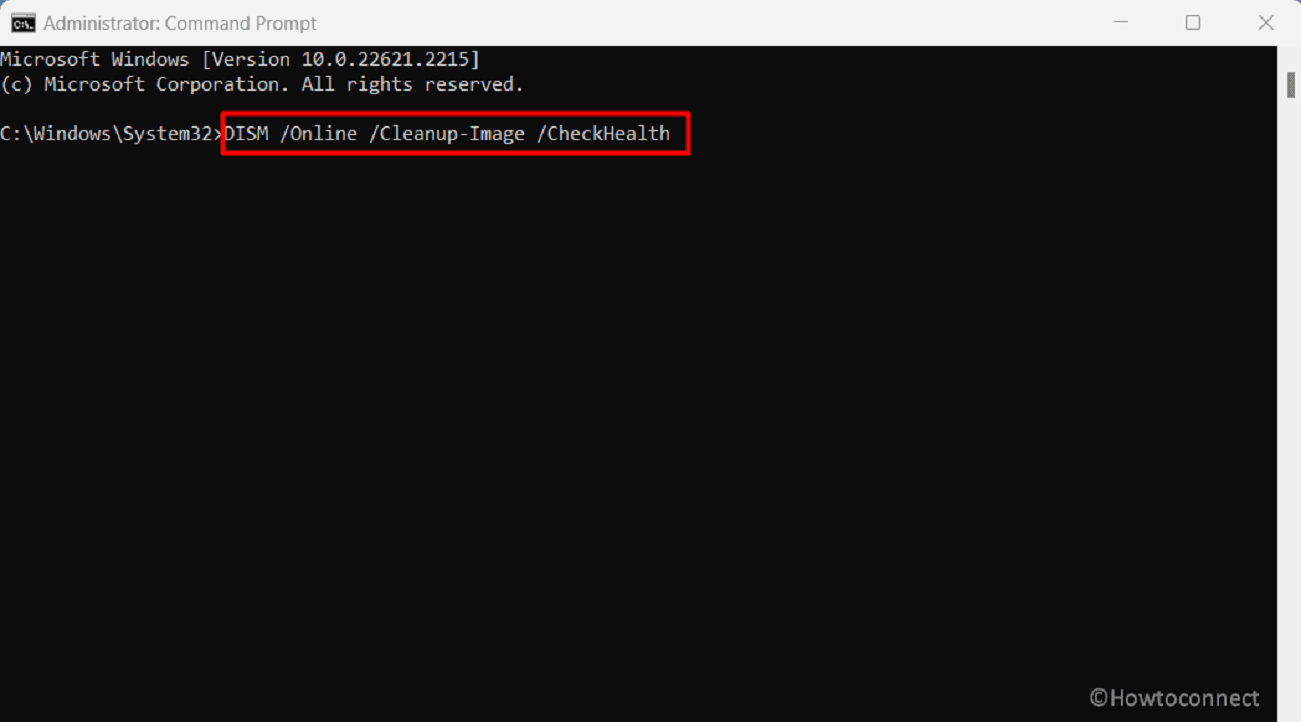
- After running each command wait for some time.
- In the end, Restart your system and install the Windows update.
Reference: SFC /Scannow, DISM.Exe, CHKDSK Windows 11 or 10.
Reset and clear Windows update database cache
Have you ever pondered over how a straightforward act like renaming a folder could contribute to resolving the Windows update error 0x800f0991? For those unfamiliar, the SoftwareDistribution folder is where Windows stores temporary files related to updates.
On occasion, these files can become intertwined, leading to Windows update errors. Therefore, by assigning a new name to this folder, you are essentially rectifying all the glitches.
- Open Command Prompt as administrator as mentioned in the previous method.
- Copy-paste the underneath commands sequentially followed by pressing Enter.
net stop wuauserv
net stop bits
net stop msiserver
net stop CryptSvc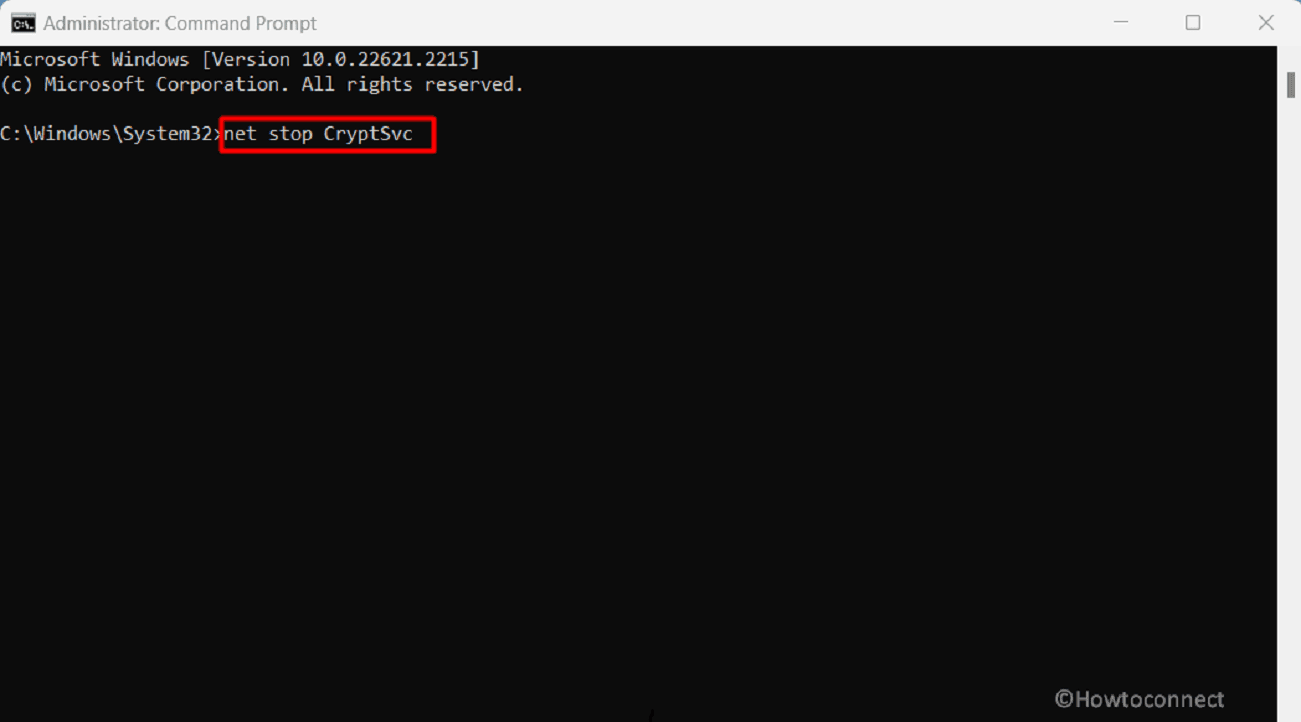
- Once completed, run the command:
ren %systemroot%SoftwareDistribution softwaredistribution.old- After that, start the Windows update, BITS, Windows Installer service, and Cryptographic Services:
net start wuauserv
net start bits
net start msiserver
net start CryptSvc- Exit the Command Prompt and reboot your PC.
Alternatively, you can use the script Reset_Windows_11_update.zip to reset the cache in an easier way.
Read: Remove Items From C:\Windows\SoftwareDistribution\Download Windows 10.
Employ the Windows Update Troubleshooter
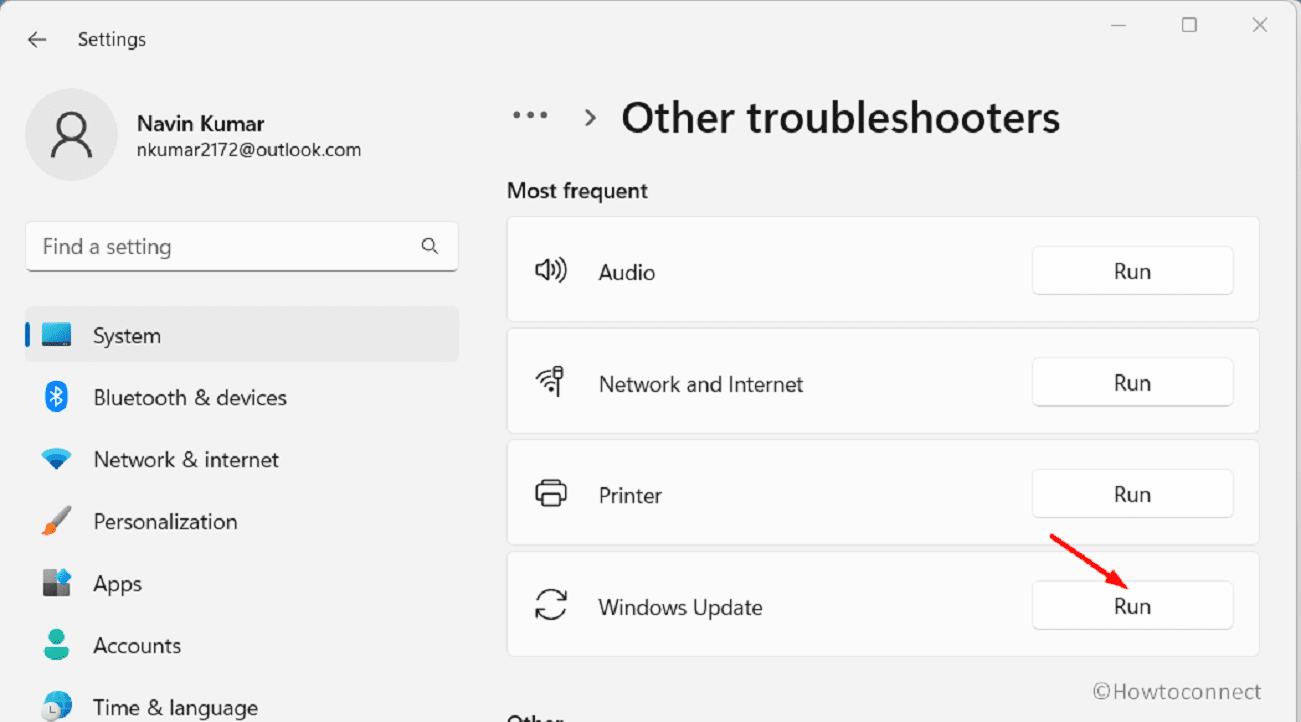
An alternate and highly appropriate method to resolve the mentioned error is by utilizing the Windows Update Troubleshooter. This built-in tool in your system serves as a fix-it solution, pinpointing issues responsible for the previously mentioned problem.
- Click on Start and select Settings.
- Select System from the right pane.
- .Go to the left and click on Troubleshoot.
- Choose Other troubleshooters.
- Locate Windows Update and click the button that reads Run.
- If the tool shows suggestions follow them.
See: Use Common Windows Update Troubleshooter on Windows 11, 10, 8.1, 7
Configure Windows Update-related Services
In case, you have not yet discovered a suitable solution, we recommend examining your Windows Update Service. When this service on your computer is inactive, updates can become stuck, resulting in error 0x800f0991. By confirming the service is enabled, you essentially facilitate smooth updates.
- Press Windows and S keys.
- Type services and hit Enter.
- Double-click on Cryptographic Services to open it.
- From the “Startup type” dropdown choose Automatic.
- See the “Running status” if the Service is running. If not click on Start.
- Click on Apply and OK and save the modifications.
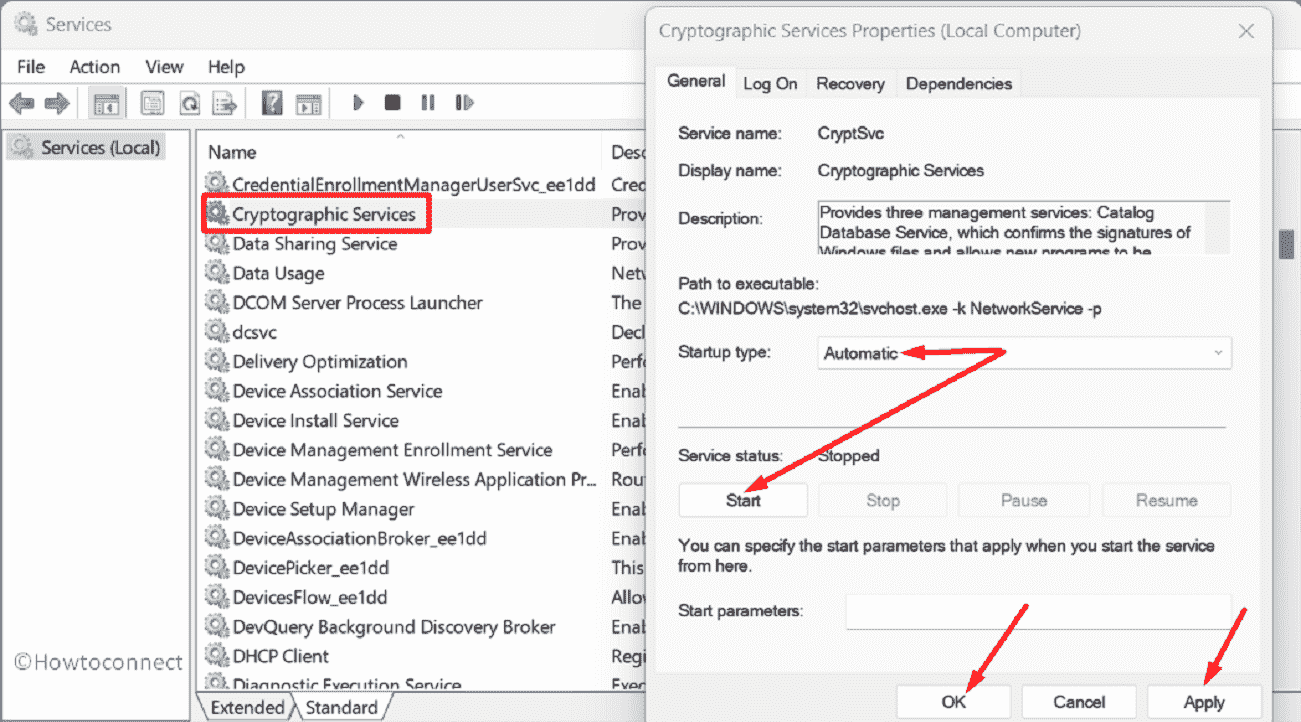
- Change the Startup type and Running status of Background Intelligent Transfer Service and Windows Update in the same ways mentioned in the above steps.
Delete Registry Entries
Accumulation of outdated files within your Windows registry could also be a notable factor causing the mentioned update error. By removing the files, you effectively establish a clean foundation for your updates. This ensures that Windows can acquire new update files without encountering obstacles from outdated ones, potentially resolving the error in the process.
- Press Winkey and R.
- Type regedit.exe and hit the “Enter” key.
- Go to the following string:
HKEY_LOCAL_MACHINE\SOFTWARE\Policies\Microsoft\Windows\WindowsUpdate- In the right panel, locate the DWORD WIStatusServer and WUServer.
- Right-click on each one and select Delete.
- Reboot the device and check if the update is successfully installed.
Use Standalone package to install the update
The Windows Update Catalog serves as a specialized repository where you can locate and download crucial updates and remedies. Additionally, the website also serves as a hosting platform for hotfixes and drivers from original equipment manufacturers (OEMs).
Should you come across the Windows update error 0x800f0991 while attempting to install a patch or build through automatic means, you do have an alternative route by seeking out the same update within the catalog. The supplementary approach entails a manual installation process. Here’s how to proceed:
- Go to “Settings > Windows Update > Update history” and copy the KB number that fails to install.
- Navigate to this link.
- Paste the copied KB number in the Search box and hit the “Enter” key.
- Search the update file compatible with the processor of your computer (x86, x64, or ARM64).
- Click on the button Download.
- After a page pops up, click on the link located there.
- Once the update is downloaded, open the .msu file and select Yes to confirm.
Follow the method: How to Download and Install Update from Microsoft update catalog on Windows 11/10
Perform In-place upgrade
An in-place upgrade resembles bestowing your existing device with a software transformation. Through this method, you update or replace the outdated software with the new version while retaining all your files, preferences, and applications. With this in mind, proceed to the following steps to successfully install the update:
- Visit the website for downloading Windows 11.
- Go to the area of “Download Windows 11 Disk Image (ISO) for x64 devices“.
- Click on Select Download and choose Windows 11 (multi-edition ISO for x64 devices). Click on “Download Now“.
- Once the page loads, click on Choose one and select the appropriate product language.
- Click on the button that states Confirm.
- Select the button 64-bit Download.
- Once completed, right-click on the ISO and select Mount.
- Choose “Open” on the warning dialog.
- From the new folder, right-click on Setup.exe and choose Open.
- Select “Yes” on the User Account Control popup.
- “Windows 11 Setup” window will appear; click on Next.
- On the “Applicable notices and license term” window, select – Accept.
- In a little time, the update will be installed along with a new version.
We expect with these 7 ways you will be able to fix Windows update Error 0x800f0991 in your system.
Methods:
Use System File Checker and DISM
Reset and clear Windows update database cache
Employ the Windows Update Troubleshooter
Configure Windows Update-related Services
Delete Registry Entries
Use Standalone package to install the update
Perform In-place upgrade
That’s all!!
